Introduction

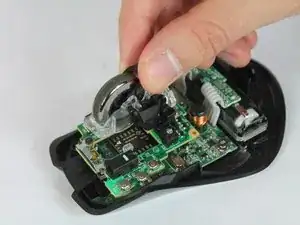
This guide will help assist replacing the scroll wheel in you Logitech G700s.

  1. TEL6wF4FV1dmmTVB
    • Remove the batteries from the mouse.

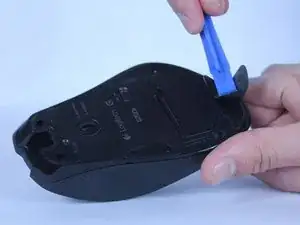
    • Use a plastic opening tool to peel up the four mouse feet.

  2. rhAqyJEOtq5DboQL
    rhAqyJEOtq5DboQL
    veptU16VIpvBdwyT
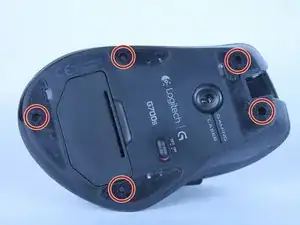
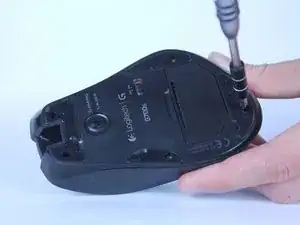
    • Remove the five 5.5mm Phillips #00 screws found underneath the mouse feet.

  3. 1V332SIE6sPjZFaZ
    1V332SIE6sPjZFaZ
    JF3HhKRHFToFBfYQ
    RrXuSGbbdGdKQDFo
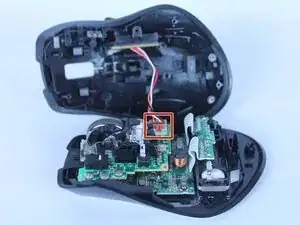
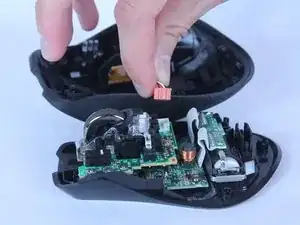
    • Pull the top of the mouse off of the bottom half.

    • There's a wire connecting the two halves.

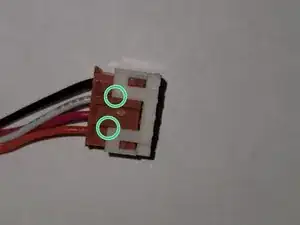
    • Unplug the programmable buttons from the motherboard.

    • The white pin housing on the motherboard may come off while unplugging. In that case, use tool to pry between at location indicated to separate them and insert the housing back onto the motherboard.

    I able to access the scroll wheel without removing the cable. If you do that, I recommend placing some sort of object against the top half of the mouse so that it doesn't move and pull on the cable. I have fairly small hands though so you might need to unplug the cable.

    Ash -

  4. 4JXJmUSXMXaknU6U
    4JXJmUSXMXaknU6U
    jmNXi2dN1ZDlvWEN
    GgDOrGjpje3Tvhac
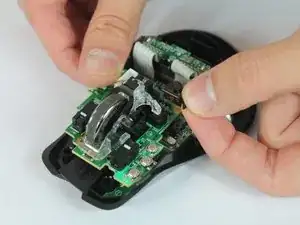
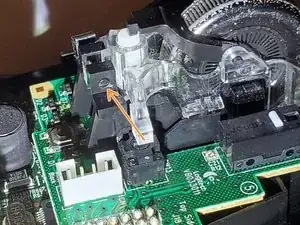
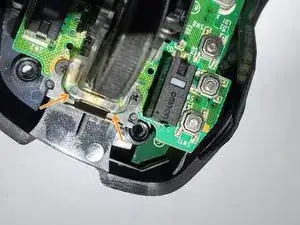
    • Remove the black pin that holds the scroll wheel to the motherboard.

    • The protrusion on the bottom side of the pin clicks into the dimple on the base.

    • I find the easiest way to remove the pin is to use the pointy end of the spudger to push on this end of the pin.

  5. Yqv2XvXUNqSkN6mX
    Yqv2XvXUNqSkN6mX
    BjPMrL2WSVIu2p4i
    iVpYAmbWcgeU6u2q
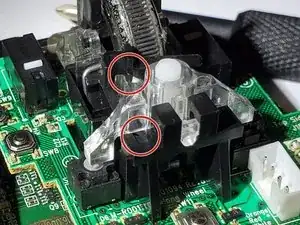
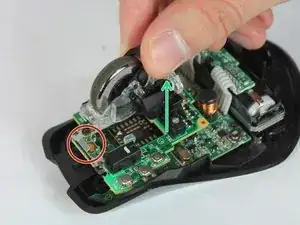
    • First, lift the assembly from the back (green arrow), while keeping the front clear plastic part resting on the springs (red circle).

    • Then, while pulling it toward the back very slightly, carefully lift the front part off the springs.

    • It might jump a little bit from the springs.

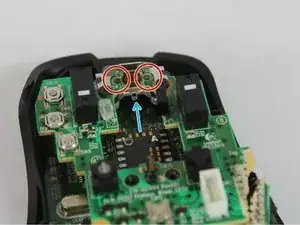
    • The clear front part has a hole that attaches onto a clear nibble just below the bracket (blue arrow in second picture) for the scrollwheel to pivot left and right for the left and right scroll function.

    • Though the pivot point isn't attached too deeply. When reassembling, align the circular marks in the front to the springs, then press the back side down into the holder and it will self align.

    • Be careful not to lose the two small springs! They are magnetic and could attach to any magnetic tip screw driver!

    • Leaving a magnet on the metal clip might help to retain the springs, though I haven't tried it.

    • Remove the springs and keep them safe.

    My problem was dirt accumulated in the clear plastic case of the wheel, making wheel hard to spin. I was able to disassemble and reassemble OK, but the difficulty was “hard”, and it took 20-30 minutes.


    Didn’t thought about taking photos and I’m not going to disassemble this again, maybe after another 2.5 years of use. Still, here’s couple of tips.


    Two tiny springs in the wheel assembly are tricky to assemble back correctly. Pay attention where each end of the spring is. You’ll need to pre-load them the same way or you gonna break the “clicky versus smooth wheel” mechanical button.


    The wheel axle is non removable. To detach the wheel, you need to apply outwards forces on the two clear plastic things holding ends of the axle. I used 2 flat screwdrivers, inserting them along the sides of the wheel. It’s easy to break plastic part by applying too much force, but I was lucky.

    Konstantin -

    I had this same issue, but what I did is take a piece of paper towel and used tweezers to force it between the mouse and the clear plastic casing. Then by forcefully scrolling, it pushed both the paper towel, and the dirt, out of the scroll wheel mechanism.

    Harrison Lee -

Conclusion

To reassemble your device, follow these instructions in reverse order.

Chase Tisinger

Member since: 14/02/18

687 Reputation

One comment

Very good guide! The replacement scroll wheel I got on eBay did not have the black plastic part that sits on top, so I had to remove it from the original one. I did that by pulling the clear plastic part away slightly and removing it (do one side first and then the other side).

Ash -