Introduction

A Logitech G Pro Superlight starts scrolling by itself. Not only does it become unusable but also extremely frustrating to the user. There may be problems like dust trapped inside, blocking the sensor from registering. It is very important to get this fixed because the scroll wheel is an important aspect of the mouse. Whether browsing or gaming it gives user many purposes of using it. This guide provides a solution by replacing the malfunctioning scroll wheel with a new one.

Caution: Turn off the mouse and disconnect the USB dongle connected to the PC before starting this guide.

  1. QqCWkDMm2a2J3Z5k
    QqCWkDMm2a2J3Z5k
    fEFj5nQev3tXKGdf
    BcrnHALPqkgUbP61
    • Mouse skates will be damaged during this process. Having a new pair of mouse skates is STRONGLY recommended.

    • Use tweezers to peel off the mouse skates on the underside of the mouse.

  2. TWLWNrQbKUyPejNu
    TWLWNrQbKUyPejNu
    uWRTG6lfGSOVT2eL
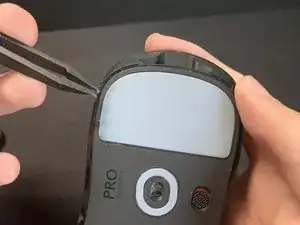
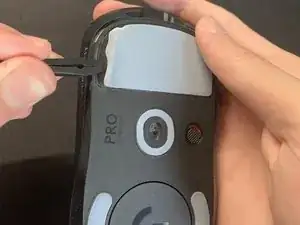
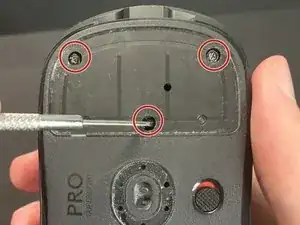
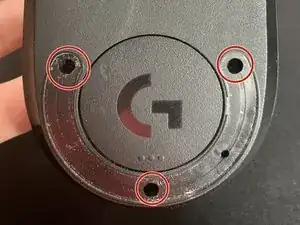
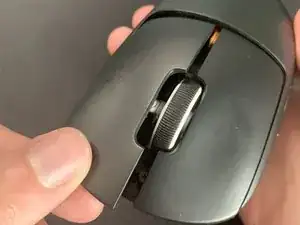
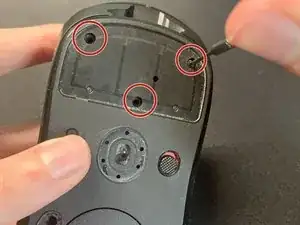
    • Unscrew the six screws using a 1.6mm Phillips screwdriver on the top and bottom side of the mouse.

  3. 1TbPTCiTteFqmlIq
    1TbPTCiTteFqmlIq
    4ZtIJkIsWNS3cAcR
    • Open the bottom shell with your hands.

    • Use caution, as wires are still intact.

    • The bottom shell should come off easily without applying any force.

  4. vtBaNo6uLcTUmRwi
    vtBaNo6uLcTUmRwi
    CVvnHAQVT36aNnLA
    • Disconnect the wires and cables in contact with the sensor's motherboard.

    • Pull and shake evenly on the cable to make sure cables are not strained. Avoid pulling heavily.

  5. tI5KESrYlMJHMoGA
    tI5KESrYlMJHMoGA
    6DNoFjrhjoXQxREy
    • Take out the battery located at the back of the mouse.

    • Flipping it upside down helps when removing it.

  6. j6WITX6C5LcAF2Xx
    j6WITX6C5LcAF2Xx
    mTQuUhx5XeCn3fEZ
    • Remove four screws at the bottom part of the mouse with a 1.6mm screwdriver.

  7. 4tYvjVlINCNCraY1
    4tYvjVlINCNCraY1
    FrPTDBrpnxGGiUDB
    • Carefully take out the left and right mouse buttons.

  8. udNZy4F2TBILPVav
    udNZy4F2TBILPVav
    kmYoRvr6cN3XL3LZ
    • Remove the four screws attached to the scroll wheel.

  9. NmICBIODuZEfR4HF
    NmICBIODuZEfR4HF
    2hkGYGWKCWdlZvfU
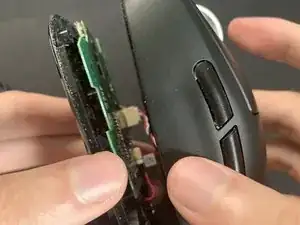
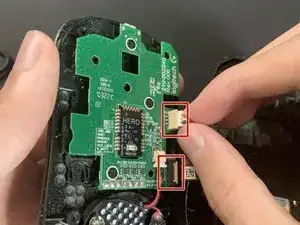
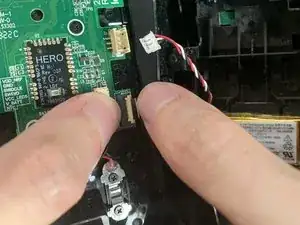
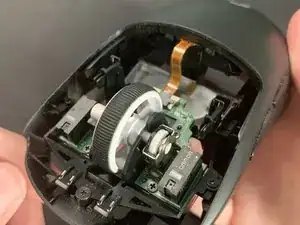
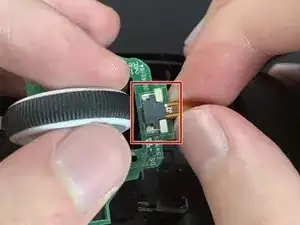
    • Apply pressure and shake evenly to remove the attached cable.

    • The scroll wheel comes off easily without using too much pressure.

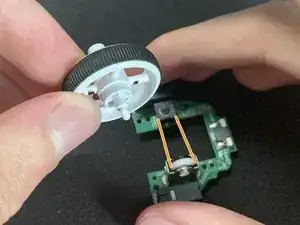
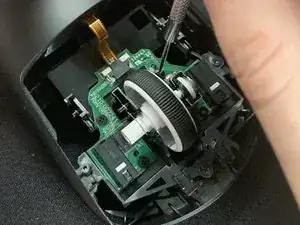
    • Insert the new scroll wheel and line up against the sensor.

  10. kUxMTXDajgyboMGp
    kUxMTXDajgyboMGp
    BiLdBP5C6vOmO5V2
    QZbOyZIOHKTI1Hae
    • Reattach the cable.

    • Refasten the four screws.

  11. DAFDKJARXQOKYEUn
    DAFDKJARXQOKYEUn
    c5lUJRXEIugAJkyk
    Fpvj1SyyDD6Ckqcu
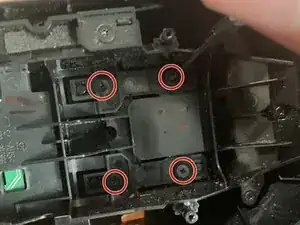
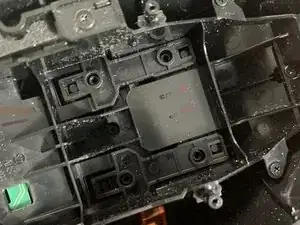
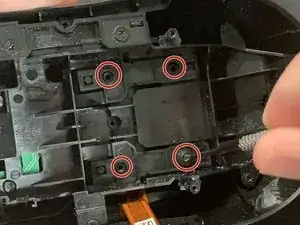
    • Use a pair of tweezers to reinsert the four screws at the bottom half of the mouse and tighten with a screwdriver.

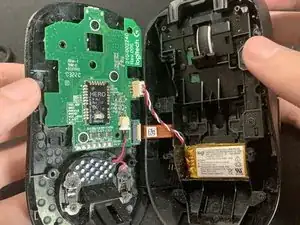
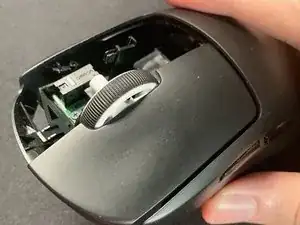
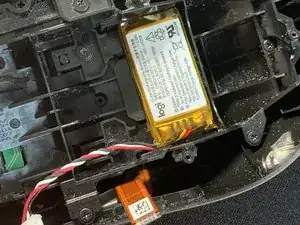
    • Attach the battery back on the bottom half of the mouse.

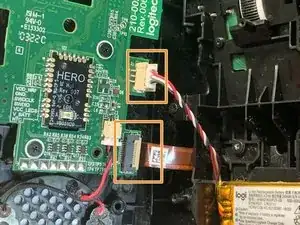
    • Reattach the two cables.

  12. ICPChgJRWoUYGmQr
    ICPChgJRWoUYGmQr
    jhmFcGRNql3usPAI
    aneMRWGlmKBiKHUK
    • Line up the bottom shell with the top shell and connect them together.

    • Reapply the four screws back onto the mouse.

  13. BKtNHG6FfqQiCv2M
    • Put on your new mouse skates.

    • Apply pressure so that they stick to the mouse, leaving no air gap.

Zane

Member since: 28/07/23

280 Reputation

One comment

Thanks for publishing this!
Do you replace only plastic part of wheel or plastic wheel + PCB?
Where do you order new wheel?

Andriy Legayev -