Introduction
Tools
Parts
-
-
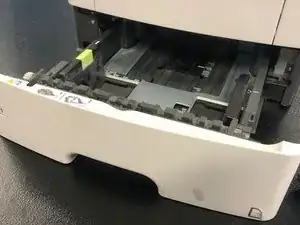
Remove the paper tray
-
Remove the screw securing the right cover to the front of the printer frame.
-
Open the memory access cover that is attached to the right cover
-
Remove the two screws securing the right cover to the RIP shield.
-
Slightly lift the printer, slide the right cover forward, and pull it out and away from the printer
-
-
-
Remove the screw securing the left cover to the front of the printer frame.
-
Release the Two tabs on the bottom of the cover.
-
Pull the cover forward, and remove it from the printer.
-
-
-
Open rear door.
-
Pull the exit door upward to release the hinges, and remove.
-
Remove the two screws securing the rear cover.
-
Remove the cover.
-
-
-
Remove the three screws from the Left Mounting Bracket
-
Two different ways to the next step, dependent on experience and/or confidence.
-
Move the the Mounting Bracket over while extending the Stapler Cable out of the way, The Stapler cable does not have to disconnected.
-
Remove the Stapler Cable and Mounting bracket from the printer frame while feeding the cable through the redrive unit and printer frame.
-
Using a pair of pliers, squeeze the nylon mounts to dislodge the stapler connector, and remove the cable.
-
Remove the three screws from the Right mounting bracket.
-
-
-
Remove the Two screws, and then disconnect the reverse solenoid.
-
Do not disconnect the reverse solenoid cable from the controller board.
-
Remove the Six screws securing the redrive assembly.
-
-
-
Disconnect the cable JEXIT1 from the controller board.
-
Disconnect the Two cables.
-
Remove the Two screws securing the fuser.
-
To reassemble your device, follow these instructions in reverse order.

