Introduction

This guide will show you how to replace your laptop's battery.

  1. FL2m4Hq5DT1LgjQ5
    FL2m4Hq5DT1LgjQ5
    YjtELAyB3pohOOO4
    sAkjrjiNnT6oqbU2
    • Before you begin, be sure to turn off your laptop and discharge the battery down to 25%.

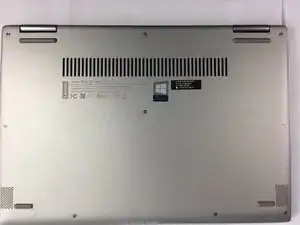
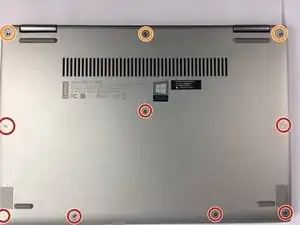
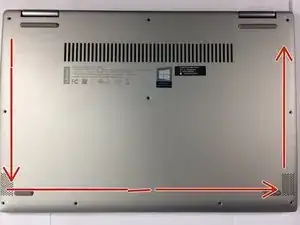
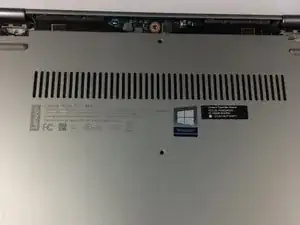
    • Start by flipping the device over so that you see the screws.

    • Remove seven Torx T5 short screws.

    • Remove three Torx T5 long screws.

  2. hfTPAjtqQmXQHRH1
    hfTPAjtqQmXQHRH1
    mVPhNaq1IixiUAhS
    jT1Wy5dwcqpIQZeV
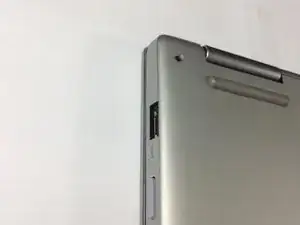
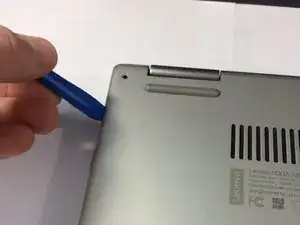
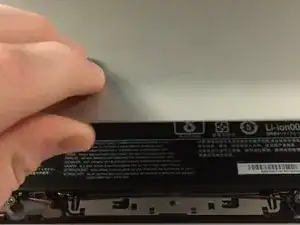
    • Starting from the USB port, use your opening tool to gently pry up the case.

    • Make sure you are prying on the cover itself, not the metal shield around the USB port.

    • Pry along the laptop in the order shown by the arrows.

    • Do NOT pry along the top side, or you risk damaging the casing. Stay with the arrows.

  3. 5wvxLJqhry23JAsX
    5wvxLJqhry23JAsX
    4dZUco1OA4HfhJvE
    jMtoaRrXOksHKSSu
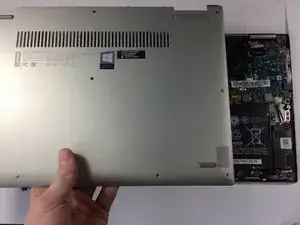
    • Lift the case from the bottom side. NOT the side with the hinges.

    • When you feel resistance, do NOT keep lifting or you will damage the housing.

    • Once you feel resistance, gently pull the case towards you. (away from the hinges.)

    • Remove the case.

  4. kWHeUqMJoAfXbXD1
    kWHeUqMJoAfXbXD1
    RKVctXeDSt3IPSlD
    bkdmKTG5nClTNf1v
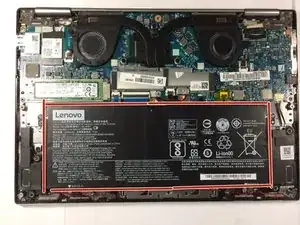
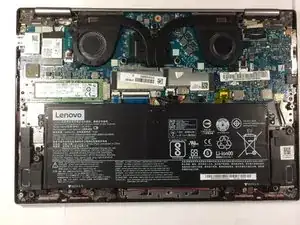
    • This is the battery. For guides that are for other parts, the battery is removed for the reason of it being a pain to connect or disconnect while screwed in.

    • Be careful not to short anything on the motherboard, as the battery cannot be disconnected before removal.

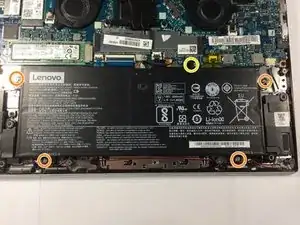
    • Remove four J1 Philips screws.

    • Remove one J1 philips screw.

    • Do not mix these screws up. If you put the longer screw where the shorter screw belongs, you will damage the shield around the keyboard.

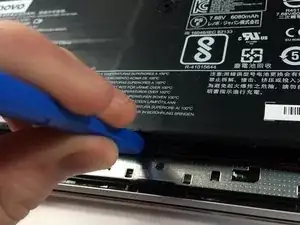
    • Lift the battery slightly using your plastic opening tool.

    • Do not lift the battery out all the way, as it is still connected to the motherboard.

    • Do NOT puncture or deform the battery or it may catch fire or even explode.

  5. EdBArGjCXT1LYl4f
    EdBArGjCXT1LYl4f
    rRgAC5MmN3gGQS34
    s6qCaDgVmSArpBgN
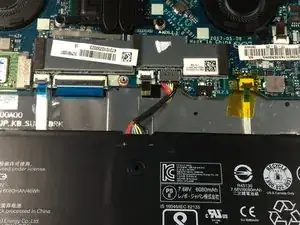
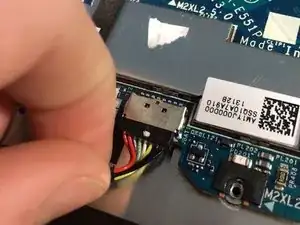
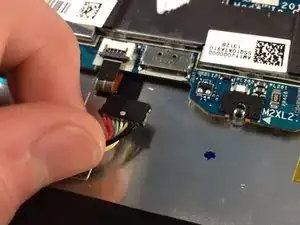
    • Pull the battery towards you until the wire is accessible.

    • gently tug and wiggle on the wire until it pops out.

    • Remove the battery.

    awsesome! thank you so much for the instructions!

    justmelendez -

Conclusion

To reassemble your device, follow these instructions in reverse order.

For optimal performance, after completing this guide, calibrate your newly installed battery.

Take your e-waste to an R2 or e-Stewards certified recycler.

Repair didn’t go as planned? Try some basic troubleshooting, or ask our Answers community for help.

Aiden

Member since: 19/09/15

17369 Reputation

6 comments

Hi Aiden. I have the Lenovo yoga 720-12ikb. Is a bit smaller. Do you know if the same instructions will work on this unit? Thanks

ignagonza1973 -

I just would like to let people know that when reassembling you need to push the connector firmly all the way otherwise battery will not be properly connected. Make sure to note the position of the switch when unplugging.

François Devoret -

This worked great, my yoga should keep on chugging for years to cone.
Robert Proaps -

On my Yoga 720-131KB, there were only four J1 Philips screws securing the battery in Step 4. There was no longer screw marked in yellow, nor was there a screw attachment point on the battery.

Thank you for preparing this guide!

Stephen Ching -

Great instructions, as usual. This was my second battery replacement (two separate computers: 720 and 730). They look similar, but screws are placed differently, and case comes apart in the opposite direction. Battery is the same though. Since they were 3 and 4 years old, the batteries were totally shot, and computers would shut down suddenly, even when apparently at 100% charge. I'm hoping this replacement will keep them going a few more years.

That battery connection is really small, it's hard to get much leverage to reconnect the new battery. Still, as others have said, pay attention to the orientation of the connector, make sure it's aligned, and be patient. If you line it up just right, it'll glide in. Make sure it goes in all the way.

frank g -

I bought a new battery for yoga 720-12ikb it shows its plugged in but wont charge... any suggestions?

venus greer -