Introduction

This guide will show you how to replace the motherboard in a Lenovo Yoga 710-15ISK laptop. The motherboard is a circuit board that is responsible for connecting all of your hardware to your processor. If your laptop is getting the Blue Screen of Death or is freezing and glitching a lot, you may want to consider replacing your motherboard. When replacing your motherboard, be sure to save all of your current components to transfer to the new one—some hardware (such as the RAM or Wi-Fi chip) can be easy to miss, and if you accidentally get rid of them with your old motherboard, your laptop will have issues.

  1. PMSyAsXWKwhgAQZg
    PMSyAsXWKwhgAQZg
    KFVZbcwnGfP24GiR
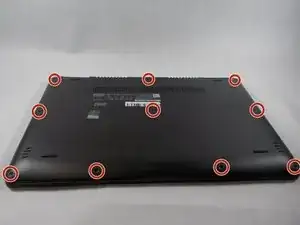
    • Flip your laptop over so the bottom is facing upwards.

    • Remove ten 2 mm screws securing the back cover to the laptop using a Phillips #0 screwdriver.

  2. KnerAkaTijWqDSQG
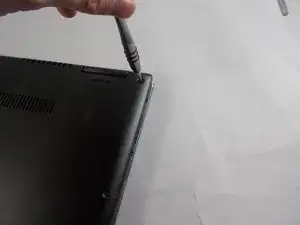
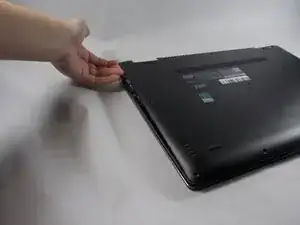
    • Pry the back cover off of the laptop with your fingers.

  3. yYDP5eUX2omK3Lcp
    yYDP5eUX2omK3Lcp
    BQpkGZAANshdNVsn
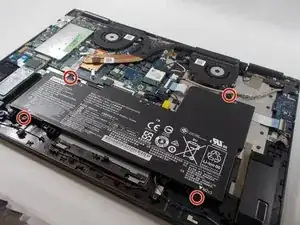
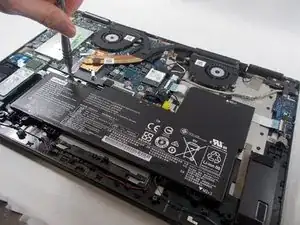
    • Remove the four 2 mm screws from the battery using a Phillips #0 screwdriver.

  4. FcdGrVCrd3ihH1tU
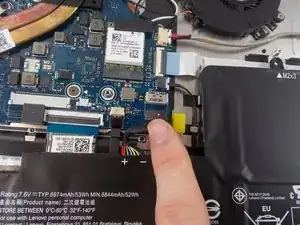
    • Remove the connector between the battery and the motherboard by gently pulling the black plastic-coated part of the wires.

  5. xiJMxCaXajWQByIG
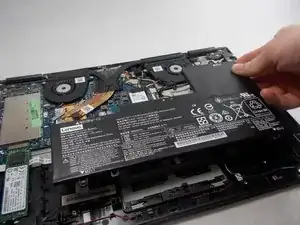
    • Remove the battery from the laptop.

  6. JI2Ox3ABHPwWjjRM
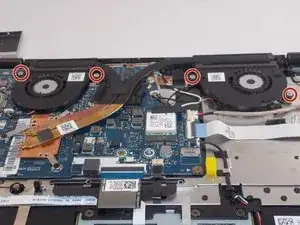
    • Remove the four 1.5 mm screws from the fans with a Phillips #00 screwdriver.

  7. 2N46cRJcnTZt6svF
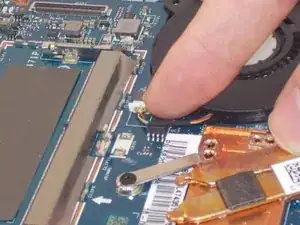
    • Unplug the wire connecting the fan to the motherboard by gently pulling the white head from the port.

  8. B4gJuCbpDFTNLGAW
    B4gJuCbpDFTNLGAW
    jsseCvKoAT1NCfBt
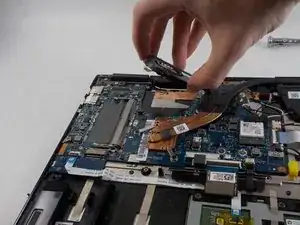
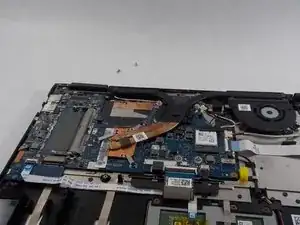
    • Lift both fans to remove them from the laptop.

  9. 1RfWqkJOqCKNjttS
    • Remove the sticker from the SSD to gain access to the screw underneath.

  10. xuxMkyTLCb43rMyk
    xuxMkyTLCb43rMyk
    qxXgNXbkvIconVJo
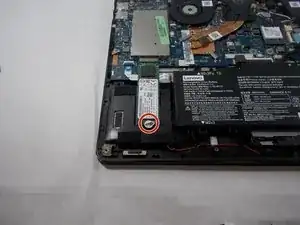
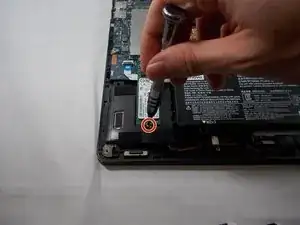
    • Remove the screw holding the SSD in place using a Phillips #0 screwdriver.

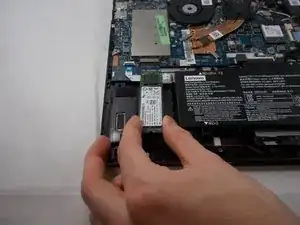
    • Gently pull on the plastic clip next to the screw until the stick is freed and bounces up.

  11. sLUSpsuGBln1ZkrJ
    • Slide the SSD out of the laptop.

  12. ykJ1aHXEiUdLR5Cd
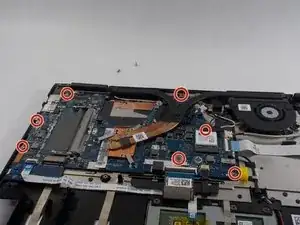
    • Remove seven 2 mm screws from the motherboard using a Phillips #0 screwdriver.

  13. rjEpDirunJBssZ5Y
    rjEpDirunJBssZ5Y
    pnadWG1AqqcpOtyQ
    xbuEvbqO2AZgNpFe
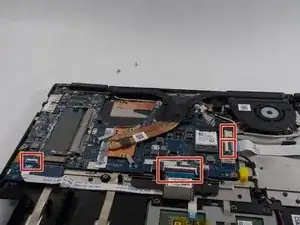
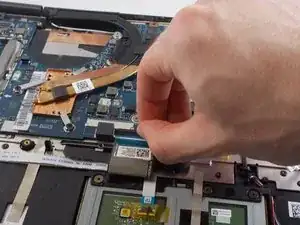
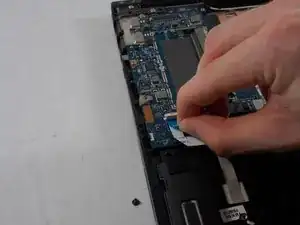
    • Unplug four cables attached to the motherboard.

    • For the flat ribbon wires, lift the black tabs holding them in place before removing them.

  14. uG1HOycXglHqZJCR
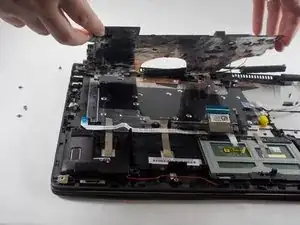
    • Carefully lift out the motherboard to remove it from the laptop.

Conclusion

To reassemble your device, follow these instructions in reverse order.
Annette Limoges

Member since: 25/10/21

181 Reputation

0 comments