
Introduction
A computer uses RAM for short term data storage. When you open a web browser or play a game, the computer temporarily stores the information for the program in RAM. Adding extra RAM can let you run more programs at a time or keep more tabs open in your browser before the computer starts running slowly.
The Lenovo YOGA 730-15IKB comes from the factory with RAM soldered to the motherboard. This soldered RAM cannot be upgraded or removed.
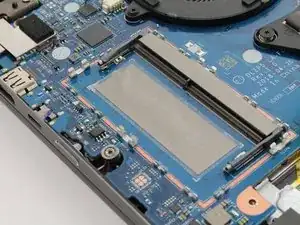
Luckily, the YOGA 730 also has a slot for adding extra RAM that is easily accessible. If you would like to add more RAM to your computer, follow this guide to locate the RAM upgrade slot.
When buying RAM, be aware that the slot can only fit SODIMM type RAM sticks.
-
-
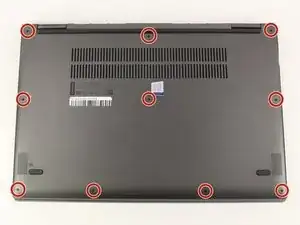
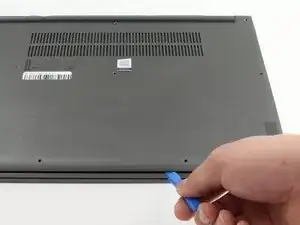
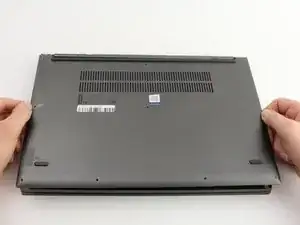
Pry up the bottom cover with an opening tool.
-
Start at the front edge of the cover and make your way along the sides.
-
-
-
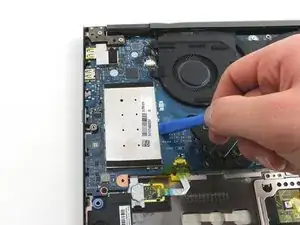
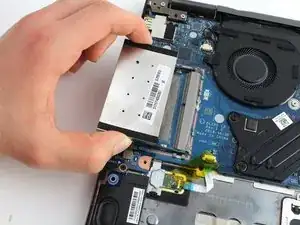
Using a plastic opening tool or other non-metal object, pry up the large metal case on the left side of the motherboard.
-


To reassemble your device, follow these instructions in reverse order.

7 comments
Thank you so much for this guide! Do you have to do anything with the SSD? Some videos about this say you have to change it but don’t go into detail as to why.
Ted Uy -
I’m glad you found the guide helpful! You should be able to upgrade your RAM without needing to touch the SSD at all (and vice versa). Neither component should have an impact on the other. The videos probably mention the RAM and SSD together because its convenient to do both upgrades at once.
What RAM and what amount of memory would be good to increase to this model?
I installed a Viper Steel 32Gb DDR4 PC4-21300 2666MHz SO-DIMM. My system now registers 40 Gb of RAM at 2400 MHz.
Performance is a huge jump over the 8 Gb I had before. I upgraded the SSD to a WD Black 1Tb , a Intel AX210 wireless card and this memory. This system is a much different system. Very fast windows 11 machine now. It was always a fast system, but its performance is noticeably improved greatly.
George -
I thought the max the system could be upgraded to was 16 gb, you were able to upgrade to 40? what was the stock ram that came soldered to the system? have one of these laying around at a family members thinking of picking up to upgrade and pass down to a friend.
dale g -