Introduction

This guide will show how to remove the keyboard from the Lenovo ThinkPad X390 Yoga. This step can be time-consuming due to the large number of screws.

  1. xnwhamDkGlyKXQjy
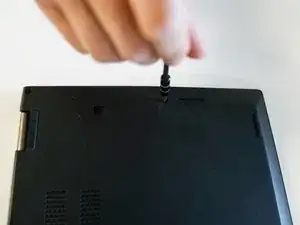
    • Use a Phillips #1 screwdriver to unscrew the eight captive screws from the back of the device.

    • The screws should not be removed from the back panel, so don't try to force them out.

  2. FeHKPMYaSseYOWcS
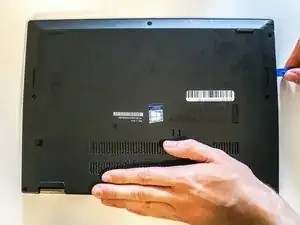
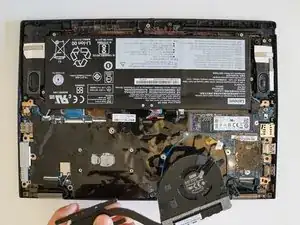
    • Use the iFixit opening tool to remove the back case by entering the tip of the tool into the seam and prying up.

    • This can be tough so take your time to undo the clips around the perimeter before removing the back cover.

  3. JwMukBgcZP3GOiOd
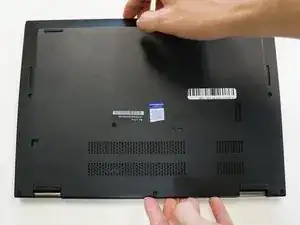
    • Once the back cover is no longer attached carefully remove it by lifting straight up.

  4. GwbXLBBR2CKvRkQK
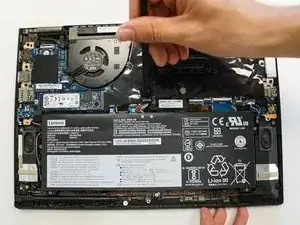
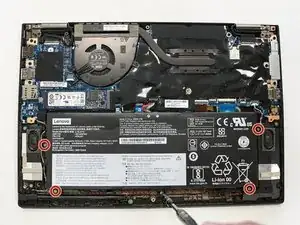
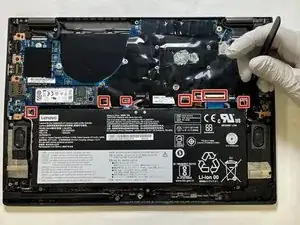
    • Use the spudger to disconnect the battery from the motherboard at the connector socket.

  5. JUEEQT25pyYKwnLQ
    • Use the Phillips #1 screwdriver to remove five 4 mm screws around the battery.

  6. kUtZ2LTAE4NZKtET
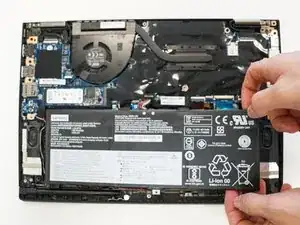
    • Lift the battery out of the laptop by lifting up.

  7. fI4suRnGvAxVeNwS
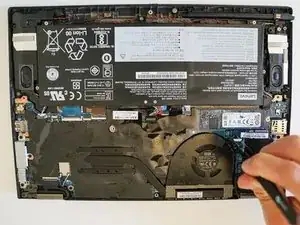
    • Disconnect the fan connector from the moetherboard with a spudger or opening tool.

  8. IpsaY6pMWnJNRuVR
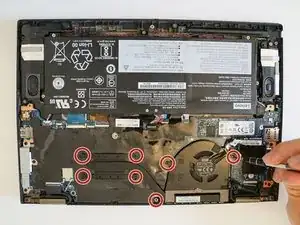
    • Loosen the seven screws surrounding the fan and heatsink using the Phillips #1 screwdriver.

    You do not have to remove the heatsink from the motherboard, it is a waste of screw turns and time. Just remove the motherboard with the heatsink attached.

    Gannon Escobar -

  9. sFaohSET3XRCbX3k
    • Carefully remove the fan from the laptop by lifting it up and off the frame.

  10. AhUoIlfOPpiRX1Al
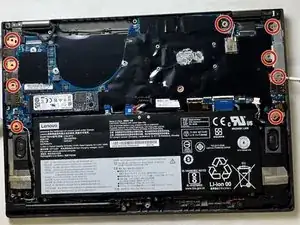
    • Disconnect the motherboard connectors with a spudger or opening tool.

  11. BhHJL611rew4mMbX
    • Use the Phillips #1 screwdriver to remove nine 5 mm screws around the motherboard.

  12. IuC3qT3fpX5ZTSMu
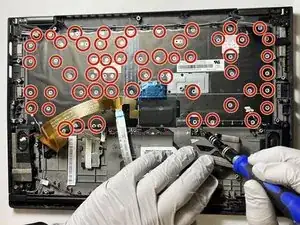
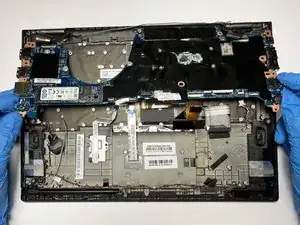
    • Loosen the sixty-eight 2 mm screws using the Phillips #1 screwdriver.

    This step is from another device by mistake I think. There are no screws to be loosened after step 11.

    mukiosa -

    Looks like you have the wrong Model, I do have these screws.

    Gannon Escobar -

    Only counted 64 screws. 66 including the screws underneath the left and right clickers above the trackpad.

    Gannon Escobar -

  13. Y12ZCiWTpHRkGASV
    • Carefully remove the motherboard from the laptop by lifting it up and off the frame.

    Out of order, remove motherboard before removing screws

    Gannon Escobar -

  14. vj4OTF1U1nR2ILCT
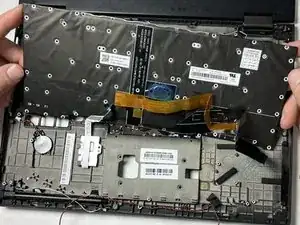
    • Gently remove keyboard

    Fails to cover what to do with the right and left clicker and how to un-fasten them from the chassis, which I am stuck on. No screws but bolted in somehow…

    Gannon Escobar -

    Last step is to pop off the left and right and remove the screws from there, the. The keyboard should be good to remove.

    Gannon Escobar -

Conclusion

To reassemble your device, follow these instructions in reverse order.
Louise Bonnimond

Member since: 03/10/22

181 Reputation

0 comments