Introduction
This guide will show you how to open the laptop to replace the Thermal Paste. This guide will also help you upgrade the RAM or the SSD inside.
Tools
Parts
-
-
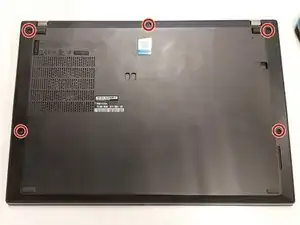
Unscrew all screws holding the back panel in place.
-
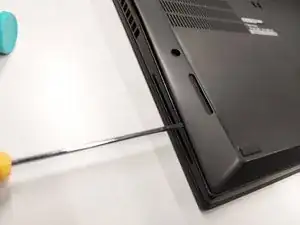
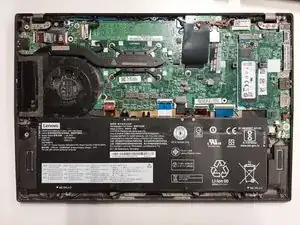
Use a prying tool to release all the clips and remove the panel.
-
-
-
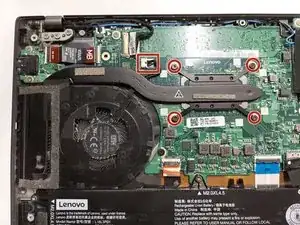
Unscrew the 4 screws holding the CPU heatsink and disconnect the fan.
-
Clean the old thermal paste from both the cooler and the CPU.
-
It's also recommended to use compressed air to remove any dust in the laptop and the fan.
-
Use only enough thermal paste to cover a portion of the pad. Use a spreader if you have one.
-
Place the heatsink back into the unit carefully and tighten the screws in an "X" pattern to ensure even pressure. Don't forget to plug in the fan cable.
-
-
-
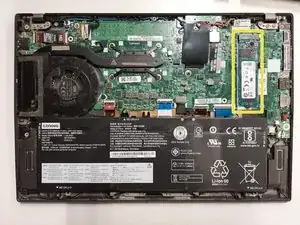
Once you have the back cover opened, it is a good opportunity to upgrade the SSD. To do so, follow the SSD Replacement Guide.
-
To reassemble your device, follow these instructions in reverse order.

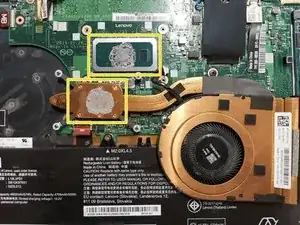
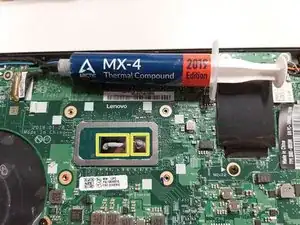

Thermal paste should not be applied to the second die/processor as it is the chipset, not a GPU/CPU.
When opening up the laptop, only one is covered in paste, this is the CPU and the other is left un-pasted as it would be adversely affected by heat transference from the CPU. The chipset/un-pasted die does not generate a large amount of heat.
Hernando Gonzalez -
Yes, that is true. However it is still better to cover the second die as well, for better performance. This will not affect the heat transferance as this laptop does now have trouble with overheating.
Simeon Brankov -