Introduction

  1. fqubWSv1RDEiduwf
    fqubWSv1RDEiduwf
    ZtBk2GAgtVDdVpgb
    GRnYIbPaLMuZgq3d
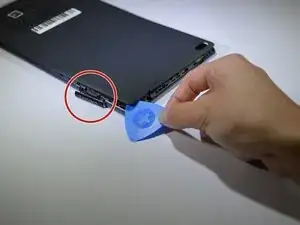
    • Start at the microSD slot.

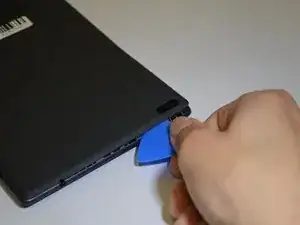
    • Use the opening pick to slide underneath the back cover of the tablet.

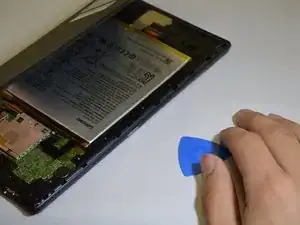
    • Slide the opening pick around the tablet until the back cover is off.

  2. 2Ylntyp6rDVq5TEB
    2Ylntyp6rDVq5TEB
    aU1ELmay3XRMOyPV
    RUBvPexUx34XTgVa
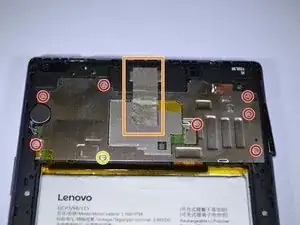
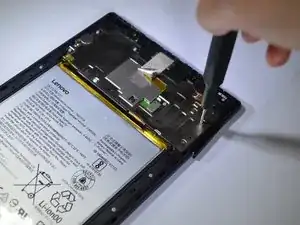
    • Remove the 8 screws with a Phillips #000 screwdriver [bit].

    • There is a screw under the blue "s" sticker.

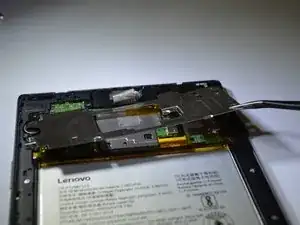
    • Remove tape holding plate down.

    • Use precision tweezers or your fingers to remove plate.

  3. qHQlsdF2jHEIvAC4
    qHQlsdF2jHEIvAC4
    GVRQ3JxqkNuGIWy6
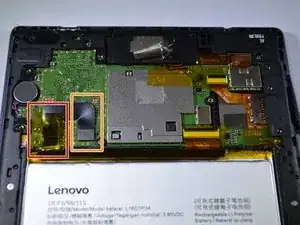
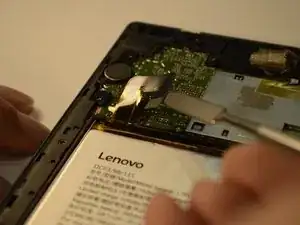
    • Remove yellow tape.

    • Use a spudger or plastic opening tool to remove the battery's ribbon cable from the motherboard.

  4. 4MO6MMJ46JmxDgp6
    4MO6MMJ46JmxDgp6
    5nAIHZqe6FuwuNgt
    FAT3CjAhHjevJYu2
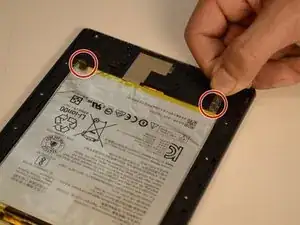
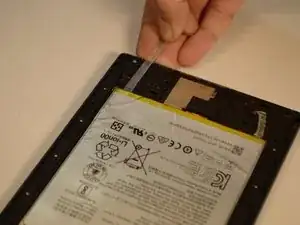
    • Gently pull on the two stretch release adhesive strips. Do not pull up, pull away from battery.

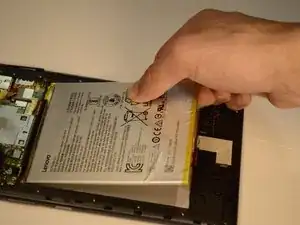
    • Once the tabs are off, lift the battery up from the frame.

    • Do not bend or puncture the battery.

    Hi

    What I want to ask is how did you get to the motherboard after step four. I couldn't see how you removed the upper protection plastic part.

    I couldn't get it out either!!!

    I wish you good work.

    vedatemre şahin -

    Be cautious when removing the adhesive strip. Pull it straight ( not up) from the battery a little bit at a time. It is longer than you'd think.

    Arthur Watson -

    Spot on instructions. Be sure to seat the battery connector very carefully and make sure it doesn't pop off. It look me several tries to seat it.

    Philip F -

  5. ZoN2WAAwWnTRHDSi
    ZoN2WAAwWnTRHDSi
    5NU1TkF1iYfJWLkO
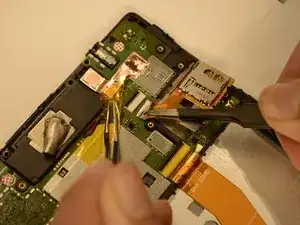
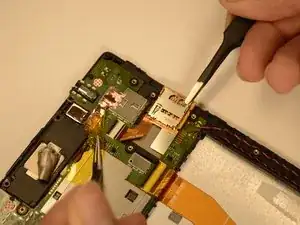
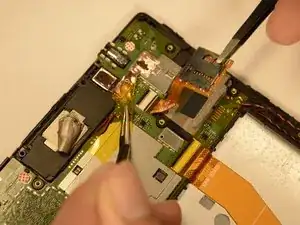
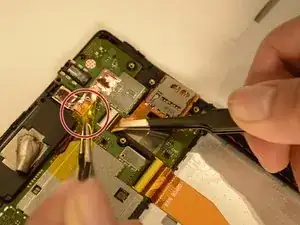
    • There is a yellow tape holding the microSD card reader connector. Use tweezers to hold down the tape.

    • Gently lift the tab on the microSD card reader's ZIF connector, and gently pull the ribbon cable free.

    Before this step, you have to remove the bezel. Be cautious.

    Laszlo Fazakas -

    Yes this is a poor how-to without that major step explained. You need to remove the 8 silver screws and 10 black screws from the chassis, then carefully pry outward on the Tab 4’s edge bezel, working all around from the front side of the tablet with a thin plastic pick or similar. Then the whole bezel can be lifted off from the back.

    Steve Tab4 -

    Also, the above step says “lift tab” on ZIF socket, but doesn’t show or explain what tab, or which direction. The “tab” is actually the black bar at the top of the ribbon cable socket. You don’t lift it, you pivot it up from the rear (top). In other words, pry the back edge up and it will pivot forward, toward the white section of the socket. That releases the ribbon cable.

    Steve Tab4 -

  6. YJKBMPAjdFKGtuEV
    YJKBMPAjdFKGtuEV
    G2REFmTidDFOeSGK
    • Lift the microSD card reader with tweezers or your fingers.

Conclusion

To reassemble your device, follow these instructions in reverse order.
Ivan Chavez

Member since: 06/02/19

776 Reputation

0 comments