Introduction

In the case where your Lenovo N21's screen is cracked, malfunctioning, or not working at all, you may need to replace the screen. This can be done easily by removing the protective panel around the screen and removing a few screws. Be careful when pulling away the screen's protective panel, because bending it too far may cause it to snap.

  1. oPHejFLmyOOmqUHQ
    oPHejFLmyOOmqUHQ
    d6Vp5G3Q5se3cZAe
    • Power down the Chromebook before starting any repair.

    • Opening up your Chromebook voids the manufacturer warranty.

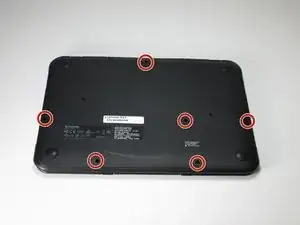
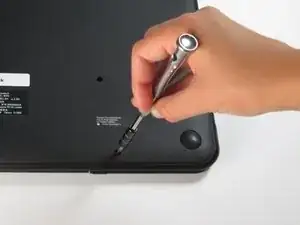
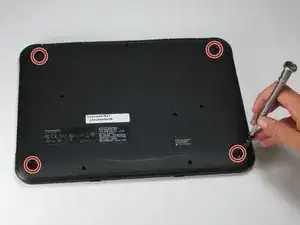
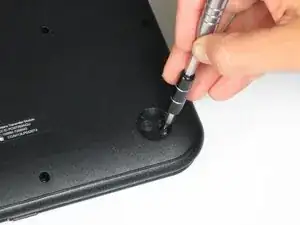
    • Use a screwdriver to remove the six 5.0mm Phillips screws from the bottom housing of the Chromebook.

    Where is write Protect Screw ???
    Please
    Lenovo N21 Chrome Book

    MAC IT -

  2. 4WMTAtsXOOglfc5j
    4WMTAtsXOOglfc5j
    DRMGZHxT6O1dLyaC
    • Use a plastic opening tool to pry off the four rubber pegs from the bottom housing.

  3. PuvBfHfWbdLIKvgp
    PuvBfHfWbdLIKvgp
    Yq2DegobSFtoXJiL
    • Use a screwdriver to remove the four 5.0mm Phillips screws located under the rubber soles.

  4. DmEVoBEZVaraPxav
    DmEVoBEZVaraPxav
    iFrLnTFYuOu4UpDL
    3Hb5jbViTLFupgYq
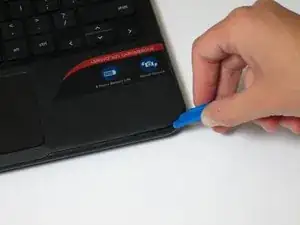
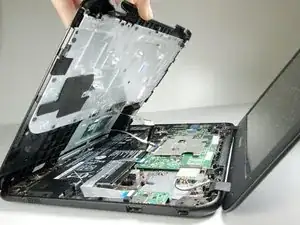
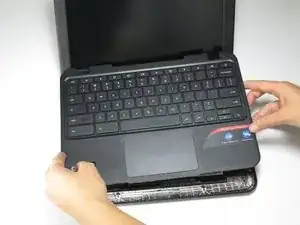
    • Flip the laptop over and open the screen.

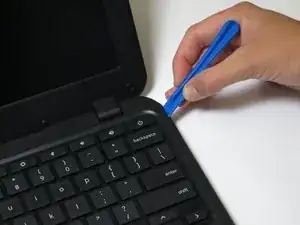
    • Gently pry the keyboard and trackpad panel away from the bottom housing using a plastic opening tool.

    • Once completely separated, do not immediately pull the panel completely away from the bottom housing. There are wires that are still connecting the panel to the rest of the internals of the Chromebook.

  5. DycCE2SZBKBGpbPe
    DycCE2SZBKBGpbPe
    O6akInfduJKZvy5W
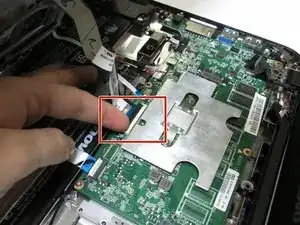
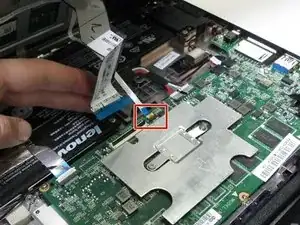
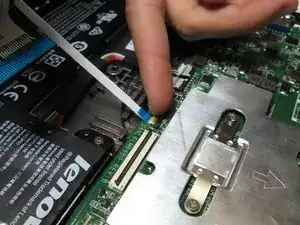
    • Disconnect the keyboard ribbon cable by lifting the ZIF connector lock with a plastic opening tool or fingernail and gently pulling the ribbon cable straight out of its socket.

  6. iGwQRkaTAcEUFCOr
    iGwQRkaTAcEUFCOr
    BMGtTREXcl1wU5dK
    okNltiJWCstbuEpd
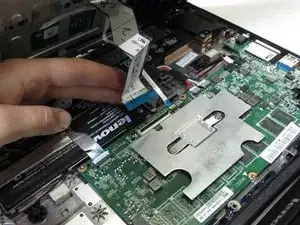
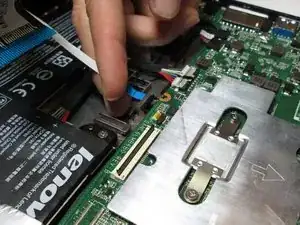
    • Disconnect the trackpad ribbon cable by lifting the ZIF connector lock with a small prying tool or fingernail and gently pulling the ribbon cable straight out of its socket.

    My replacements did not come with the trackpad zif. I had to remove from the old part and move to the new part.

    Michael Selburg -

  7. yHhMJQbfjnBjaVFl
    • Remove the keyboard and trackpad panel away from the device.

    Has anyone gone through the experience of replacing JUST the keyboard? It looks like they are available as a separate component, e.g. https://www.ebay.com/itm/New-for-Lenovo-... but I haven’t found a tutorial on removing the keyboard from its bezel. Thanks!

    mbates -

  8. Vcpa6YJr5mDIXdGo
    Vcpa6YJr5mDIXdGo
    i4vKEyKspaPRCmqO
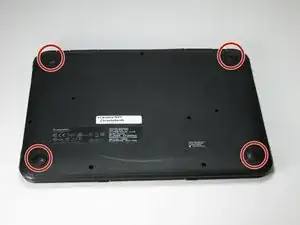
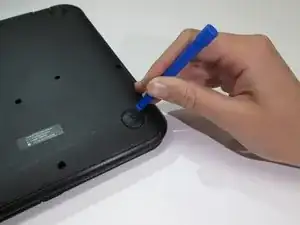
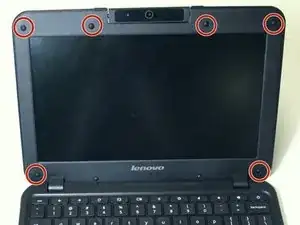
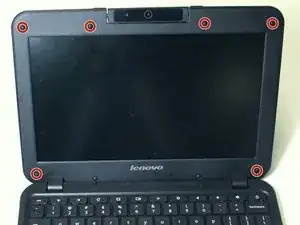
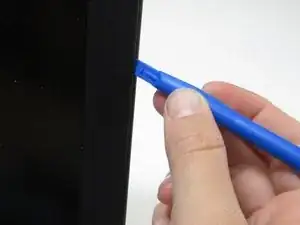
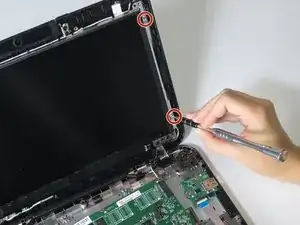
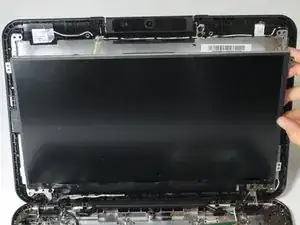
    • Carefully pry off the six small rubber pads around the screen with a plastic opening tool to expose the screws.

    • There are two rubber pads without screws underneath that do not need to be removed.

  9. MFNa5VVeoLPYbeOk
    MFNa5VVeoLPYbeOk
    M1GgmKVAUVIhCG4c
    • Remove the six 4.0mm Phillips screws that are underneath the rubber pads with a screwdriver.

  10. CF1YX36RbxgpRF6g
    CF1YX36RbxgpRF6g
    1XL3DlcEN5SDVNPC
    • Use a plastic opening tool to carefully pry the thin plastic frame away from the screen.

    • The bottom edge of the frame has adhesive on it, and will take a little more power to peel away. Be careful not to bend the plastic too far or it will snap.

  11. qeCAeqeeETM1qphI
    qeCAeqeeETM1qphI
    JKm2L1wb6rttmOBq
    • Remove the four 3.0mm Phillips screws symmetrically placed on either side of the screen.

  12. PfToWPFfeTAkaWaT
    PfToWPFfeTAkaWaT
    SYYEQvJKgac2wEhW
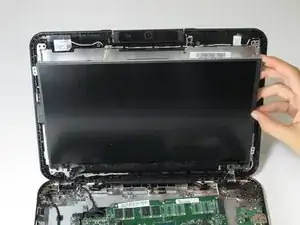
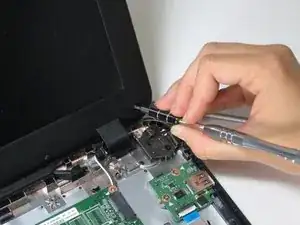
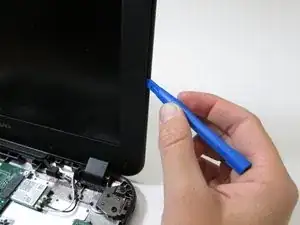
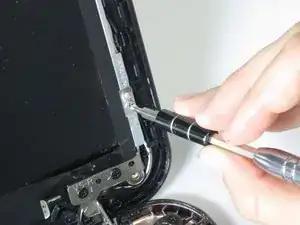
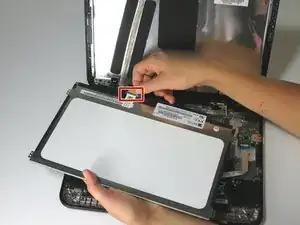
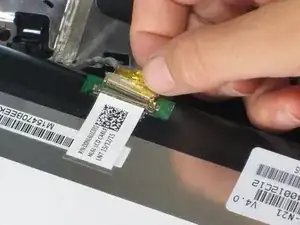
    • Pull the cable connecting the motherboard to the screen straight out from the back of the screen.

    • The screen is very fragile. When handling it, avoid applying uneven pressure on or bending the screen.

  13. UWYOEPk3EMSvVqrJ
    • Remove the screen from the device.

Conclusion

To reassemble your device, follow these instructions in reverse order.

Lynette Cox

Member since: 26/04/17

757 Reputation

0 comments