Introduction
Use this guide to upgrade your current storage size for your Lenovo Legion 5-15ACH6 laptop.
The SSD Drive is a storage device that stores data in your computer. If you have a Lenovo Legion 5-15ACH6 laptop, you already have an SSD installed. However, if you are running low on storage space and wish to upgrade your SSD, you are in luck. The process to install additional storage is simple. Follow this easy step-by-step guide, and you should have plenty of storage in no time.
Be sure to backup your data on your current SSD so you don't lose it while you install your new SSD. Make sure to power off your laptop entirely before you start the process and unplug it from the charger.
-
-
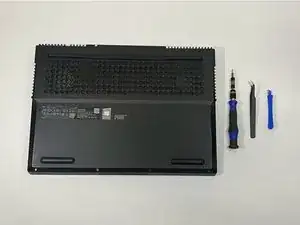
Use a Philips #1 screwdriver to remove the six 11.1 mm on the back of the device.
-
Use a Philips #00 screwdriver to remove the four 4.1 mm screws on the back case.
-
-
-
Starting from the back of the laptop slide your opening tool between the bottom cover and laptop chassis.
-
Run the opening tool along the seam to separate the bottom cover from the chassis.
-
Remove the bottom cover and place to the side.
-
-
-
To disconnect the battery cable safely, use the pointed tip of a spudger to carefully push on each side of the connector.
-
Alternating from one side to the other, gently “walk” the connector out of its socket.
-
-
-
Remove the three 4.1mm Phillips #00 screws holding the metal shield in place.
-
Remove the metal shield and place it to the side.
-
-
-
Remove the single 4.1 mm Philips #00 screw holding the SSD in place.
-
Pull the SSD out and away from the socket.
-


To reassemble your device, follow these instructions in reverse order.