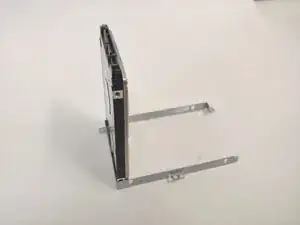
Introduction

This hard drive replacement guide will show you how to properly remove the hard drive from your Lenovo IdeaPad. The only tool mandatory for this guide will be a #1 Phillips head screw driver and a metal spudger.

  1. SjrCeNYo5YHpWadA
    SjrCeNYo5YHpWadA
    4iUW2lLaK1yVQ3nI
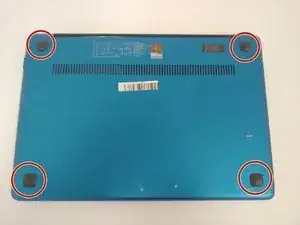
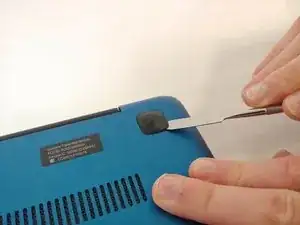
    • Using the metal spudger, remove all the rubber squares on the bottom of the laptop.

  2. geeNC5KDNZCXDP3g
    geeNC5KDNZCXDP3g
    NuuLSVPTpM5Lu2XX
    AFFoAWixoCrDKKjh
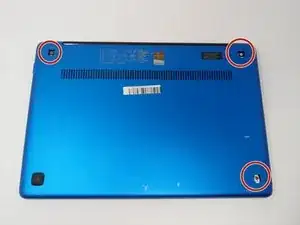
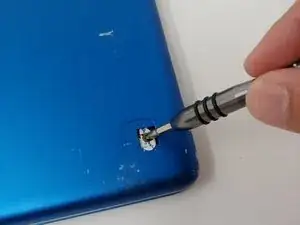
    • Remove the three 6 mm Phillips #1 screws holding the panel on the laptop.

    • Pry the panel from the laptop using your hands or the metal spudger if necessary.

  3. HbW2DtoXxJMhMfhc
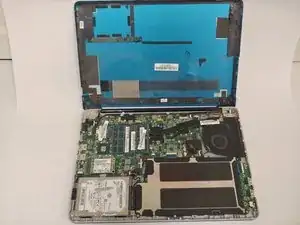
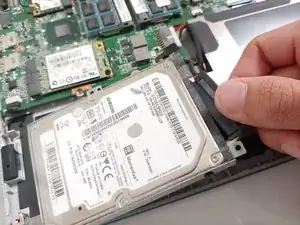
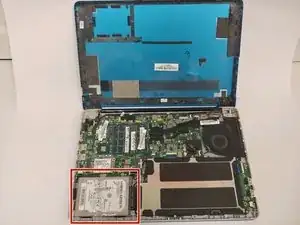
    • Locate the hard drive in the bottom left corner.

  4. lZDN353HuPUV1LJx
    lZDN353HuPUV1LJx
    Q62xmyFPKSd31G1V
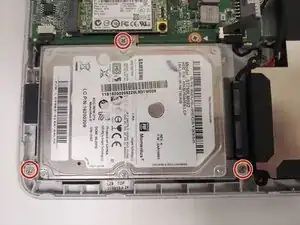
    • Use the Phillips #1 screwdriver to remove the three 3mm screws located on the rim of the hard drive.

  5. XJE1RDfXes1yLoJR
    XJE1RDfXes1yLoJR
    imSm3NfcOPLpdH6u
    U4KnTIRVLmJwI1se
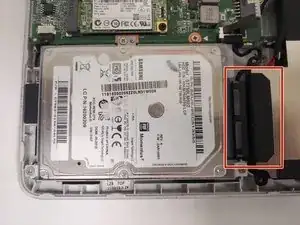
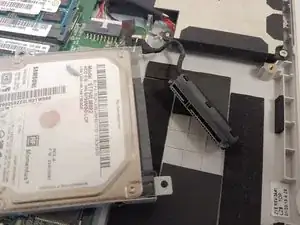
    • Use your fingers to detach the black connector from the hard drive.

    What is the name of the black connector cable

    Issifu Alhaji Iddrisu -

  6. fm1WntHOX35yKxlW
    fm1WntHOX35yKxlW
    1kgfNCIVuqIeaGL1
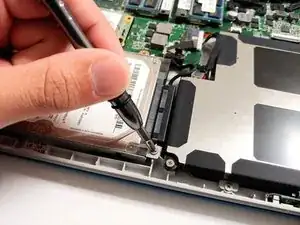
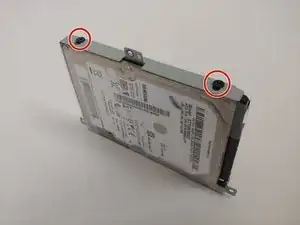
    • Unscrew the four screws on either side of the hard drive with the Phillips #1 screwdriver.

  7. pILnLEdtBrNeiXEO
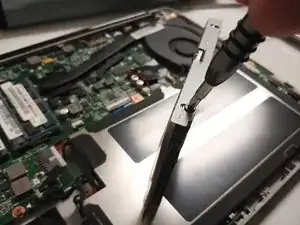
    • Use your fingers and gently lift the hard drive from the case it was screwed into.

Conclusion

To reassemble your device, follow these instructions in reverse order.
Jeff Nyheim

Member since: 18/09/18

169 Reputation

0 comments