Introduction

  1. wyH5ZtGfvt3tXZCP
    wyH5ZtGfvt3tXZCP
    STVRrDRyJfyEVMNu
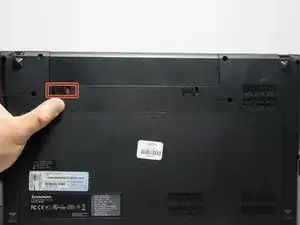
    • To unlock the battery, flip the laptop over so that the bottom is facing upward. Then unlock the left clip by pushing the clip to the left.

  2. bd446o4IKQMB6xSy
    bd446o4IKQMB6xSy
    VJQZSXe2HRGCANqO
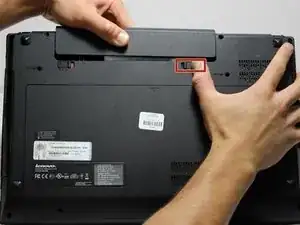
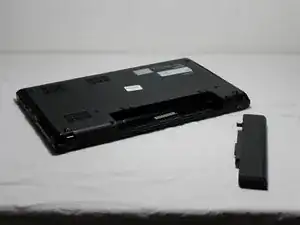
    • Now push the right clip to the right and hold it while using your other hand to pull the battery out.

  3. TVRhT2UK1XHQLNtb
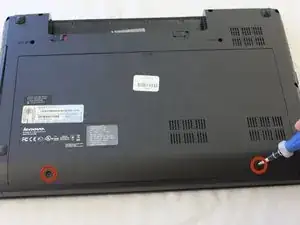
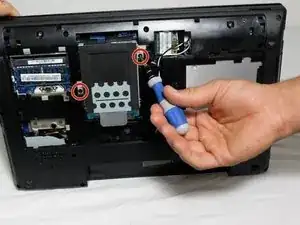
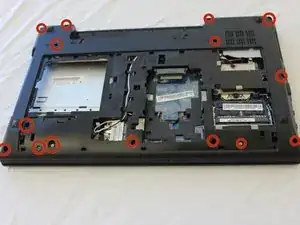
    • Remove the two screws highlighted.

  4. tmNa6EQwNHqYuMAc
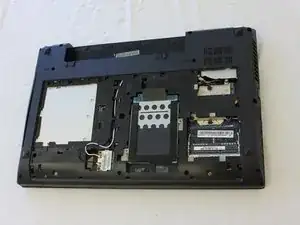
    • This is the back of the laptop with the cover removed.

  5. 5ieHCEQnnButwTII
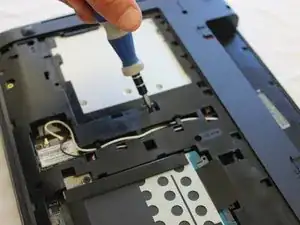
    • Locate and remove the single screw right of the optical drive

  6. LmTZRQrVjDsGhoQI
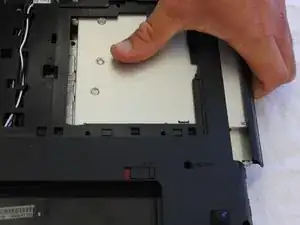
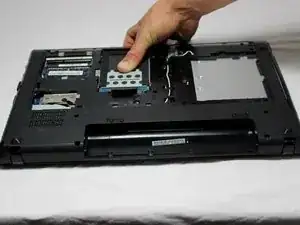
    • Optical Drive should slide out easily with one thumb's effort.

  7. KYWZ2EbhcBJEWqak
    • Now remove the last two screws highlighted

  8. rbekWw2jFhR6HQpS
    rbekWw2jFhR6HQpS
    DLhImmEOsJZ5de3d
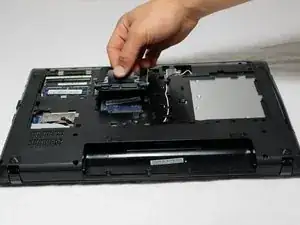
    • Push hard drive away from the center of the chassis.

    • Lift the hard drive out of the chassis using the tab located on the drive.

  9. 1hGOBrAPhlIEQ5UK
    1hGOBrAPhlIEQ5UK
    Qfs5pPKVKrZAahrM
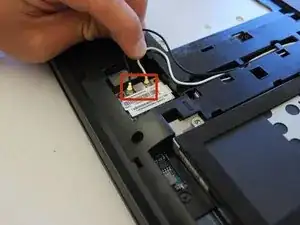
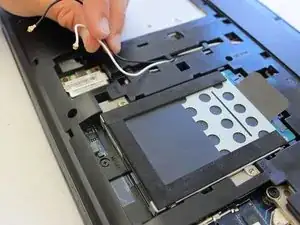
    • Remove the white and black wires.

  10. 2jotuuYEUruCV1IW
    2jotuuYEUruCV1IW
    GIKbTXyHTl6KWblC
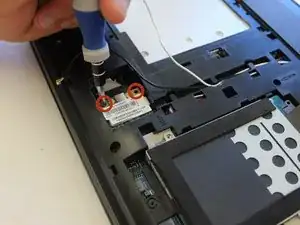
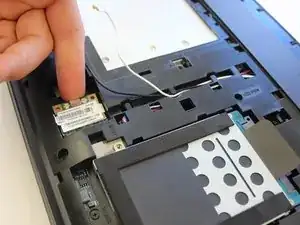
    • Next, unscrew the wifi card

  11. RPpKsHEANjoEGNkW
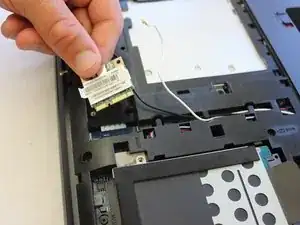
    • Pull out the wifi card.

  12. g6LMdYqYjIfYUdke
    g6LMdYqYjIfYUdke
    3hhNpxWWDZqjCxPT
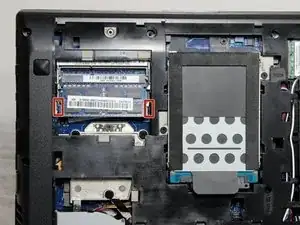
    • Now push the little clips out away from the memory to unlock the memory.

  13. cSicRrkYDmFgXiQf
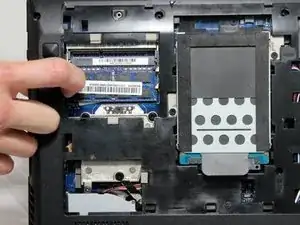
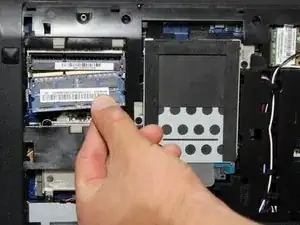
    • After unlocking the memory from it's position, pull the memory out.

  14. iRNppGyJ2uLkA3yD
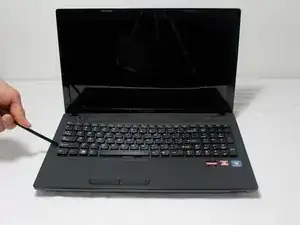
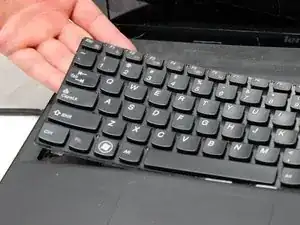
    • Remove three screws on bottom of case. They have a little keyboard image next to them. If you don't do this first, the keyboard will not come off. Place the plastic spudger right under the edge of the keyboard and lift up the keyboard.

  15. NGrNRfjFCfJqLSyD
    • Slowly and gently lift the keyboard up to separate from the chassis.

  16. kgmKi6CoYilxyBpX
    • Gently lift the keyboard off the chassis.

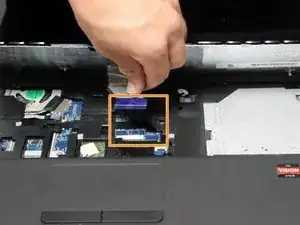
    • Carefully disconnect the keyboard from the laptop by unhooking the keyboard ribbon.

  17. qGabVDeatvYroXWJ
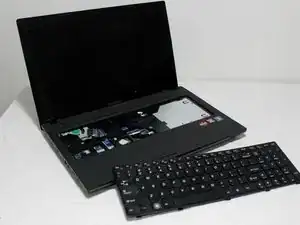
    • Now remove the keyboard from the computer.

  18. SZiZxieTioFQCmP3
    SZiZxieTioFQCmP3
    qHJkmG6SwUnJMqnH
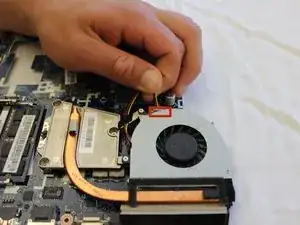
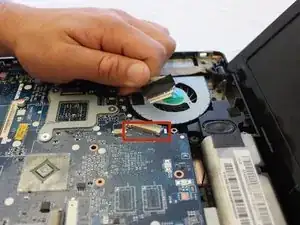
    • Pull the plug shown.

  19. wOpv3UZ1ngmeutRW
    wOpv3UZ1ngmeutRW
    RBUQo1uHJw4jjb1J
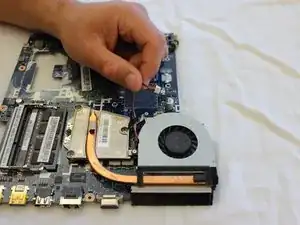
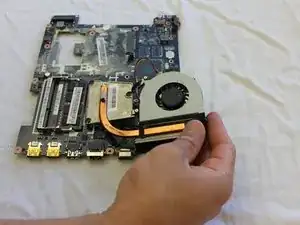
    • Lift up fan.

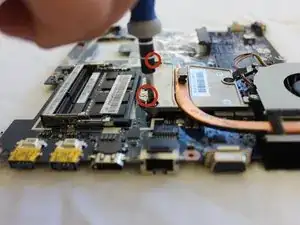
    • Remove two highlighted screws.

  20. tP3TO2UUFGMOJPOe
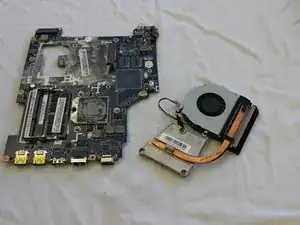
    • This is the fan separated from the motherboard.

  21. KJKOg6IUEbfMtg1T
    • Remove all screws shown.

  22. ZLBAwcmgEvgw1snw
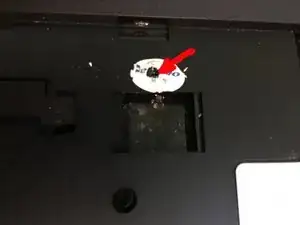
    • Flip laptop over.

    remove screw under oval paper sticker

    Alex Kopyoff -

  23. mU6lb2MPND1McToM
    • Remove one more screw hidden under white paper oval sticker (lenovo)

  24. PTTsNRp2FQe5x4qa
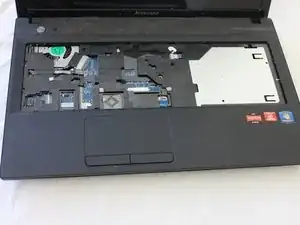
    • Remove keyboard bezel.

  25. DZlvLVPyl3TdinFS
    DZlvLVPyl3TdinFS
    3wJXfnLCEByX6MwU
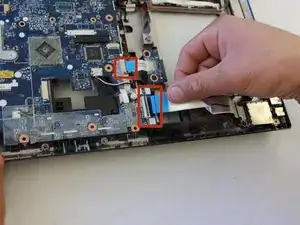
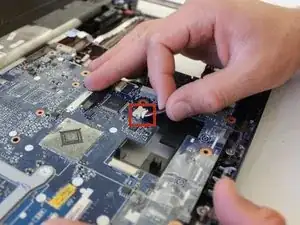
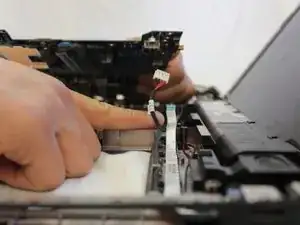
    • Unplug highlighted tabs.

  26. FWFDmUEvxAIUYEk1
    FWFDmUEvxAIUYEk1
    NomeW1YS2WwRUySC
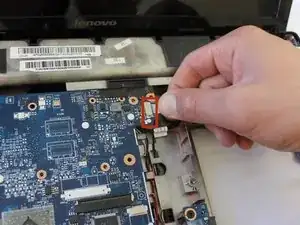
    • More tabs need to be removed.

  27. UPgnQIuVgx1RqoGZ
    UPgnQIuVgx1RqoGZ
    A2GGQhQsUMjtkLLD
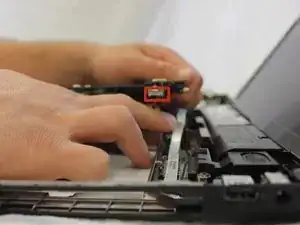
    • Remove final plug connecting motherboard to base of laptop.

  28. KvGTRpomYZWSuZbq
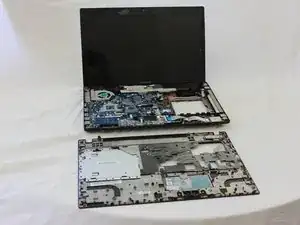
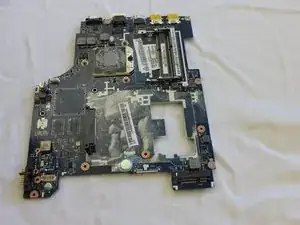
    • This is what the motherboard looks when taken out of the laptop.

Conclusion

To reassemble your device, follow these instructions in reverse order.

Patrick

Member since: 08/04/14

453 Reputation

2 comments

You cannot must pull up on the keyboard. There are three screws on the bottom of the case that have to be removed first!!

Clint Hatchett -

My laptop open hoi no please tell me why open hoi na please vaia
Mdimranh203@gmail.com -