Introduction

Use this guide to remove the Speakers from the Lenovo 130-15AST . The speaker is a output hardware device that connects to the laptop to create sound. The speakers may be inoperable even though the volume is turned all the way up and the mute button is off. This could be due to faulty speakers or speaker connections. The replacement guide requires the use of the following tools: Jimmy, Prying & Opening Tool Assortment, Phillips Head #00 & #0 Screwdrivers, and Tweezers.

  1. 5BakCZ2PK12ZVZoA
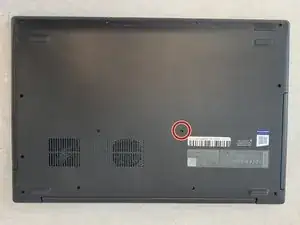
    • Verify that the DVD/CD Tray is free of DVD's and CD's.

    • Using a Phillips #00 screwdriver, remove one of the 6.0mm screws.

  2. XJKTb2DWhUNXFmtl
    XJKTb2DWhUNXFmtl
    QqiBMhQZcANdD5BK
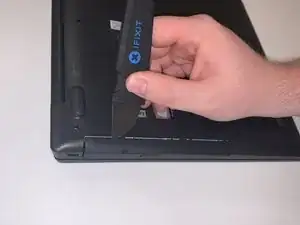
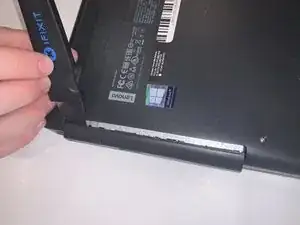
    • Using the Jimmy Tool, gently pry the DVD/CD Drive away from the case of the laptop.

  3. CaTwfPLn2giEV2t1
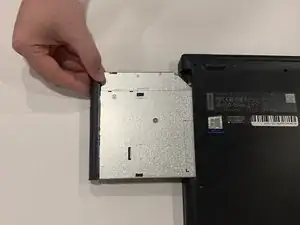
    • Gently slide the DVD/CD Drive out of the laptop.

  4. v51J5jhiMWbLFeC4
    • Before proceeding, make sure the computer is turned off and it is not connected to any power source.

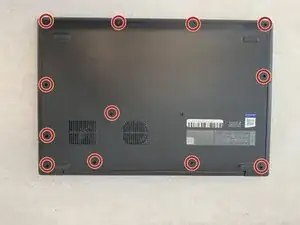
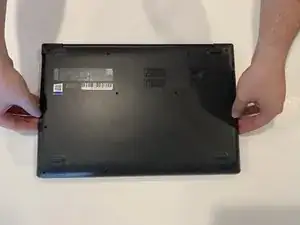
    • Using a Phillips #00 screwdriver, remove twelve of the 6.0mm screws.

  5. F5fpIqQLGcO2wfRQ
    F5fpIqQLGcO2wfRQ
    2kH3TKnHQbArQtjo
    DnGxgV4dyYK5xlRH
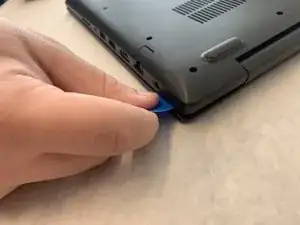
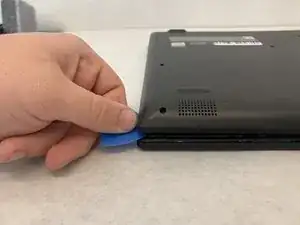
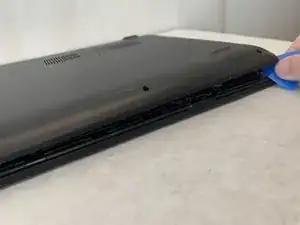
    • Do not try to completely remove this case without ensuring the entire case is free of connection points as this could crack or damage the case.

    • Use a thin, flat edge to gently break the seal of the case.

  6. vZ5uYAHB2ICXb4Ad
    vZ5uYAHB2ICXb4Ad
    kjuMGQBGQbZmlYAY
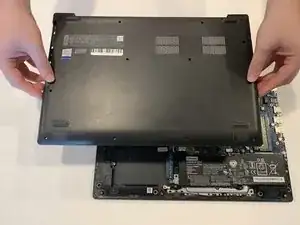
    • Make sure that the back panel is completely free from the laptop.

    • Grab the sides of the back panel of the laptop with two hands. Then separate the panel from the laptop by lifting up.

  7. sTdEvIVcPLAltavR
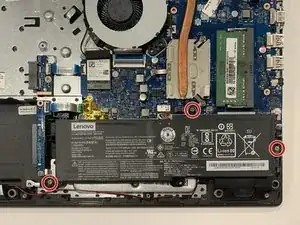
    • Using a Phillips #0 screwdriver, remove three 6.0mm screws.

  8. NW2hXoPgPrP65LuD
    NW2hXoPgPrP65LuD
    3SlmHi3wXvQujrUk
    p6mOPZpQNPCJBZMy
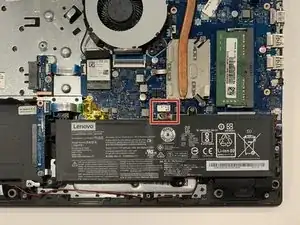
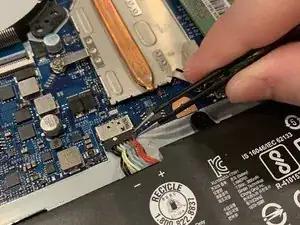
    • Using a pair of tweezers, remove the black plug which includes 8 wires.

  9. K2L2kdKFVr4TNgmt
    K2L2kdKFVr4TNgmt
    vBjpJiTKpnafZVCc
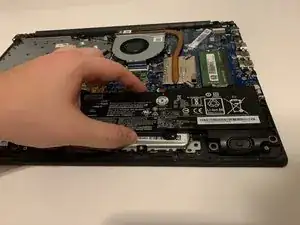
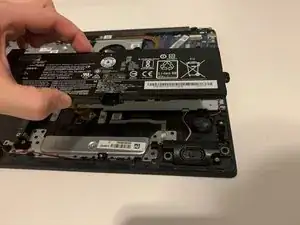
    • Grabbing the sides of the battery with one hand, remove the battery from the laptop.

    I worked. Thanks you so much for the informative and thorough explanation.

    Guy Kaminitz -

  10. PGJK4RToHvxpdpE2
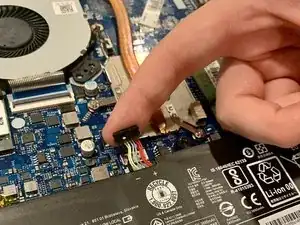
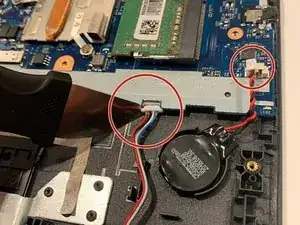
    • Using a prying tool, remove the white plug (which includes 4 different colored wires) from the motherboard. Repeat the same step for the other plug.

    • This plug is small and fragile. You should not use a lot of force to separate the plastic connection from the motherboard.

  11. cQE5ZYGY5bSpr26e
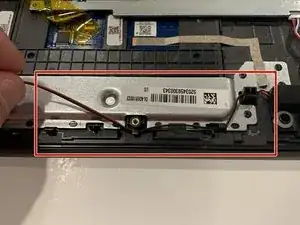
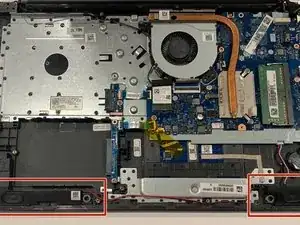
    • Disconnect the speaker wires from their connection tabs along the front of the computer.

    • These wires are not connected to anything internally. They connect the speakers from the power supply to each other.

  12. VuchHLhGGOJ2B3ya
    VuchHLhGGOJ2B3ya
    IeCwKoEdrwdL5Zql
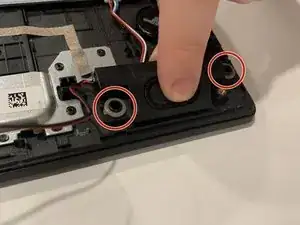
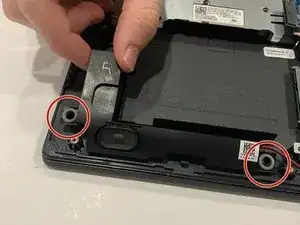
    • To remove the speakers, pinch the inside edge and lift upwards.

    • These speakers are help in by O-rings. Be sure not to lose these, as new speakers do not come with new O-rings.

Conclusion

To reassemble your device, follow these instructions in reverse order.
Wesley Atteberry

Member since: 22/09/19

202 Reputation

0 comments