Introduction

  1. TQJDdlidJVfwKMVT
    TQJDdlidJVfwKMVT
    QlfdhyZmxX2yJ4eJ
    JPhTCDBnfACvvkMt
    • Make sure you power off your Chromebook first as you will be disconnecting the battery!

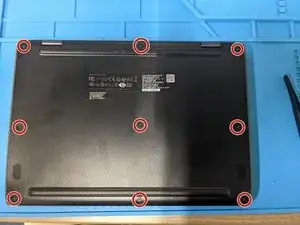
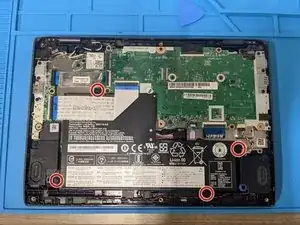
    • Remove all 9 screws on the back of the Chromebook with a Phillips #0 screwdriver

    • The screws circled on this Chromebook's back casing are all identical!

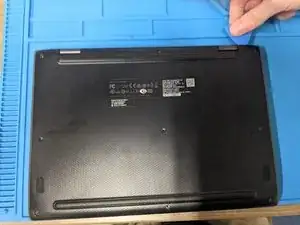
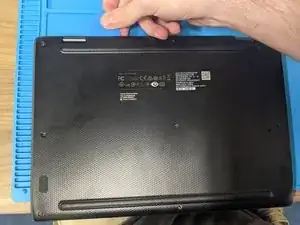
    • Use an opening tool such as a spudgerand carefully work your way around the laptop to remove the back cover

  2. 1BqgnWMaNFDApOyr
    1BqgnWMaNFDApOyr
    pg2P2dZfcAJGXuKZ
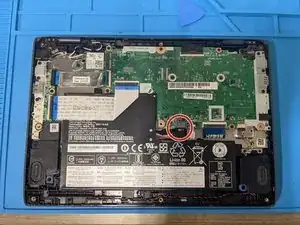
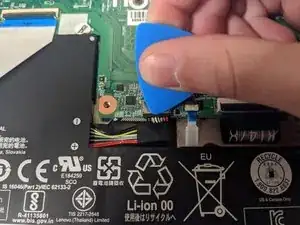
    • Remove the black tape covering the connector, then using a spudge tool, carefully unplug the battery from the motherboard

  3. MshbOByYC1VUAp1j
    MshbOByYC1VUAp1j
    NUBKfYLxSvDHVPIU
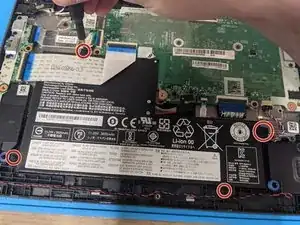
    • Remove the 4 screws holding in the battery and set them aside

    • Make sure to separate the screws for the battery from the screws for the backing that were removed in the first step!

  4. Ci6SIZkiJrj3TdY5
    Ci6SIZkiJrj3TdY5
    ZhKyQYDVtbkrSlEv
    PbmrqVWpSVGY53ci
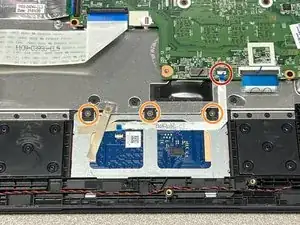
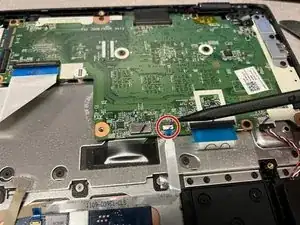
    • Disconnect the Trackpad Cable by lifting the Connector.

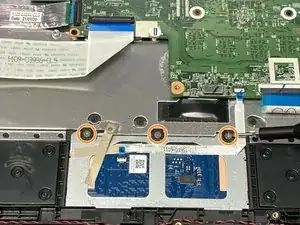
    • Remove the 3 screws holding in the top of the trackpad with a Phillips #0 screwdriver

  5. BWKNlY1U1mAHfp4L
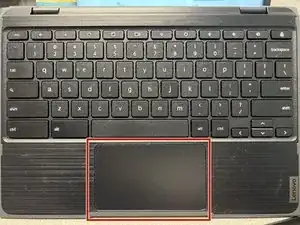
    • Please make sure the Chromebook is open as the trackpad will come out from the inside of the device.

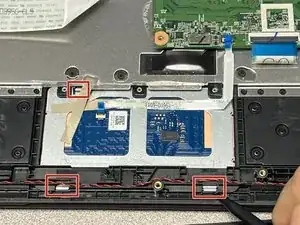
    • There are 3 tabs (2 at the bottom and 1 at the top left of the trackpad), using the Spudger, push the tabs to remove the Trackpad from the case.

Conclusion

To reassemble your device, follow these instructions in reverse order.
Sam Addington

Member since: 21/09/22

159 Reputation

0 comments