Introduction
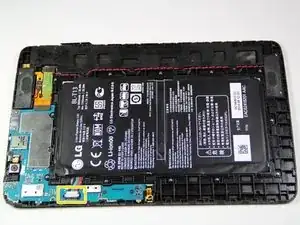
This guide will show you how to access the motherboard, which screws and cables to remove and disconnect, and where the plastic clips are to separate the board from the device.
Tools
-
-
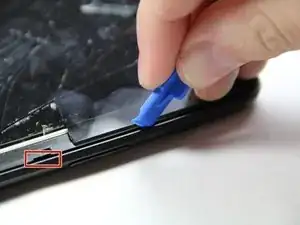
To remove the back panel of the device, start by attempting to fit the plastic opening tool in the crease between the screen and the back panel of the tablet.
-
Try opening picks if the case is not flexing enough, or if it is already cracked to prevent further damage.
-
You can use your hands to push against the corners of the device to attempt to make the gap larger for your plastic opening tool to fit in.
-
If you are replacing your screen because it is damaged, it may be useful to pick away at some of the glass to expose the clips in the edges of the plastic.
-
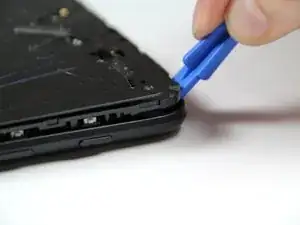
Insert the corners of your plastic opening tool into the slots that are on the very outside edge of your device to start disconnecting the panel.
-
-
-
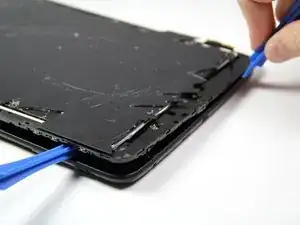
Once the edge of your device's panel is separate from the screen, continue moving around the outside of the device while continuing to pry the two pieces apart from each other.
-
-
-
Insert another plastic opening tool (or a similar tool) between the screen and the back panel on the opposite side of the device to hold it open.
-
-
-
Disconnect the battery by inserting the point of a spudger underneath the white tabs on either side of the connector and gently pry up.
-
-
-
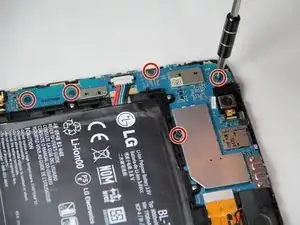
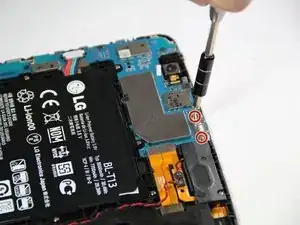
Remove the five 2 mm Phillips #000 screws securing the motherboard.
-
The silver EMI shield may come off during this step. Just set it aside until reassembly.
-
-
-
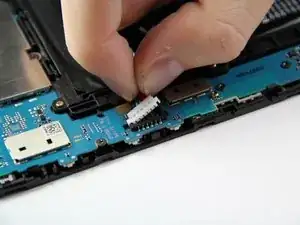
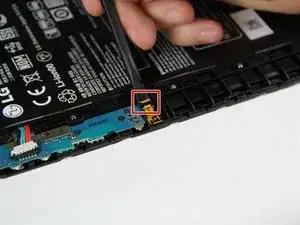
Disconnect the cable from the battery to the motherboard by grabbing the cable and pulling upwards.
-
-
-
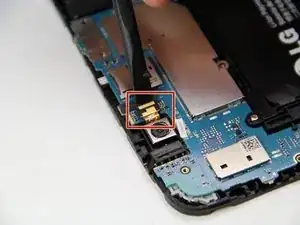
Using the spudger, pry up the connector on the motherboard from the back camera to disconnect it.
-
-
-
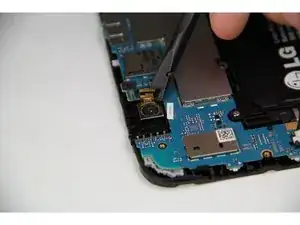
Then move to the front camera towards the end of the motherboard and disconnect that by using the spudger to pull up on the clip.
-
-
-
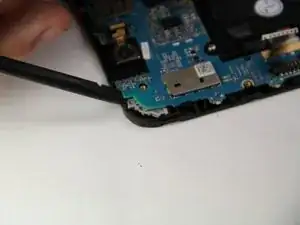
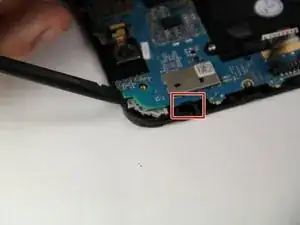
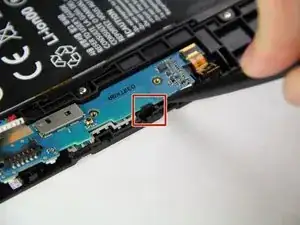
Now that all of the wires and screws are disconnected, use the spudger or a prying tool on the bottom corner of the motherboard to release it from one of the clips holding it in place.
-
-
-
Once the corner is removed, repeat the same action at the far end of the motherboard to release the second clip.
-
To reassemble your device, follow these instructions in reverse order.
4 comments
How easy is it to replace the USB-C connector from the motherboard?
I have a broken USB-C connector on my LG G Pad 10.1 Motherboard. What is necessary to change this connector? I have ordered a new USB-C connector without knowing how to connect with this LG Motherboard. Any help would be appreciated. Thank You.
Were you able to replace just the port? Im having the same issue myself with just the port damaged and im not trying to replace the entire motherboard.
My LG 10.1 tablet was dropped in water and won't accept a charge. When I connect the charger I can see the LG 10.1 welcome screen and then it has a lightning bolt, but then it turns solid blue then off. But the Dat prior, it only had a ? Mark inside of a circle and an error message saying that the temperature was not right. Now that u let it dry out more it is not allowing me to charge it and I really need to access it for my Gmail account. I'm so stressed ?. Can you offer any advice? Thanks in advance…
