Introduction

Is your Kindle Fire HDX 7” not listening to you anymore? Don’t pull out the sleeper sofa just yet.

Replace the microphone by following this guide and see if it restores the communication between you and your tablet.

  1. gxoRiHhEOixXuexo
    gxoRiHhEOixXuexo
    QCdpcKS6dLTSEsBj
    cOYVVwypVVOURgU3
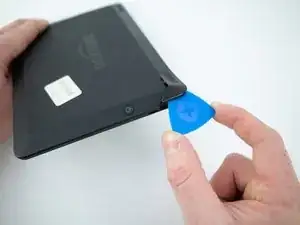
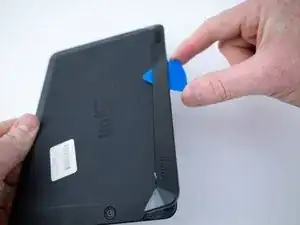
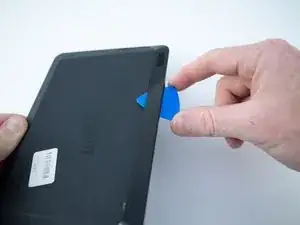
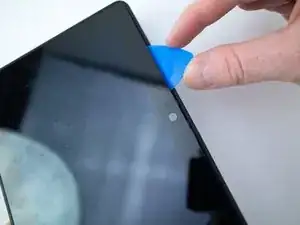
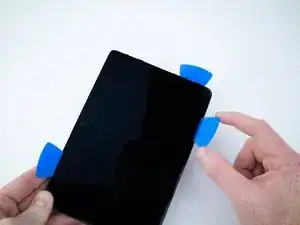
    • Insert an opening pick underneath the speaker bezel, and slide it along the perimeter to separate it from the tablet.

    • The adhesive is strong and may require an iOpener, or heat gun, to soften.

  2. YZQpowUT4UKB2PT5
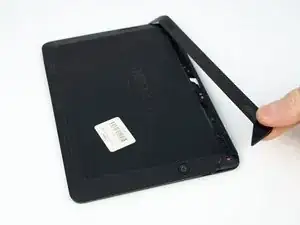
    • Remove the speaker bezel.

  3. chnPZTYvwdvqU4lm
    • Remove the six pink 3mm T3 Torx screws from the back case.

  4. M2u6tqVyPxkZbHvJ
    M2u6tqVyPxkZbHvJ
    nFJCsveAvlXQHdWx
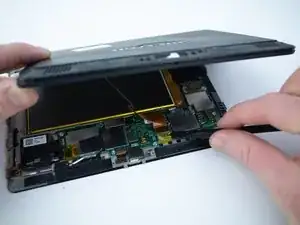
    • Wedge opening picks around the perimeter between the display and back case.

    • Work the opening picks around the perimeter until the two halves disengage from each other.

    • Don't completely separate as the display ribbon cable still connects the two.

  5. v4AJDtcKpWR6vEyJ
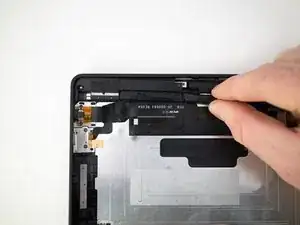
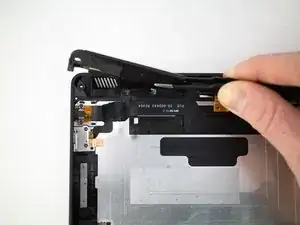
    • Use the flat end of a spudger to pry up and disconnect the rear panel press-fit connector from the motherboard.

    So I don’t remove the MLB?

    pckeeler7 -

    When re assembling the press fit connector will not stay in place when trying the shut the case, it seems too short.

    Is there a nack or trick to doing this please?

    Carl Purser -

    • There may be a glue strip between the battery and the outside case. Gently pry the case open and use the flat end of a spudger to separate the glue strip.

  6. UtOaPoU5PYZXFqYL
    UtOaPoU5PYZXFqYL
    MSeVeshKKnkG4GSM
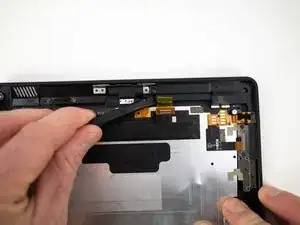
    • Pry up the left speaker with the flat end of a spudger and remove.

  7. PLMbhWKZgVCTj1fD
    PLMbhWKZgVCTj1fD
    DBbCNL4oEtguJLfM
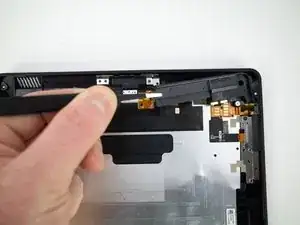
    • Pry up the right speaker with the flat end of a spudger and remove.

  8. nUM62dOjaXBJIkDN
    nUM62dOjaXBJIkDN
    Sfrc5vGbeeWJEeLs
    wuBTsv1TIYYS5xUl
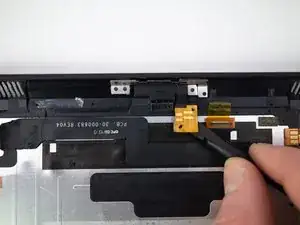
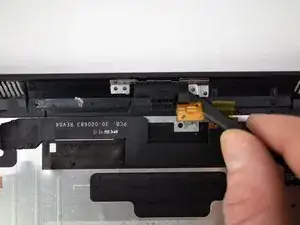
    • Pry up the microphone connector from the rear panel with the flat end of a spudger.

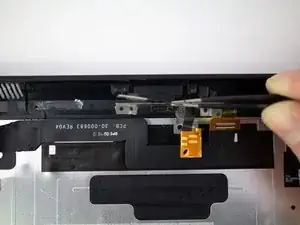
    • Pull up on the microphone with a pair of tweezers to remove.

Conclusion

To reassemble your device, follow these instructions in reverse order.
Blake Klein

Member since: 30/01/17

70362 Reputation

0 comments