Introduction
Tools
-
-
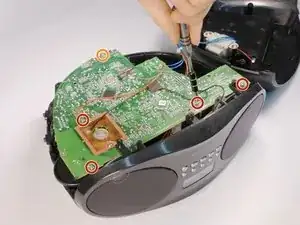
Unscrew the four 12.5mm screws with the Phillips PH1 Screwdriver.
-
Unscrew the one 10mm long screw with the Phillips PH1 Screwdriver.
-
-
-
Orient the device so that the back is facing you.
-
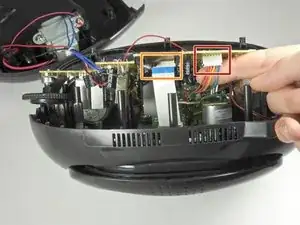
Unplug the six pin male/female header from its socket on the motherboard. The wires on the header are these colors: burgundy, red, orange, yellow, green, and blue.
-
Gently pull out the ribbon cable from its socket on the motherboard.
-
-
-
Rotate the device so that the front is facing you.
-
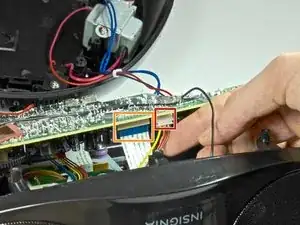
Unplug the four pin header from its socket on the motherboard. The wires on the header are these colors: brown, red, orange, and yellow.
-
Gently pull out the ribbon cable from its socket.
-
-
-
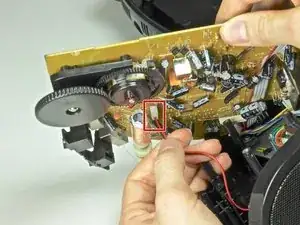
Pull out the two pin header from its socket on the motherboard. The wires on this header are black and white.
-
To reassemble your device, follow these instructions in reverse order.


