
Introduction
You may find yourself in need of additional fast storage to feed hungry computer applications such as graphics and video editing tools. If you would like to replace a faulty NVMe drive or one with insufficient capacity, follow this guide.
The battery for this device is not easily accessible and will require opening the device. Before you begin your replacement, be sure to disconnect the laptop from any power source. Additionally, we recommend that you turn off the device wait 5 minutes.
If you live in area rich of Static Electricity please advise using an ESD Strap.
Parts
-
-
Please turn off the device before opening the device
-
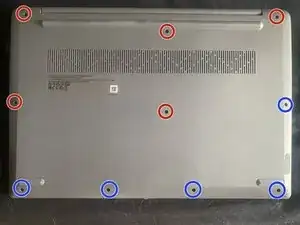
Remove the ten screws as shown in picture
-
The four bottom screws are different length for the other screws! (Blue Circle)
-
Remove the bottom case using a guitar pick
-
-
-
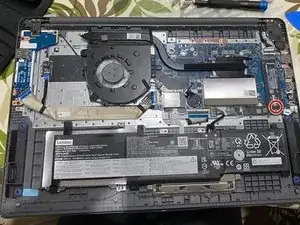
Using the screw driver remove the screw (Red Circle)
-
The device will be lifted remove it by pulling the device.
-
-
-
Insert the new SSD according the pins on the motherboard.
-
Push gently on the SSD and screw it using the screw which was removed
-

To reassemble your device, follow these instructions in reverse order.
