Introduction
They say Macs don’t get viruses. That’s probably true - as long as you stick with the traditional definition of a computer virus as a malicious program that replicates itself inside a system. Macs do get tons of garden-variety malware and adware, though.
The outbreak of the Bing redirect threat demonstrates how prolific a single strain of Mac malware can get these days. It hijacks a victim’s web browsers, including Safari, Google Chrome, and Mozilla Firefox, and redirects them to Bing.com via a series of auxiliary URLs such as SearchMarquis.com and SearchBaron.com.
The logic behind this bizarre browser takeover is to quietly drive traffic through disreputable advertising networks before it arrives at Bing. Whereas the role of this legitimate search engine is to smokescreen the foul play, it is the main symptom of the attack.
If you are experiencing this issue, the following steps will help you remove the Mac malware that sets the annoying redirect activity in motion.
-
-
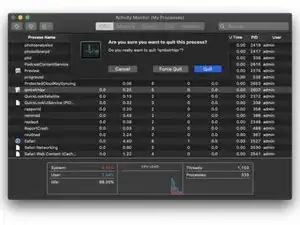
Click the Go button in your Mac’s Finder bar, select Utilities in the pull-down list, and open the Activity Monitor.
-
Try to spot the malicious process. Focus on executables that spawn multiple threads, have icons you don’t recognize and use up a significant amount of CPU and memory.
-
If you find the rogue process, click the X button in the upper right-hand part of the Activity Monitor app and then select the Quit or Force Quit option on the follow-up dialog.
-
-
-
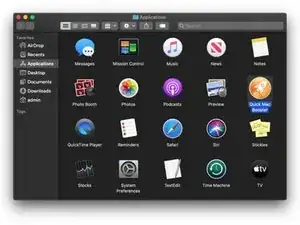
Expand the Go menu in the Finder area again and select Applications. Check the list for an app that has recently cropped up on your Mac without your permission. Move the culprit to the Trash.
-
-
-
Select the Go to Folder option as shown below.
-
Enter ~/Library/LaunchAgents (with the tilde sign) and click Go.
-
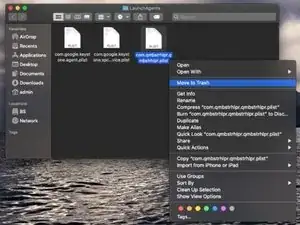
Check the LaunchAgents path for recently added dubious files and remove them.
-
Use the Go to Folder function to open the following paths: /Library/LaunchAgents (without the tilde sign), /Library/LaunchDaemons, and ~/Library/Application Support. Go over their contents and move suspicious files and folders to the Trash.
-
-
-
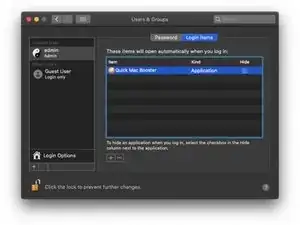
Head to System Preferences, select Users & Groups, and click the Login Items tab. To make changes, you will need to click the padlock icon at the bottom left and type your password. Then, select the malicious app and click the “minus” sign to eliminate it from the list.
-
-
-
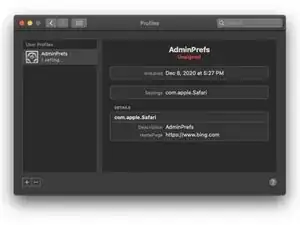
Go to System Preferences and select Profiles. Note that this feature will be missing if there are no device profiles installed on your Mac. If it’s listed, though, open it, select the unwanted profile, and click the “minus” sign to get rid of it.
-
-
-
Control-click the Trash icon in your Mac’s Dock, select Empty Trash in the contextual menu, and click the Empty Trash button on the follow-up dialog to confirm this action.
-
-
-
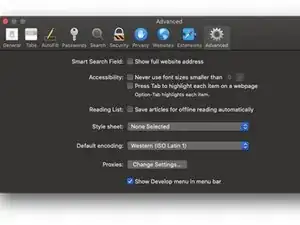
Open the web browser, expand the Safari pull-down menu in the Finder bar, and select Preferences. Click the Advanced tab and put a checkmark next to the option that says Show Develop menu in menu bar (if it’s not enabled already).
-
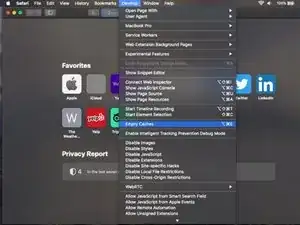
Now that the Develop menu is displayed in the Finder area, click it and select Empty Caches as illustrated below.
-
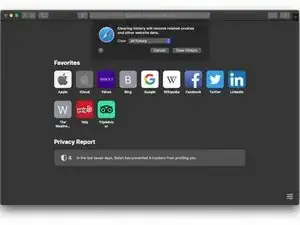
Expand the History menu and select Clear History. Click the Clear History button on the confirmation dialog.
-
Reopen the Safari Preferences screen, click the Privacy tab, and select Manage Website Data. Click the Remove All button to delete all the bits and pieces of information websites have stored to track your online activities. Then, click the Done button.
-
Restart Safari.
-
-
-
Open Chrome, click the Customize and control Google Chrome button, and select Settings.
-
Click the Advanced button in the sidebar and scroll down to Reset settings. Select the Restore settings to their original defaults option and click Reset settings.
-
Restart Chrome.
-
-
-
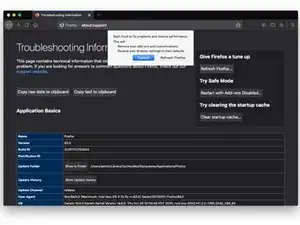
Open Firefox, click the Open menu button, go to Help, and select Troubleshooting Information.
-
Click the Refresh Firefox button and confirm the action once a follow-up dialog pops up.
-
Restart Firefox.
-
To avoid the Bing redirect malware down the road, treat app installers with caution – especially ones downloaded from unofficial software marketplaces. This infection mostly hinges on app bundles to spread. The default (“express”) installation option only mentions the benign software and never reveals the real structure of such packages. As a result, users click through without a second thought, only to discover shortly that their web browsers are taken over.
One comment
I have had this issue on a computer (Mac, all browsers) for a little while, where google searches would redirect to bing, and tried everything. I thought to check the /etc/hosts file, and that's where the problem was. So, if above tips do not work, that is another place to check.
- From terminal: sudo vim /etc/hosts (then type in password)
- Check for any lines that are pointing google.com to an IP address, or otherwise manipulating google.com
- Comment out these lines with a # (or delete them)
- Save
- Flush your DNS cache
This solved my issue, hopefully this can help someone else too.
VAR -

