Introduction

  1. CHibMi1FK1kfRMRR
    • Turn the DS to the back side.

  2. NDlXCNjVaikSPkrI
    NDlXCNjVaikSPkrI
    BKUHlLqcEOCVRicb
    • This is the PH00 Screw,

    • Unscrew it.

    • The screw remains captive to the battery cover, you do not need to worry about losing it.

  3. paEajC61OxOXa4AP
    paEajC61OxOXa4AP
    BtEjGYZYaNy5WLcS
    • Remove the battery cover.

  4. vq6Sl52jOcfbrdxT
    vq6Sl52jOcfbrdxT
    wYiVeFPruOr6f3oZ
    igJh4QPlRlKOuKqi
    • Wedge the edge on the side of the battery using a spudger.

  5. xEsZsiyTfgjafMUP
    • Take out the battery and leave it for at least 15-30 seconds.

  6. nh6IeXPQQqQnf5PO
    nh6IeXPQQqQnf5PO
    BMfgMFW6dNmsJIcq
    ZTpf4y1NhyteJYnl
    • Reinsert the battery.

    • Make sure the battery matches the + and the - connectors.

  7. ORBJ4Vndpd2jVVWJ
    ORBJ4Vndpd2jVVWJ
    YnEASqCNLLJoK6Hu
    • Put the cover back on and screw it in.

  8. AUW21Hx6aCNyyIqc
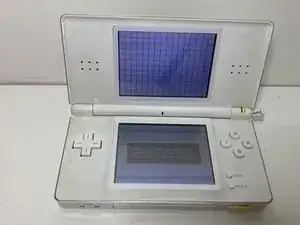
    • If everything done correctly, You should be at the setup screen, It would look like when you got the ds from the store.

    • You can hold A + B + X + Y + R while turning on the system and the ds will boot into a ds cartridge without doing setup, you can boot the Game Pak/GBA Cartridge if you hold A + B + X + Y + L Instead.

Conclusion

To reassemble your device, follow these instructions in reverse order.

Artem Ivat

Member since: 05/02/20

2709 Reputation

0 comments