Introduction
You can perform this on many chromebook not just sunsetted ones that are no longer taking updates from google. A big exception is ARM based chromebooks apparently. The flashing script will fail in some fashion for those. I am not sure if it gives an appropriate error message or an inscrutable code since I don’t have such a system to test against. If anyone feels the urge let me know what the error looks like or send me a screenshot I will include in this guide. I am going to provide links and info for some I am familiar with how to unprotect the roms on. Others can feel free to add additional ones as they see fit (I will require 500 reputation points to participate in edits though). Don't let this happen to your chromebook http://h22235.www2.hp.com/hpinfo/globalc...
Note: Sadly, many newer chromebooks require the ability to tiddle around with the firmware to disable the write protected mode that is factory set. The original mindset of manufacturers was to allow a simple hardware switch which was either a physical two position switch inside the case away from prying fingers or the removal of a physical write protect screw from a special point inside the case. If you know how this is done on some of the newer models contact me and lets discuss modifying this guide to be more complete for the newer models of chromebooks now coming out.
Note2: Update, are you someone who can read a lot of plain English technical instructions and are not afraid of a command line user interface? If that describes you accurately, there is a new way to enjoy a linux on chromebook experience for the newer generations of chromebooks mentioned in the first note above. It is called "breath". If you are not being truthful with yourself answering the question above please stop now! Otherwise you will just set yourself up for frustration while continuing to add to the hordes of linux opponents and naysayers that already fill the web with disinformation. There are some hardware requirements for generating the install media and a growing list of supported newer chromebooks. Oh, and it is thoughtfully hosted on github too! Thanks to Cameron for providing the link! I am going to try this now! I intend to post results here later based on my experience. Here is the link: breath
Tools
-
-
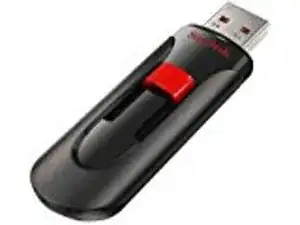
You will need a couple of decent sized USB sticks. I used 16gb sandisk cruzer sticks. One for your desired live linux image and one for taking a backup of your original chromeos supporting image. The second one is optional since you only need that if you ever want to go back to your chromeos image.
-
I did it just in case I bricked my laptop. Turned out to be unnecessary since the script worked perfectly. You can probably skip taking the chromeos flash backup since it probably won't be needed for yours either.
-
Download amd64 lubuntu LTS image or whatever flavor you desire of linux. Burn it on one of your USB sticks with software suitable for creating bootable USB sticks. Download: http://cdimage.ubuntu.com/lubuntu/releas...
-
Note that you may use a second computer to perform the above step. I was able to do it with my crouton chroot on my existing Pavilion chromebook. I use and recommend Etcher software for this step: Linux - Mac - Windows creating bootable images on USB keys - SD cards the easy way. or...
-
You can burn to any USB device with this technique: you can try with the "chromebook recovery utility" from the web store. It basically does a dd of any image with a .bin extension, rename your downloaded linux iso to add the .bin extension, then on the tool choose "use a local image" by clicking the gear icon at the top right.
-
You are now ready to "unscroogle" your chromebook. Remember those silly ads? I actually loved my chromebook for five very productive years. If it was not unsupported, I would continue to use as is too.
-
-
-
Step 2 for HP Pavilion Chromebook in this guide. Above guide contains information and links on upgrading memory and storage as well!
-
-
Step 2 for many other Chromebooks involves removing a write protect screw somewhere on the motherboard. Google is your friend here.
-
Example write protect screw on HP Chromebook 11 G3 (2013) HP Chromebook 11 G3 write protect screw specifics
-
Since you have it apart this is a good time to upgrade to more memory (if your chromebook model supports that) and or a larger SSD if you wish or need more space for dual boot for example. Reassemble carefully in reverse order.
-
Boot into chromeos for next step.
-
-
-
You most likely will need more storage to support this kind of setup. Since this is advanced usage, I won't cover that sort of thing here. Since google in their wisdom will stop supporting your hardware/software after only five years you probably don't care about dual booting anyway do you?
-
-
-
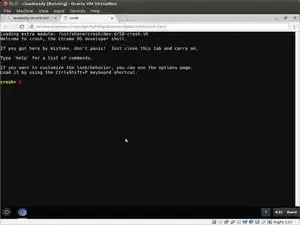
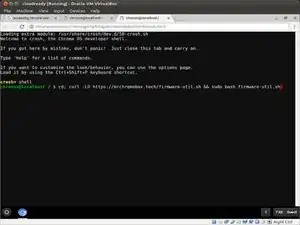
Press [ Ctrl ] [ Alt ] [ T ] to get to the crosh shell prompt on the chromebook (See first image). Note: these first 3 shell images were captured via cloudready which is a chromeos workalike not an actual chromebook but are identical for our purposes here.
-
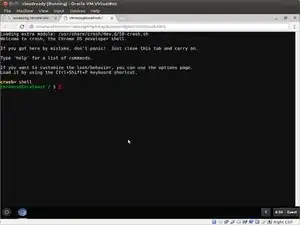
Use the "shell" command to get to the shell prompt. Just type "shell" into the prompt and press enter (see second shell screen image).
-
Type the following (or cut and paste into a single command line... see third shell screen image). I include the full command in the next bullet point...
-
cd; curl -LO https://mrchromebox.tech/firmware-util.sh && sudo bash firmware-util.sh
-
Press enter on above command line when you are ready to start converting your chromebook to a fully functional general purpose personal computer.
-
-
-
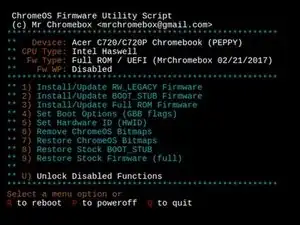
You should get that menu (see graphic) with appropriate device data for your particular Chromebook. Select option 3 to flash a full UEFI capable rom onto your system. Note this is the end of your chromebook effectively once you pass the clearly identified "point of no return".
-
Note: Some chromebook architectures are unsupported (notably ARM cpu systems). You may get a error message if your system is unsupported.
-
You can either perform the chromeos rom backup or not as the option presents itself (your choice). You will need that extra USB stick if you choose to backup the original rom. Do you feel lucky punk? Sorry :D
-
Once it is finished it will prompt you to power off and restart the device. At that point you can insert your new linux boot/install USB stick. From there you simply install like you would on any typical laptop.
-
I opted to go the full UEFI route on mine but it is optional. Follow the instructions under the FAQs (https://mrchromebox.tech/#faq) The fifth question there is answered with how to proceed to setup your UEFI boot option files correctly.
-
-
-
I have installed cairo-dock and now my hardware is off the leash. I now have the poor man's friend... the free-open-source- software macintosh work-alike.
-
To reassemble your device, follow these instructions in reverse order.
12 comments
Thank you very much for the detailed information. I have successfully converted my ASUS C302C chromebook to Linux laptop.
A better and safer way to install Linux on Chromebooks exists :) https://cb-linux.github.io/breath/
Cameron -
Thanks for the useful input Cameron. I added a follow up note to the heading here. Now I am going shopping for a more modern used chromebook.
tcagle53 -
hello, thank you for sharing
i want to ask for lenovo chromebook slim 3, can it install linux?, cause when i reboot and start to mode developer not found properly
Did you read "Note2" in the above introduction? If not and if your device is supported by "breath" that may be a viable approach. It is a fairly complicated process that I have not tried so beware if it is out of your comfort zone.
tcagle53 -


