Introduction
The air you breathe inside your car is filtered through the cabin air filter. Located behind the glovebox of most cars, it must be changed periodically. Your owner's manual will advise the bare minimum frequency recommended for your vehicle, but some car owners opt to change there's more frequently. Environmental impacts, including fires, can impact how quickly the cabin air filter fills up, and could cause it to require replacement more often. Luckily, it's a relatively easy replacement that most people can do themselves, with ease. This guide will offer a breakdown of the general technique, but I recommend looking up a vehicle-specific tutorial as well to make sure your car doesn't have any particular quirks.
-
-
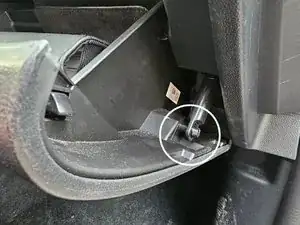
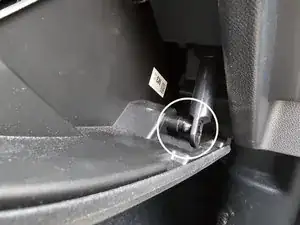
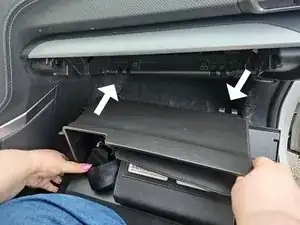
Open your glovebox, and look for the tamper. Put a little outward pressure on it; it should just pop off.
-
-
-
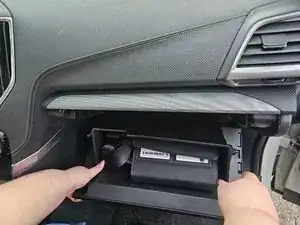
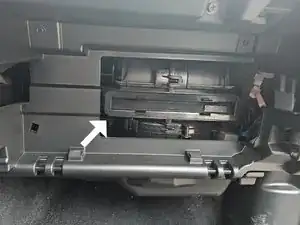
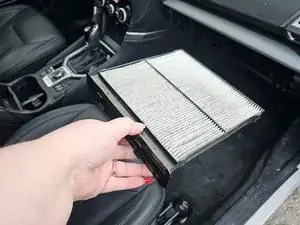
Pull gently to remove the cabin filter. Some cars may have a cover that must be removed before the cabin filter can be accessed. Be sure to note how the cabin filter was installed so you can install the new one in the same manner.
-
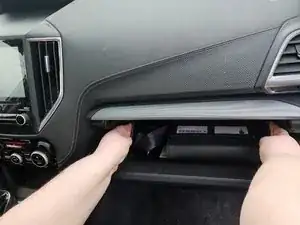
To reassemble, carefully place the glove box back on its hinges, squeeze the sides, and reattach the damper. That's it. You've changed your cabin filter.
One comment
My non factory air filter makes a constant whistling sound when installed and the heater on. Toyota decided to “fix” it by just removing it. No more whistling but no more filter either. They said I could buy a new factory filter and they would install it but I don't have the $80 it costs. Any thoughts or suggestions? Also does your book have pics? I really liked the pics above for the air filter replacement info. Thanks.
