Introduction

This guide shows how to install a 2.5-inch hard drive into the aluminum enclosure sold by iFixit. The enclosure can hold either a SSD or a standard 2.5-inch (platter) hard drive, as long as they have the proper SATA connectors.

If you have a silicone enclosure, follow this guide instead.

  1. 4JhGoJe32DvBABcV
    • Before you begin, look at your hard drive's ports and make sure that it has the right connectors:

    • Narrow data port

    • Wide power port

  2. l5LZ15iFvLKSgKkj
    • Use the included screwdriver to remove the two Phillips screws.

  3. GlKNvlSsO66fTYOs
    GlKNvlSsO66fTYOs
    uFfdj1OJMECyOWK1
    • Slide the plastic tray out of the aluminum housing.

    it doesn't slide out

    jbechtel1 -

  4. HEDUVFyoyHCPjZQG
    HEDUVFyoyHCPjZQG
    yG2mwjvGE4BUJmEU
    bHqdPvQVNkFSCtrl
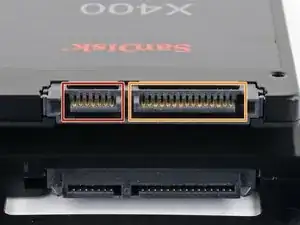
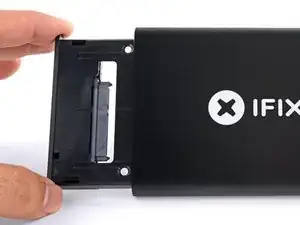
    • Set the drive in the plastic tray and align the drive ports with the tray socket.

    • To prevent strain on the enclosure socket, lay the drive as flat against the tray as possible.

    • Carefully push the drive into the tray socket to seat the ports.

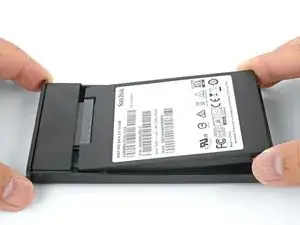
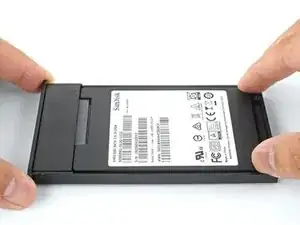
    • Press the drive's raised edge down into the plastic tray.

    • If the drive edge catches on the foam block, the drive is not fully seated against the tray socket. Continue pressing the drive into the socket until it clears the foam block.

    It is helpful to use something thin like a credit card as a shoe horn here - while the back edge is still raised, insert a thin card between the edge of the drive and the foam block, then push the drive edge down and slip the card out. This will allow the end of the drive to sit flush against the block without any overlap or mashing of the block. It also eliminates the need to keep pressing or forcing the edge of the drive to fit.

    Charles Bradford -

  5. tZZJY1ygca2RoloP
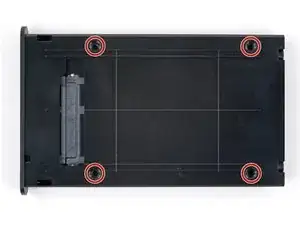
    • Flip the drive tray over.

    • Use the a Phillips screwdriver to install the four mounting screws (included in the kit) to secure the drive to the tray.

  6. oUPQLXfcPRKeDdLN
    oUPQLXfcPRKeDdLN
    ajPNox2oOMWeTPlM
    v5h44HwBXbMnMlGu
    • Slide the tray back into the aluminum housing.

    • Reinstall the two Phillips screws to secure the tray.

Conclusion

Your drive is ready for use!

Arthur Shi

Member since: 03/01/18

248651 Reputation

8 comments

Now what do I do?

Louise McCampbell -

You will need to plug the enclosure into a computer to access it. From there, you can format the drive or retrieve data.

Arthur Shi -

How do I plug the enclosure into a computer? Are there cables? Thank you.

Shannon Mikus -

Very good explanation on "How to do it yourself"

Jawa Herath -

Very good Instructions with clear explanations.

Jawa Herath -

I have removed the two screws to open the case and install the SSD, but it won't slide out. đŸ˜¡

Keith Ball -

Works like a charm! The kit included a soft rubber bumper pad, the size and shape of a quarter (US$0.25). No explanation of where it might go -- but I assume it'd be handy if the drive itself was somewhat thin and needed some support within the enclosure.

Joel Baird -

The drive is successfully installed in the case and connected to my second Mac to grab some old files but I"don't have permission" to open my old documents etc folders. Will the permissions be repaired if I plug it into the Mac it came from? Or how do I make the drive available on other Macs?

Matthew Matthew -