Introduction

If the hoverboard is unwilling to move and it is fully charged, there may be an issue with the wheel motors.

  1. jcPCxhJpPfMStuAQ
    jcPCxhJpPfMStuAQ
    ZORU3xWa2R6fI6rK
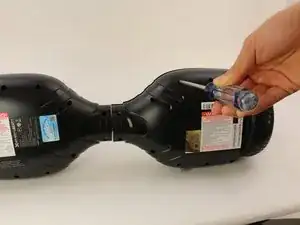
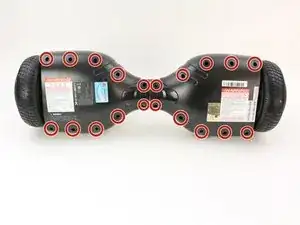
    • Flip the hoverboard over so the labels are facing upwards.

    • Remove the twenty 18mm screws using a Phillips #2 screwdriver and twisting counterclockwise.

  2. AmZ1SxCMDK6bWdQU
    AmZ1SxCMDK6bWdQU
    bdRoFh53ESwwT6OF
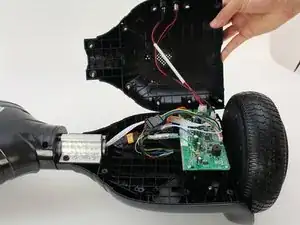
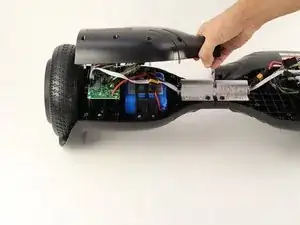
    • Remove the bottom cover by lifting it away from the hoverboard.

    • The cover on the side without the battery has two wires connecting the power button and charging port.

  3. kiH511JZEkUZFAhW
    kiH511JZEkUZFAhW
    HGKwKvtevT6klLSO
    BPlALJxnQrsabnPP
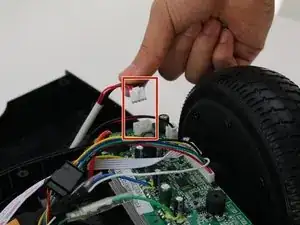
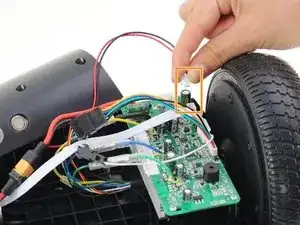
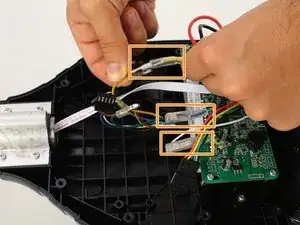
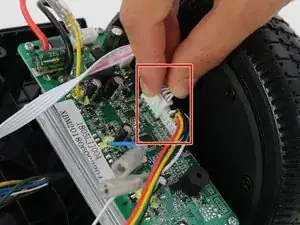
    • Remove one connector from the non-battery side circuit board.

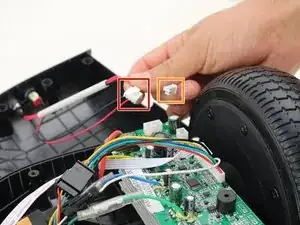
    • Remove the next connector from the non-battery side circuit board.

    • To remove the connectors, pinch the plug and pull away from the circuit board.

    Which does brakes

    Fabian Rodriguez -

  4. xsknmukjZKx1iN5m
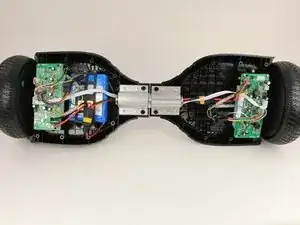
    • Place the hoverboard so the sensor boards face you.

    Where can you purchase the replacement boards?

    jparram -

  5. JkHerOIWVTDQ4GM4
    JkHerOIWVTDQ4GM4
    SfE1CnHAB1Lf1MrS
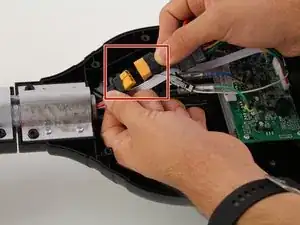
    • Remove battery connector by pulling it apart.

    • Slide the rubber sheaths away from the connector on the blue, green, and yellow wires.

    • Disconnect the colored wires by pulling them apart.

    • The large colored wires connecting the sensor boards to the wheels need to match for the motor to operate correctly.

    Hola buenos dias, sabes que requiero las carcasas de este mismo modelo, tendrás?

    Hugo Villaverde -

  6. xHSI3QpINuIUCBQJ
    xHSI3QpINuIUCBQJ
    etQDlUYCyRAJyPUs
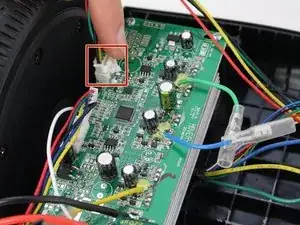
    • Remove the white cable from the sensor boards by disconnecting the cable on each side of the hoverboard.

    • To release the cable connector, squeeze the sides while pulling it away from the sensor board.

  7. 1pUlrmh1s5uDaF5L
    1pUlrmh1s5uDaF5L
    XSJnSDmOk5pcUvfZ
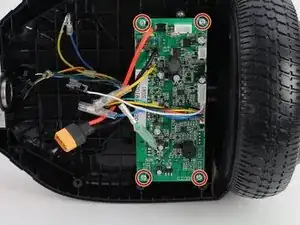
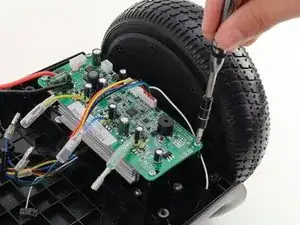
    • Remove the four 10mm screws with a Phillips #1 screwdriver.

  8. HNPD1m16PgFiRlce
    HNPD1m16PgFiRlce
    NQHxWDmt61ffJLxj
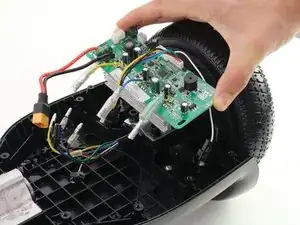
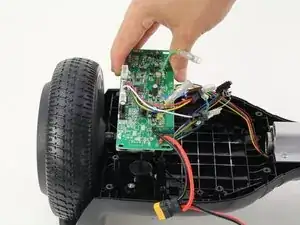
    • Remove the sensor board by lifting it away from the hoverboard.

    • Repeat steps 4-8 to remove the sensor board from the other side.

  9. AIBOWIV3mlCdYQfb
    AIBOWIV3mlCdYQfb
    o6FwdnISIWjNXVjX
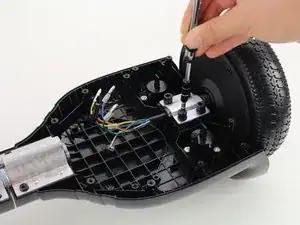
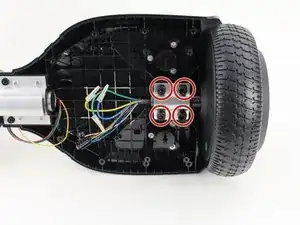
    • Place the hoverboard so the four 36mm Allen bolts are pointing up.

    • Remove the four 36mm Allen bolts on each side using a 5mm Allen Wrench.

    • The four Allen bolts have lock washers.

  10. lUT1LthHqtQCAvf3
    lUT1LthHqtQCAvf3
    UbWjSNpSGcpoijbj
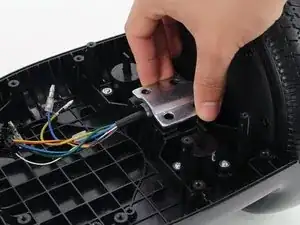
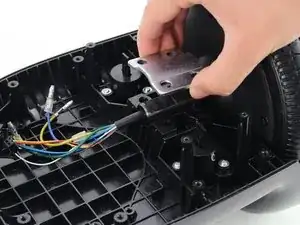
    • Lift the metal retaining plate away from the motor shaft.

  11. EKLsgB4lCk3rKRmK
    EKLsgB4lCk3rKRmK
    LYJ4OsAdiVeSrmOC
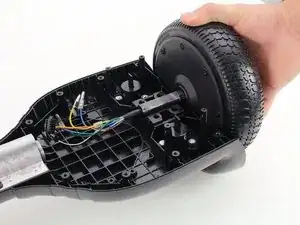
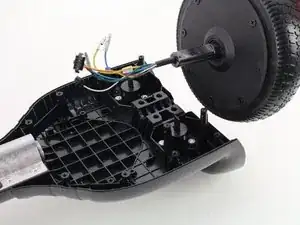
    • Lift motor assembly away from hoverboard.

    • There is a flat section on the motor shaft that needs to point up, towards metal plate.

    • The motor assembly should be flush with side of hoverboard.

    Where can you purchase replacement motors?

    luke-1115@hotmail.com -

Conclusion

To reassemble your device, follow these instructions in reverse order.

Eduardo Miranda

Member since: 08/10/18

355 Reputation

2 comments

My bracket the wheel attaches to hoverboard is broke can that portion of board be replaced? Where can I buy it if so?

Adam Vernengo -

Can I buy a replacement battery side motor for hover1 drive hoverboard. If so, where? Can’t seem to find it on internet
luke-1115@hotmail.com -