Introduction

Follow this guide to replace a worn or damaged throttle cable on the Honda FC600 tiller. Be sure to follow all safety precautions listed in the tiller’s user manual when working on or operating the machine.

  1. afWWneI6nJJNnTSX
    afWWneI6nJJNnTSX
    aS1c2GhSauaImBWG
    NhrR5ZLy6WLc61ai
    • Before you begin, it's important that you completely cut power to the tiller by disconnecting the spark plug. This will prevent the engine from accidentally starting up while you're working on the tiller.

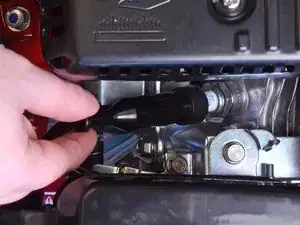
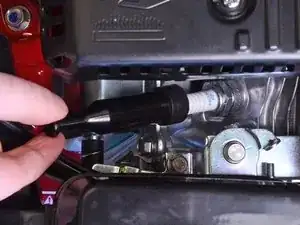
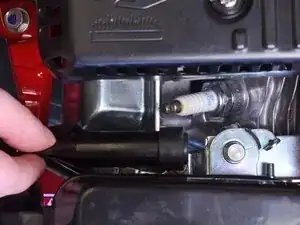
    • Grab the spark plug cap and pull it straight out to disconnect the spark plug from the engine.

  2. MjvpVHbF5QZShy1w
    MjvpVHbF5QZShy1w
    PiIODWQuQeBUiIOa
    • Push the throttle lever all the way down.

    where do i find the on/off switch in the picture?

    JEFFREY -

    The on/off switch is the red switch to the right of the photo. It is not needed for this repair.

    Craig Lloyd -

  3. IGGUSArVJUWHG1KR
    • Remove the 23 mm-long Phillips #2 screw securing the throttle lever to the handlebar.

    • This screw is accompanied by a square nut. Be sure to retain it for reassembly.

  4. dCcOUJUbfpD1hIcX
    dCcOUJUbfpD1hIcX
    jenneQvDtUMTTkVO
    • Use a pair of needle-nose pliers to remove the small clip attached to the throttle cable.

  5. sVRcxFcVWPcCErqx
    sVRcxFcVWPcCErqx
    sDEnY6JDfCwOsHq3
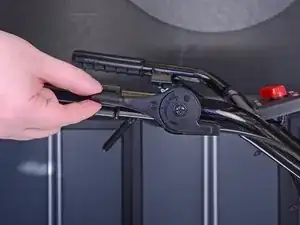
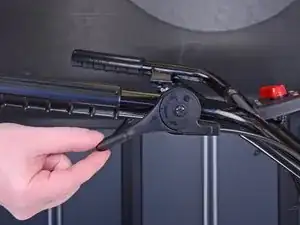
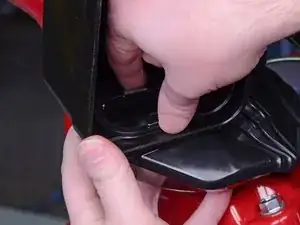
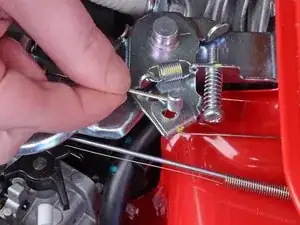
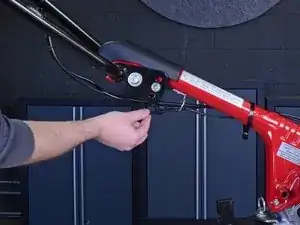
    • Grab the open end of the throttle cable and pull it out of the throttle lever to free it from its recess.

  6. 3HBZdrTtORhLgYVE
    3HBZdrTtORhLgYVE
    nilBcLYAS6hYeOqE
    rwxORc4IoU4sinjH
    • Continue to lift the throttle cable out of the throttle lever, making sure it clears the openings in the recess.

  7. P1UYBKTCWwJTKOQr
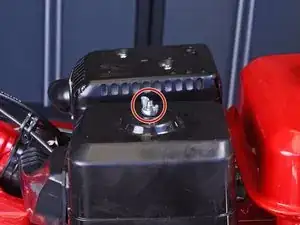
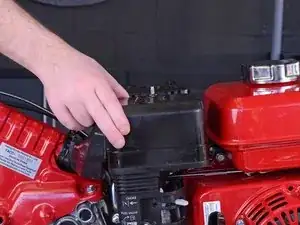
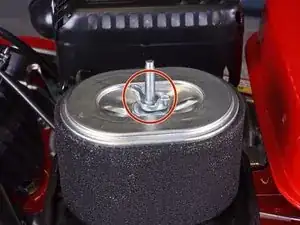
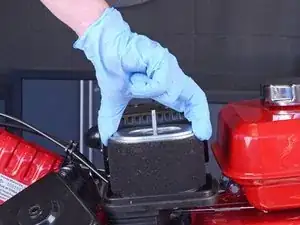
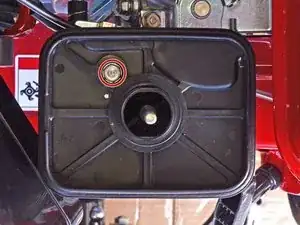
    • Use your fingers to unscrew and remove the wing nut securing the air filter cover to the air filter elbow.

  8. qAIxaFLEJvLaLMi5
    qAIxaFLEJvLaLMi5
    RAxmLOBFh5QAeeXs
    • Lift up and remove the air filter cover to reveal the air filter.

    • The air filter cover will still be attached to the tiller by a flexible hose. You can push the cover to the side while you continue to work on the tiller, or follow the next two steps to completely remove the cover.

  9. E3g5rgJjlo6URDCI
    E3g5rgJjlo6URDCI
    O2DXEP1sOEY2HayD
    • The next two steps are optional, but they will make it easier to work on the tiller from here on out.

    • Squeeze the metal clip on the inside of the air filter cover and remove it.

  10. awwj62TXZUOClaJB
    awwj62TXZUOClaJB
    gIEhprLPHA2vdfAW
    • Hold onto the air filter hose and pull on the air filter cover to remove it.

  11. AAKoZXBevEt2npI4
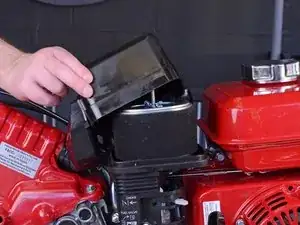
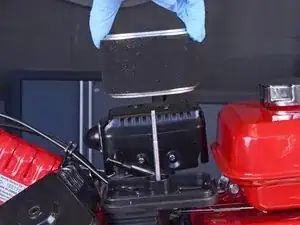
    • Use your fingers to unscrew and remove the wing nut securing the air filter to the air filter elbow.

  12. DFDSd34Ae1BMeWnq
    DFDSd34Ae1BMeWnq
    Q5rVOkCCiUj3gYdW
    • Wear gloves or use a rag during this step, as the air filter is coated with oil.

    • Lift the air filter straight up off the elbow, making sure it clears the threaded rod.

  13. vaSMThSXlIKtsSPw
    • Use a 10 mm socket and socket wrench to remove the 25.5 mm-long bolt securing the air filter elbow to the tiller.

  14. MbPxpQVOrxEWgjxi
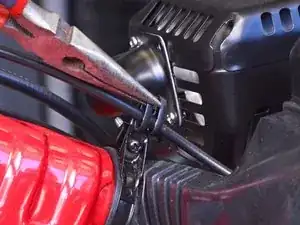
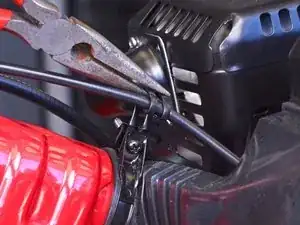
    • Use a 10 mm socket and socket wrench to remove the two nuts securing the air filter elbow to the carburetor's threaded rods.

  15. SY4ZvWQRmwlQ41El
    SY4ZvWQRmwlQ41El
    BuTcthOv2SKITVJq
    ZKkBUqkuFIvxBgls
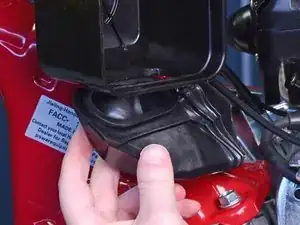
    • Use a pair of snap ring pliers to loosen the spring hose clamp on the breather tube, pulling it out 2-3 cm so it's not clamping onto the end of the tube.

  16. K1yHLZr4UHiXrKKf
    K1yHLZr4UHiXrKKf
    II5eVlguGvnOBYUS
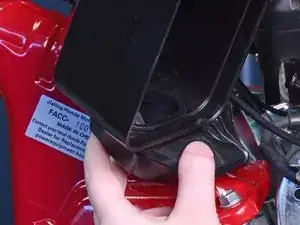
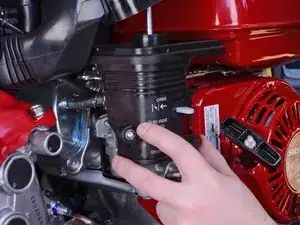
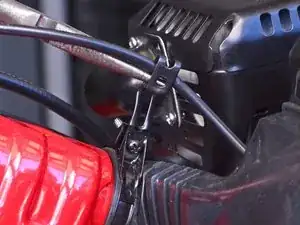
    • Pull the air filter elbow straight off, making sure it clears the carburetor's threaded rods.

    • As you remove the elbow, you may need to use your other hand to remove the breather tube from the engine's valve cover.

  17. RibugM2ALKFByBE4
    RibugM2ALKFByBE4
    UgMec11pwtRJldKd
    xfrPEpjHqPYxDnbZ
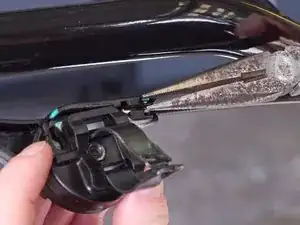
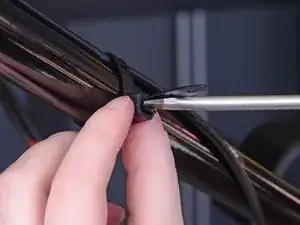
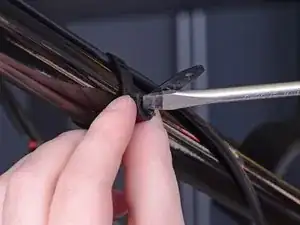
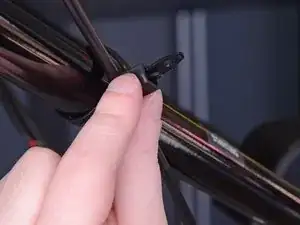
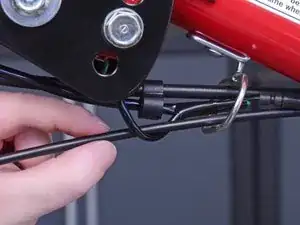
    • Insert a flathead screwdriver in between the release tab and the tip of the cable tie securing the throttle cable to the handlebar.

    • Twist the screwdriver to separate the release tab and loosen the cable tie.

    • Repeat this step for the remaining cable ties.

  18. 6M16TB3idWdSpebJ
    6M16TB3idWdSpebJ
    VNj6FGdTNjhYNAOd
    O5dQ5NqqffwNd5HL
    • Pull the throttle cable out of the cable holder underneath the handle column.

  19. cayZfARZUE2DUL1l
    cayZfARZUE2DUL1l
    sfXOjxDREYAopbsl
    NGTOshgL2Y2LGJMX
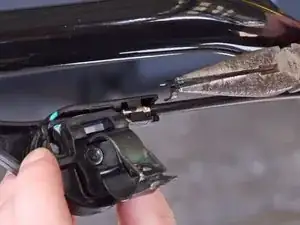
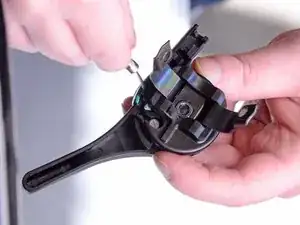
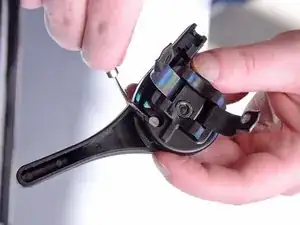
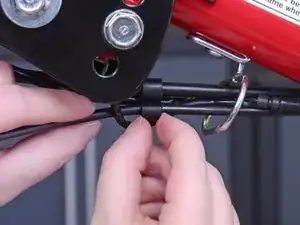
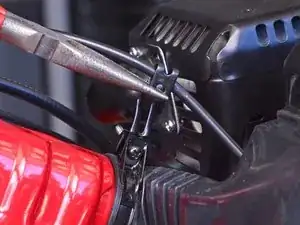
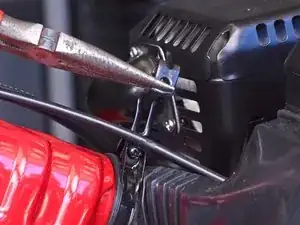
    • Use a pair of needle nose pliers to bend the metal clip at the bottom of the handle column out and upward.

  20. uJY5Ahhj5kHubvFt
    uJY5Ahhj5kHubvFt
    JU36vLIiHebRQN1x
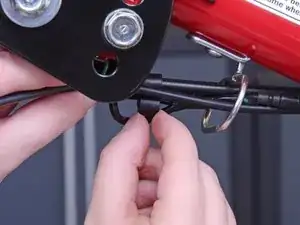
    • Use a pair of needle nose pliers to bend the last section of the metal clip outward to release the throttle cable.

  21. VST51ngpsy6YN5KA
    VST51ngpsy6YN5KA
    MmBXETEj3isVESOI
    sHKc2FdAFDNV4GDc
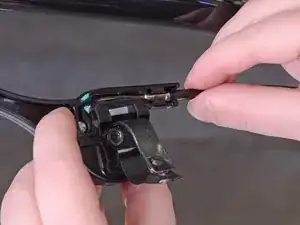
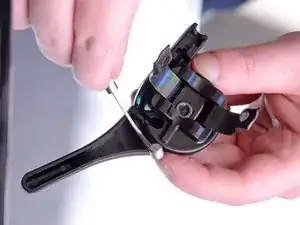
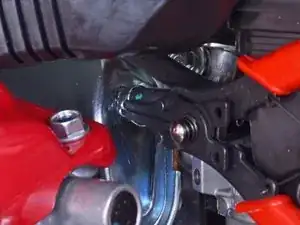
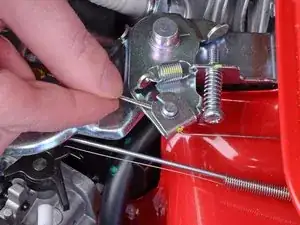
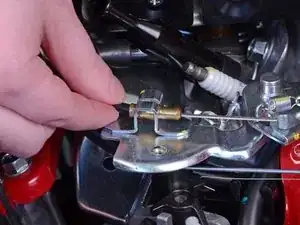
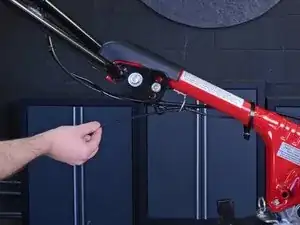
    • Grab the end of the throttle cable with your fingers and push the cable inwards so that it lines up with the small cutout on the control lever.

    • Lift the throttle cable straight up to free it from the control lever.

  22. Ow1UanVldVvRaaVf
    Ow1UanVldVvRaaVf
    JQdEjLpc2LrTGryc
    XGFHZcIDJKXmVC2O
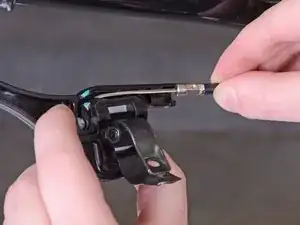
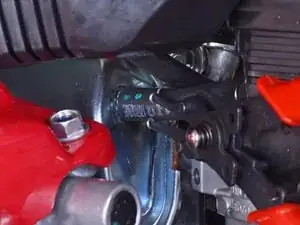
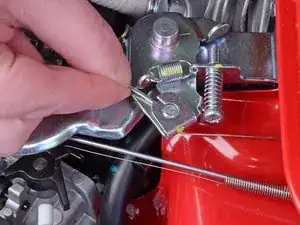
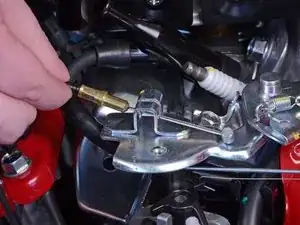
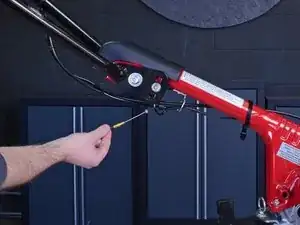
    • Grab onto the end of the throttle cable housing and pull it out of its holder on the control lever.

    • Lift the throttle cable straight up to completely remove it from the control lever.

  23. gsttyZ3mHMcuGwN3
    gsttyZ3mHMcuGwN3
    nHWMID5OQMcB6FBG
    FHCOwObyT4OFHMii
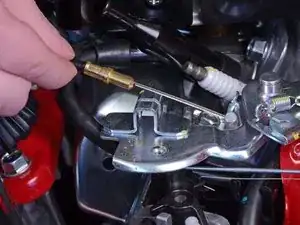
    • Pull the throttle cable all the way out, fishing it through the clips, cable ties, and guides.

Conclusion

To reassemble your device, follow these instructions in reverse order.
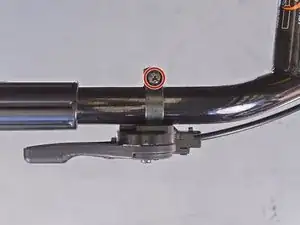
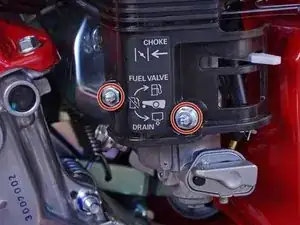
Craig Lloyd

Member since: 10/02/16

35240 Reputation

0 comments