Introduction

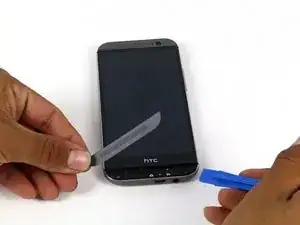
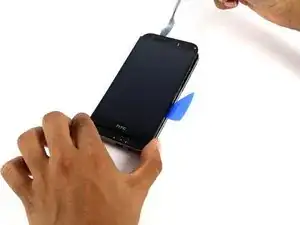
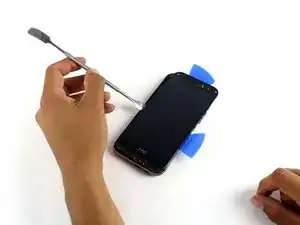
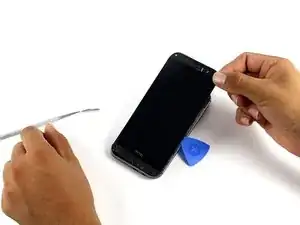
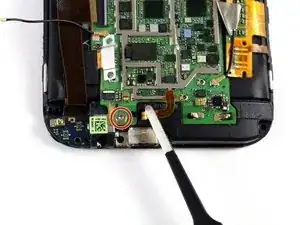
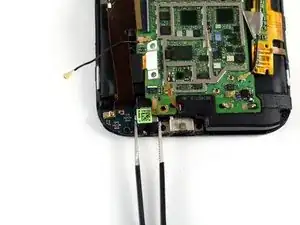
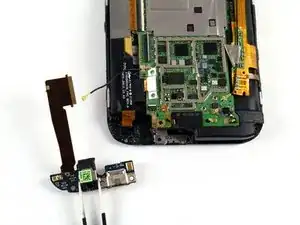
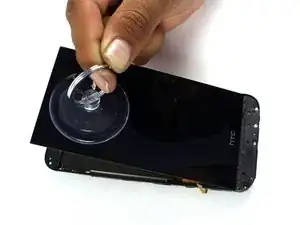
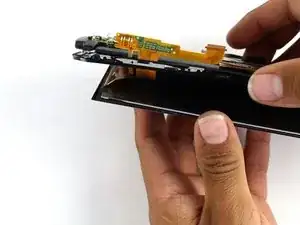
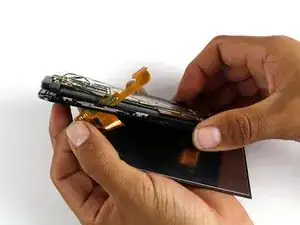
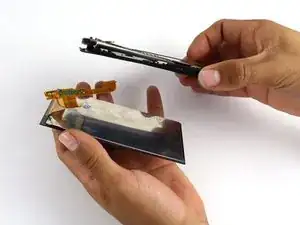
Use this guide to replace the display assembly on your HTC One M8. This assembly includes the digitizer and the LCD panel.

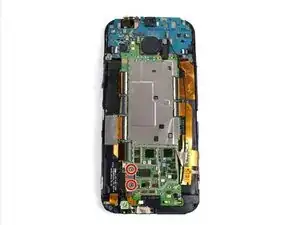
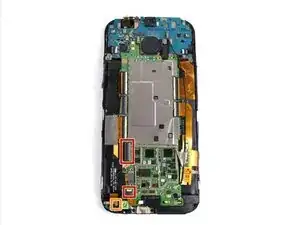
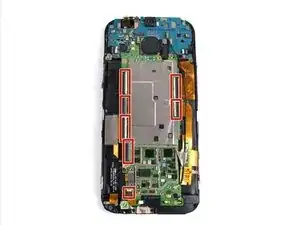
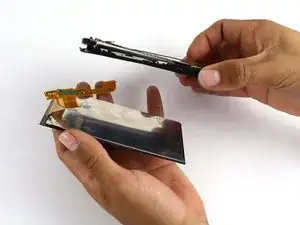
Please note that your device may have a large amount of copper shielding and tape covering the back of the display assembly, as shown here. If this is the case, you'll need to gently remove it to get at the motherboard.

  1. 4uTAnfGyxtijjQ1f
    4uTAnfGyxtijjQ1f
    qwFgZwWRsJ6KUlhj
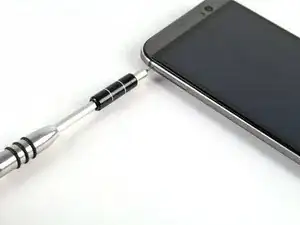
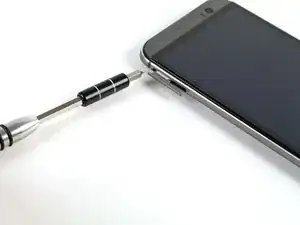
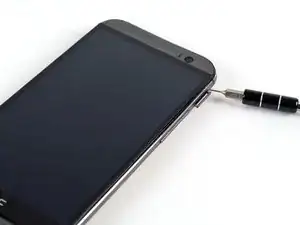
    • Insert a SIM card eject tool or a paperclip into the small hole in the SIM card tray, located on the upper left hand side of the phone.

    • Press to eject the tray.

    • This may require a significant amount of force.

    I just successfully completed the battery replacement on m8 using this guide…thought I would add a comment at each step to follow my story. This step of course should be easy if you’ve put the phone back together.

    Ashley Keith (sc0rch3d) -

    My HTC m8 doesn’t have a SIM card, and it might not have a micro SD card, since i can’t back anything up on it. Does not having the SIM card or the micro SD card matter in disassembly and reassembly?

    Lewwy Ignovoir -

  2. FRXkaFwTtZH1CHKQ
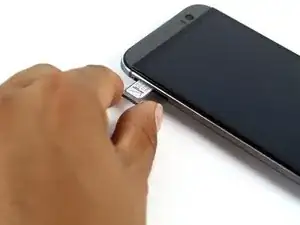
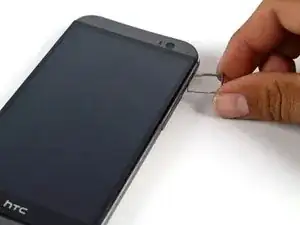
    • Remove the SIM card tray assembly from the HTC One M8.

    • When reinserting the SIM card, ensure that it is in the proper orientation relative to the tray.

    My phone have a problem from sim card rejected ,

    shola -

    Another easy step if you have the right tool

    Ashley Keith (sc0rch3d) -

  3. 4CFQNL5baNtxLuyI
    4CFQNL5baNtxLuyI
    oeYFRPVliqG6gIhY
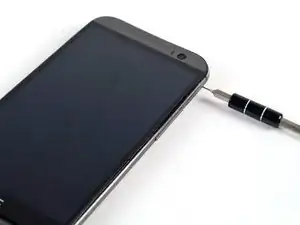
    • Insert a SIM card eject tool or a paperclip into the small hole in the microSD card tray, located on the upper right hand side of the phone.

    • Press to eject the tray.

    • This may require a significant amount of force.

    another easy step if you have the right tool

    Ashley Keith (sc0rch3d) -

  4. 3gqFoAxPHm3cDBSS
    • Remove the microSD card tray assembly from the HTC One M8.

    • When reinserting the microSD card, ensure that it is in the proper orientation relative to the tray.

    another easy step if you have the right tool

    Ashley Keith (sc0rch3d) -

  5. HlbeTVCOOEoQGCQW
    HlbeTVCOOEoQGCQW
    UB1fQvvW5OYFJNqD
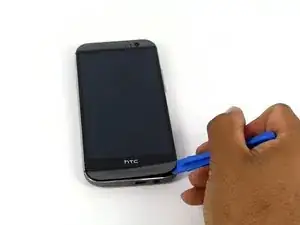
    • Use an iOpener or heat gun to loosen the adhesive on the upper and lower speaker grilles.

    • Refer to the iOpener guide for info on how to use the iOpener.

    I used a heat gun settings 200 at 75, but I also found using a hair dryer works just as well. Heated up the bezels came right off and for putting back on I heated it back up and they have stayed put.

    Jason Cobb -

    I used a hair dryer for this which worked fine but I didn't need to heat it for as long as I did. 10-20 seconds is enough to start. I didn't realise how hot it would get so after heating for 90 seconds on high heat the phone was absolutely roasting and I've got two spots of heat damage on my screen. Still all works though luckily.

    Ian -

    Disassembly: I did NOT use any heating elements. I have a straight edge razor (like you use to scrape off window decals). Gently push in 1 point of the straight edge and work in the rest of it. Then use a spudger slowly to remove the grills.

    Assembly: Enough adhesive should be left to reinstall the grill with no problem. Be careful align it perfectly then don’t be afraid to give a good push into place.

    Ashley Keith (sc0rch3d) -

    What are the speaker grilles?

    Lewwy Ignovoir -

  6. 2YsuBPkZFkn3tTKp
    2YsuBPkZFkn3tTKp
    VoHpohwMpRK2Xuuu
    HccAba2fnRMUhnud
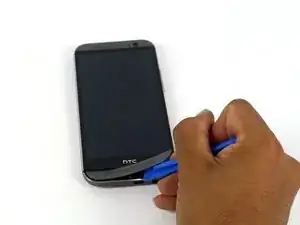
    • Use a plastic opening tool to gently peel up the lower speaker grille.

    • The adhesive is messy, and can be removed using Goo-gone.

    Disassembly: I did NOT use any heating elements. I have a straight edge razor (like you use to scrape off window decals). Gently push in 1 point of the straight edge and work in the rest of it. Then use a spudger slowly to remove the grills.

    Assembly: Enough adhesive should be left to reinstall the grill with no problem. Be careful align it perfectly then don’t be afraid to give a good push into place.

    Ashley Keith (sc0rch3d) -

    You need to get between the thin black rim and the grey speaker cover, not between the metal and the black rim.

    Nebuar -

  7. kUMBx3hCpAHyCBNF
    kUMBx3hCpAHyCBNF
    WeT5ePxlt5HRGG1Z
    • Use a plastic opening tool to gently peel up the upper speaker grille.

    Be careful on these steps to not bend the grill while removing.

    Ashley Keith (sc0rch3d) -

    What is the strip of tape for under the grill? Mine has snapped off completely

    crabonarock -

  8. S6QVUODFAqm1towZ
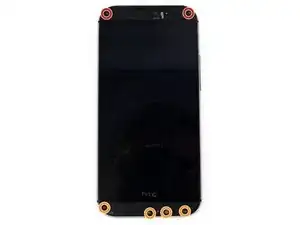
    • Remove the two silver 3 mm Phillips #00 screws from the top.

    • Remove the four black 4 mm T5 Torx screws from the bottom.

    The markers on step 8 were wrong. The 4 black TX screws are actually all in the bottom, while the silver screws are on top.

    WP7User -

    Nice good good

    tamerseleman68 -

    Do yourself a favor and get a proper set of small screwdrivers including smaller Torx bits T5-T10 (especially with magnetism)…you’ll thank me later. Getting the cheap kits from Amazon or included in the order will likely not work or strip easy.

    Disassembly: be easy with the screws and don’t strip them. organize your workspace. i put the top screws next to my top speaker grill on the left of my workspace (and worked left to right…so that assembly was right to left) and bottom torx next to my bottom speaker grill.

    Assembly: be easy with the screws and don’t strip them. you will definitely feel the stopping point and don’t add extra torque.

    Ashley Keith (sc0rch3d) -

    My 2 silver Phillips screws at the top are PH #000, not #00.

    At the top be careful about moving the camera lens cover.

    At the top and bottom, be careful about peeling or lifting off the speaker covers.

    Qrash -

  9. DyXVX2TwYxsSXbXS
    DyXVX2TwYxsSXbXS
    INBdOPirewhtHqn2
    GQGYJeQ3KD62PIkb
    • Work your way around the perimeter of the phone with a spudger and plastic opening picks to free the clips that secure the rear case to the display assembly.

    • A metal spudger is pictured, but it is best to use a nylon spudger to prevent marring the device.

    • Be careful not to lose the power button: it sits loosely in the top of the lower chassis.

    • Significant force may be required to pry the casing apart.

    Note: the pictures make it look like it's the glass the comes loose from the body. In fact, it's the metal shell the comes off, while all of the electronics are attached to the face. To get it started, you have to dig your spudger in between the metal shell and the little plastic rim that goes around the glass. I found it easiest to start in the middle, below the volume buttons.

    Kael Shipman -

    I wish this was more clear in the picture. I ended up cracking my screen/digitiser trying to pry the glass open... the more you know!

    NzUddin -

    I tried starting by the volume buttons but was having no luck. I found starting just under the sim card worked best. Raising the whole side and the top up allowed the rest to come out. Be mindful of the charging port at the bottom and don't force the bottom out first but rather lift the top end out then the charger will clear. Same goes for putting back together. Charger port in first them push down on the sides and top.

    Jason Cobb -

    I used guitar picks to wedge inside the case as I prised it open

    Ian -

    Why do they design it to make it so difficult to replace the battery?

    Rich Hanes -

    Disassembly: did not use any heating elements. used my straight edge razor near the top left side opposite the volume rocker (it should go in pretty far and worked until i heard the first clip pop. worked around the top and down the right side. as others mentioned, you’re getting the top loose then rocking out the unit to not screw up the charge port. DO NOT LOSE THE POWER BUTTON.

    Assembly: hold the shell with charge port up and place the power button (this keeps it from falling out while assembling). put charge port in first then slowly work your way around the side little by little. I started hearing the clips pop into place maybe as I working around the perimeter on the 3rd try. after that, give it some good force as the unit should almost be flush with the shell.

    Ashley Keith (sc0rch3d) -

    After destroying the tip of three nylon spudgers, I would like to advocate using a METAL spudger, as shown in the picture. Just be careful to minimize scarring of the metal cover. But, the nylon spudger definitely is not strong enough to release the chassis, especially since these phones tend to be pretty old and set in their ways at this point in time. With a metal spudger, I was able to separate the back from the chassis in just a few minutes, after spending over 30 minutes failing with the nylon spudgers.

    christopher e m -

    Not sure g enough for any of this work. Mine are nubs now. And left residue around the edges that I was trying to pry loose.

    loritankersley337 -

    Please tell me, how to put in the Power Button. It’s not symetrical.

    I would appreciate a picture of it in it’s housing or a discription.

    Th.Laahcs -

    I found that on my HTC M8 the power button needs to be a shade to the left. You can figure it out on your model by looking for the button by using a Sim Card eject tool and pressing on the power button which on my model was covered by black tape. You’ll feel the button click/press once you find it - you can then determine if the button is a shade to the left or right when you line it up with the housing with no power button. Place the phone temporarily into the shell and you’ll be able to determine the button placement, this is how I did it.

    Hector Vera -

    I too also used a metal spudger on the left side opposite the volume rocker, that seems like a good spot to start.

    Hector Vera -

  10. bT2A2wjNLXmoN1Zq
    bT2A2wjNLXmoN1Zq
    CiXoWm2Q5HEPV2cJ
    • Remove the two silver 2mm Phillips #00 screws securing the battery connector to the motherboard.

    • Use a plastic opening tool to gently pry up the battery connector.

  11. d34NWQJkEl25ZoPX
    d34NWQJkEl25ZoPX
    UQwuYFOCQ6p6Mcd6
    GKyUaJBRw2sImf6y
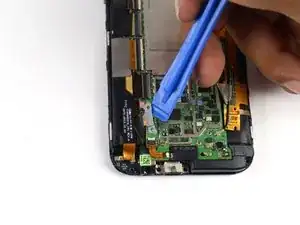
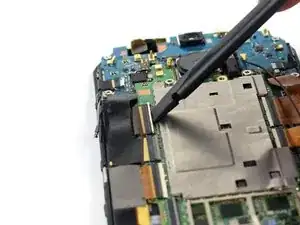
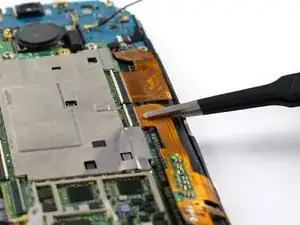
    • Use a spudger to disconnect the two ZIF connectors.

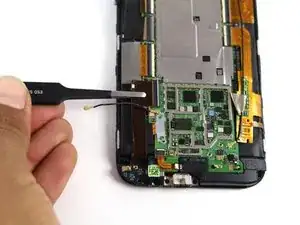
    • Use the flat end of a spudger to disconnect the black antenna cable.

    • Use a set of tweezers to pull the two ribbon cables free of the ZIF connectors.

    Note that there are two hardware versions of the replacement part. One has one antenna connector, the other has two antenna connectors. The iFixit part labeled "Sprint" is the one-connector version. It is the most common. It may be labeled "16GB" on ebay and from other sellers. My 32GB T-Mo device required the "16GB" version of the hardware, so use caution when ordering. The iFixit part labeled "Verizon" is the two-connector version. You may see this one labaled "32GB" on ebay. My understanding is that the 2-connector part is for Verizon & AT&T Windows M8s, but I could be mistaken.

    If you don't know which hardware you need, and you are ordering parts before cracking open your device, I would suggest (at least at 2017 ebay prices) ordering one of each and returning the one you don't need.

    Alex LeDonne -

    Be mindful of the small ZIF connector, as when you remove it, it will stick out from the back of the phone and can be easily damaged if you put the phone with its back on the table. Better put it flat again after you loosen the cable

    As happened to me; the white part came loose, but I managed to put it back. However, it doesnt have as much r'resistance' as initially. Nevertheless my phone is still working, so probably the small ZIF is only to keep the cable in place. This kept me sweating for quite some time...

    AG Draaijer -

  12. QA1SpFKPyIxWhpYy
    QA1SpFKPyIxWhpYy
    5a6OFDUdhu1JEqE2
    421G3Qi1u5UnYPkR
    • Remove the single silver 4mm T5 Torx screw securing the headphone jack/micro USB board.

    • You may need to gently bend the small ribbon cable out of the way to get to the screw.

    • Use a pair of tweezers or a plastic opening tool to gently pry the headphone jack/micro USB board up and out of the phone.

    There is a small rubber pad stuck to the inside end of the headphone jack. You can see it in the 3d picture that goes with this step, slightly offset to the right. Your new part will almost certainly not include this rubber pad. Stick it on the new headphone jack. This helps keep your M8 a little more water-resistant, as the pad is covering a small hole.

    Alex LeDonne -

    There is some adhesive sticking the board to the phone, you will need to reapply the heating pad to easily lift of the part.

    Gibson Scisco -

    There are also small surface mount components on the bottom side (opposite the USB connector) that can be broken if the board is pulled out without first lifting it up and away from the adhesive. I just successfully repaired the USB connector (solder joints on all pins were broken) and replaced a couple of the 0402 size resistors that broke off the USB board when removing it from the phone, and the phone is now charging again. Thanks for the step by step tear down - it helped save me from not destroying the M8 while opening it up!

    Brian West -

  13. wKaYFHNLHiCyblNn
    wKaYFHNLHiCyblNn
    E2tQn2TSQOVCNHKs
    V3HuHlYeOjpHtMUt
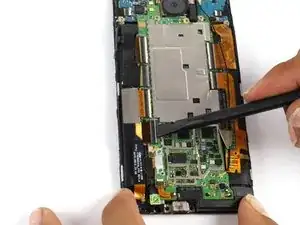
    • Use the tip of a spudger to disconnect the seven ZIF connectors.

    • Use a pair of tweezers to gently pull the seven ribbon cables free of the connectors.

    Top left connector does not need to be detached and is tricky to put back in

    woitas2 -

  14. FQWIG2gOax2KBTHn
    FQWIG2gOax2KBTHn
    WqP5HEmkyOFBmExV
    mLIHBCHCwcSnorsl
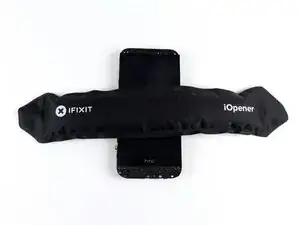
    • Use an iOpener to loosen the adhesive securing the display assembly to the rest of the device.

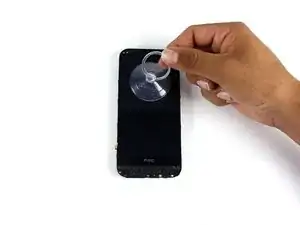
    • Use a suction cup to gently separate the display assembly from the rest of the device.

  15. qZfagAlXsfYtJcAX
    qZfagAlXsfYtJcAX
    gkqDVoIpWXeJcLQZ
    D1GahUmD2NxDQO1i
    • Carefully guide the display assembly ribbon cable through the midframe for removal.

Conclusion

To reassemble your device, follow these instructions in reverse order.

Michael Gonzalez

Member since: 14/04/15

4430 Reputation

10 comments

Great guide - many thanks!

In step 13, you only need to disconnect four ZIF connectors - the top two on the left and top one on the right can be left connected.

Thanks again!

Byrn

Byrn -

Be careful when reassembling:

Make sure the power button is put in the right way, it may look symmetrical but it's not! When put in the wrong way it does not work. Check if the shape of the button aligns with the edge of the casing, it's pretty easy to see if you pay attention to it.

Also keep an eye on the back camera. The round black cover glass may shift when trying to click the phone in its casing.

I ended up taking it apart at least 4 times because of this :(

Also, if you want to heat things up you can also use an incandescent light bulb and put your phone over it.

Jan de Vries -

position of the square block on the power button is a little bit left from the center (phone facing you with screen)

AG Draaijer -

don't follow step 13 in fact &&^& this guide listen to byrn
DeAndre Barron -

very helpful, thanks

Stuart Gilks -

This is a good guide, but indeed Byrn made it better !

Re-assembly can be stressful, especially since the phone will go into 'safe mode' or get stuck into the bios boot screen.

Apparantly, when the 2 volume buttons are not working, or pressed in continuously, this makes the OS go into a frenzy, and you're stuck in safe mode.

I tried to assemble the back cover (with power already on, as then there is no cover button pressing), but it went wrong and eventually my phone got stuck in the boot screen and the power button was also not working anymore.

So I opened the phone (with power on) and removed the battery cable (step 10), which reset my phone again, after which is was booting normally.

Assembly of back cover was finally well achieved by inserting the top-right first to ensure proper alignment to the power and volume buttons.

AG Draaijer -

Now I'm finished, I also found this youtube guide, which is better than the ones I used to do my 'surgery'

https://www.youtube.com/watch?annotation...

AG Draaijer -

hi

my phone was drop down now display back light is not work

what will do now

it can repair or want to change new display

india_nzb -

You may have a dissconnected cable. Check inside, if there isn't a disconnected cable, here's a replacement screen. :)

LCD Digitizer Assembly Replacement for HTC One M8 Display Touch Screen - BLACK

LambdaMisc -

Hi there,

Please help?

I've replaced the screen 2 times and the screen didn't come on. I can feel that phone is turned on becouse it does buzz and response when I touch the screen, but the screen stays black, nothing comes out.

Any hints?

I am only trying to restore my data from this mob but it was reported lost or stolen and than I found it with broken screen.

When I replaced the screen first time it was ok, but then I pressed on the screen to place it bit better against the housings and the screen cracked .

Since then I've replaced the screen twice with no luck.

Best regards!

Raphael

Rafal Glovacki -