Introduction

The HP TouchSmart 15-r015dx has 4 GB of RAM.

  1. uyljIJRmCJIWv6JN
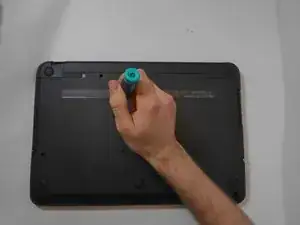
    • Turn off your laptop.

    • Ensure your laptop is off. Removing the battery while it is on may harm your laptop or yourself.

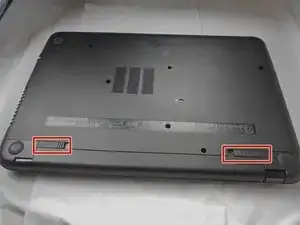
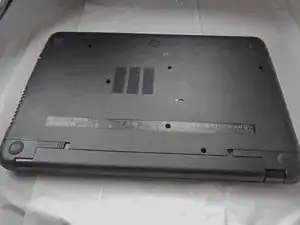
    • Flip over to view the bottom of the laptop in order to gain access the battery and the DVD±RW Drive.

  2. JgLWacsFcObJbOgV
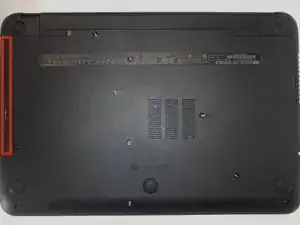
    • There are two battery release switches circled.

  3. wteMxcwhnK1kOkGJ
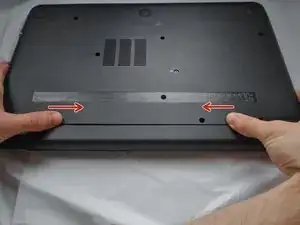
    • slide release switches inward towards each other to release battery.

  4. JAlQl2IrCFLrpxxM
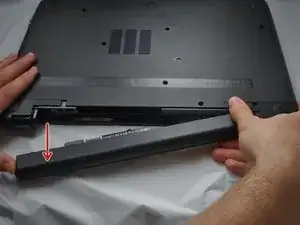
    • after sliding the release switches, pull battery towards yourself to remove battery.

  5. 42E4Qv1NEpBPZ5DI
    42E4Qv1NEpBPZ5DI
    4xWZ2eBJjALuTVB3
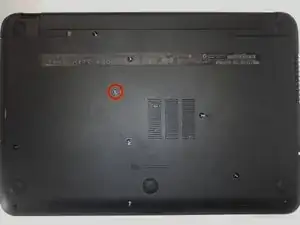
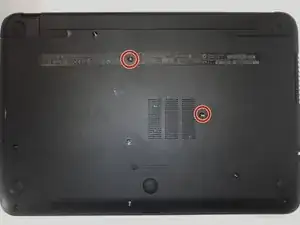
    • There is one screw holding the DVD±RW Drive in place. Use the #00 screwdriver to remove the screw.

  6. lCUdr4ic3BKBv6bK
    lCUdr4ic3BKBv6bK
    sP6vq24R6bKqW1wd
    QOvTQl6QBedHZyJx
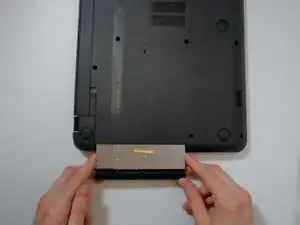
    • The DVD±RW Drive is here. Remove by gently pulling it straight out.

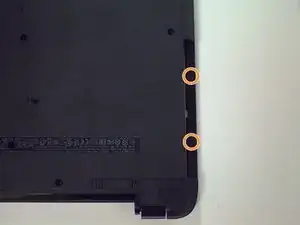
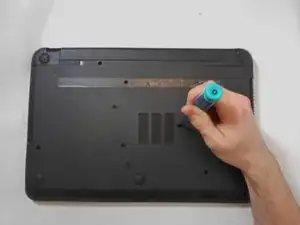
    • After removal of the DVD±RW Drive, two screws are exposed and must be removed.

  7. FbVFNBxBcPPiiyEX
    FbVFNBxBcPPiiyEX
    41ucZv1DCGYxBAyT
    • Using your Phillips #00 screwdriver, remove the two screws to loosen the fittings of the keyboard.

    • One of the screws lies in the label.

  8. H6eJiJf4kGQNQTl1
    H6eJiJf4kGQNQTl1
    uHfGxNktrvAoCxJU
    ThiDGkLcHPwTeiXr
    • Flip the laptop over to view the top and lift the screen up.

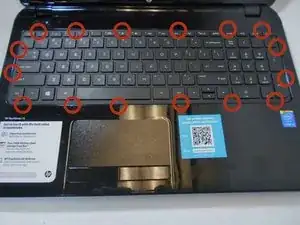
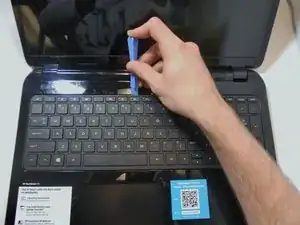
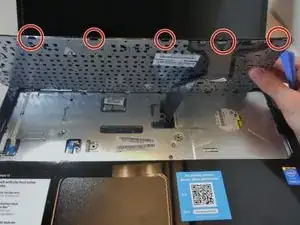
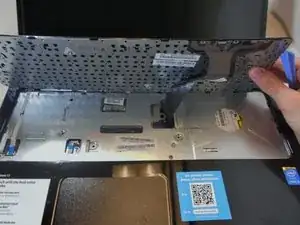
    • There are sixteen clips holding the keyboard in place. Gently pry up each clip using a plastic opening tool. Once all clips are loose, lift the keyboard from the computer.

    • Do NOT pull the keyboard up more than 2-3 inches as there is a film-material connecting the keyboard to the laptop.

  9. XYrjayFkt5pDOUvF
    XYrjayFkt5pDOUvF
    sROhnv6UGhf6vNQU
    aMGY6NETbGlhuXvK
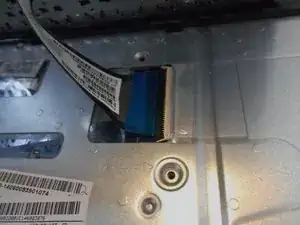
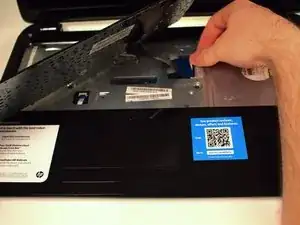
    • There is a small black latch holding the film-material in place.

    • Flip the black latch up to release the film-material. Once flipped up, simply pull the film-material out from the laptop to release the keyboard.

    • There are tiny prongs on the ribbon; it must be carefully removed and upon re-installation the prongs must be lined up exactly in each tiny track in order for the keyboard to work.

    I used this guide to upgrade the memory on an HP 15-r011dx, and found that the keyboard ribbon is very finicky. In fact, the first time I put the PC back together, many of the keys on the keyboard didn’t work! Two more tries did the trick. I finally realized that the teeny, tiny teeth on the ribbon must be carefully threaded into the connector (i.e., lined up exactly in each tiny track) in order for the keyboard to work. I usually work on Macs and have never encountered this issue before now, but next time I take apart this, or any other PC laptop, I’ll know this is a quirk.

    Traveled Woman -

  10. vcpvnIqTOcKglbay
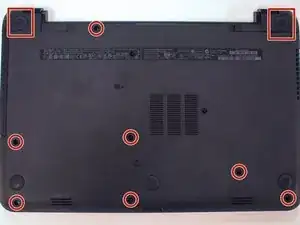
    • Flip the laptop over to view the bottom and remove the remaining screws from the bottom.

    • There are 2 screws located underneath the covers.

  11. XUuLVlyBaG4ISZ4L
    XUuLVlyBaG4ISZ4L
    BgEmHuuC1UnYEI6N
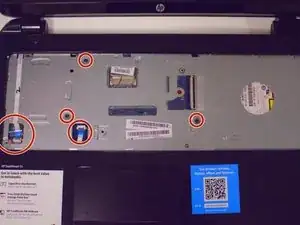
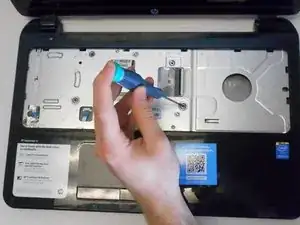
    • Flip your laptop over to view top and open it.

    • Remove the four screws and the two wires before removing the base of the laptop.

    • The metal prongs that wires fit onto stay attached to the computer and can be easily bent when trying to remove or place the plastic piece on to secure the wire. Also pay attention to how the plastic piece looks when you take them off (i.e. which side is up and facing out).

    The 2 DVD screws are on the underside of the laptop (you need to turn it over) - Not visible where the keyboard was.

    marcsimmons -

    It would be nice if you added how to unplug and plug back in the wires. I used two small flat head screwdrivers on each side of the white ‘plugs’ to gently apply equal pressure to remove them. However, since the wire is not attached to the white plug, which is not mentioned, and the white plug is quite small, it is difficult to figure out how to reassemble it, or which side of the plug was front/back, up/down. It looks like the wire strip lays on top of the wire teeth/posts that stick out and then you slide the plug on top of that to secure it. So far, no luck with this attempt.

    Patrick -

    After struggling to attach the two wires that had been unplugged, I would suggest using the blue plastic tabs that are attached to the wire to unplug them, instead of doing what I did above, which is pulling out the white plastic piece that holds the wires down. I have not tried it, and you might need to still remove the white plastic pieces that secure the wires, but it’s worth a shot. If you do end up removing the white plastic pieces, be warned that the metal prongs that they fit into and stay attached to the computer, can be easily bent when trying to place the plastic piece on to secure the wire, so if you are having a problem, check that. Also, pay attention to how the plastic piece looks when you take them off- which side is up and facing out.

    Patrick -

    The white retainer is designed to just flip up off the ribbon cable. No need to completely remove them. Gently pry up on the ribbon side of the white retainer to flip it up off the ribbon cable. Then the ribbon cable will slide out . Make sure , when reconnecting , the ribbon is fully seated, then flip the retainer down to secure.

    Mike Miller -

  12. CJ5mucYF32XRFLAQ
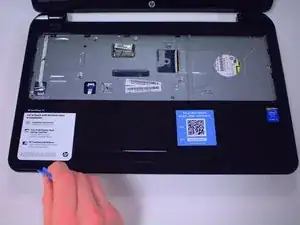
    • Use your plastic opening tool to pry the base of the laptop off.

  13. ANaDTVHa1pLRLrFb
    ANaDTVHa1pLRLrFb
    cLIpZLtIypqiFxTC
    UrSi21Ig122MB3CY
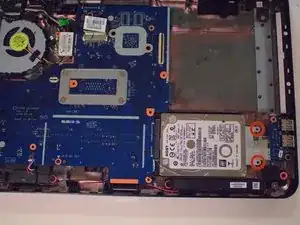
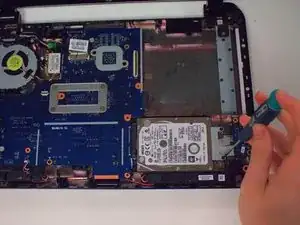
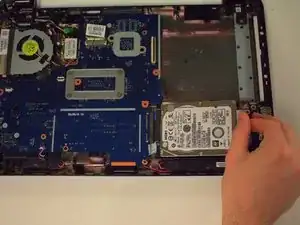
    • There are two screws holding the hard drive in place. Remove these screws.

    • Remove the hard drive by pulling it to the right like shown.

  14. QhsD3PJK6OFikUVs
    QhsD3PJK6OFikUVs
    WOuJKJmjioTcFwMA
    1qvIn6funIrfssAO
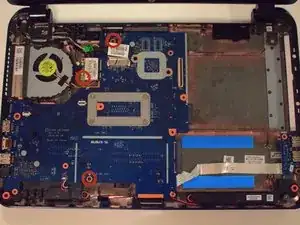
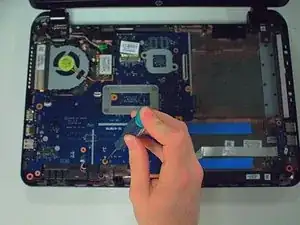
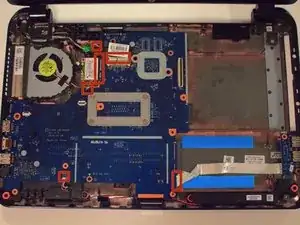
    • There are 3 screws holding the motherboard in place.

    • Unscrew the screws to release the motherboard.

  15. CwEVtlJZEsObRAAu
    CwEVtlJZEsObRAAu
    2e1QdTUjTlQGDUTO
    vlRCcmWJXv3KIBTY
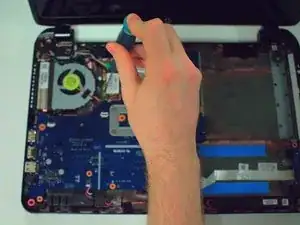
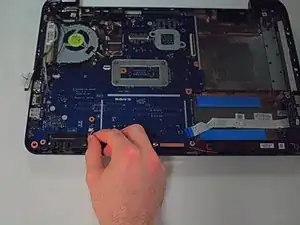
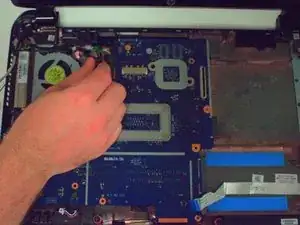
    • There are several wires that need to be disconnected from the motherboard.

    • Remove the wires carefully.

  16. i3FbajrLGRRButLH
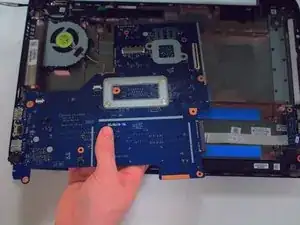
    • After removing all the wires, pull the motherboard out.

  17. v6QjOOtPeQNtWply
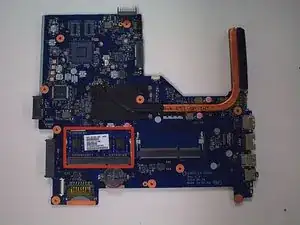
    • Put the motherboard on a hard, flat surface to avoid damaging it.

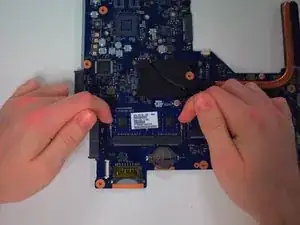
    • The RAM is marked in red.

  18. OTKNXDxReOFpsYBK
    OTKNXDxReOFpsYBK
    lghgxUYVXRBUmhfL
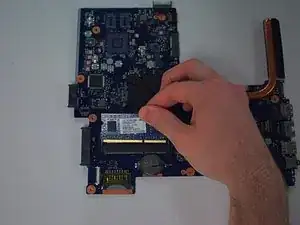
    • There are two switches holding the RAM in place that need to be moved.

    • After the switches are released, simply pull the RAM up as shown.

Conclusion

To reassemble your device, follow these instructions in reverse order.

Jacob Kleinsorge

Member since: 30/01/15

2093 Reputation

3 comments

Cool, thanks guys. I used the guide successfully to upgrade the RAM on my HP 15-r033na Notebook. It would have taken ages without your help! A really tough way to reach the memory.

I wonder if the second DIMM slot is usable. The specs I've found says this board only takes one card, so maybe the second is disconnected.

Tim Ellison -

Did you ever get an answer on this? Did your upgrade improve performance at all? Seems like 20 steps x 2 should only be undertaken if there's a serious boost at the end of that tunnel. Thoughts?

Note that my system now has 4GB in slot 1 and 2GB additional in slot 2. Still, I constantly run out of RAM.

Thanks!

Daniel - HP TS 15 owner

Daniel Robin -

Thanks so much for this guide. I’d found my PC’s manual/repair guide online (it’s an HP 15-r011dx) but the instructions were much more cumbersome. Your guide is excellent, and now with twice the RAM, I feel like I have a totally different PC!

The whole upgrade was much more fidgety though than any Mac I’ve ever worked on, and so strange that HP puts the RAM chip on the motherboard. Crazy… It’s like having to do a root canal to brush your teeth!
Traveled Woman -