Introduction

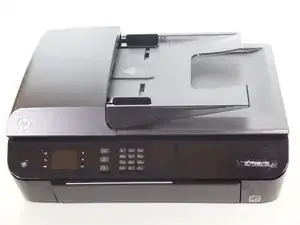
This guide will show you how to remove the LCD display.

  1. DJgFTt4yRQCqXsSe
    DJgFTt4yRQCqXsSe
    Nnfrfw5THPMk6jwt
    EiKCCi1NbTCn3TdG
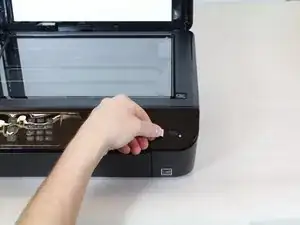
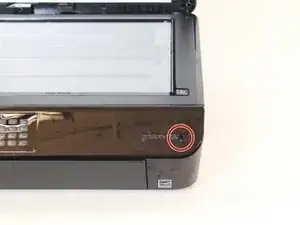
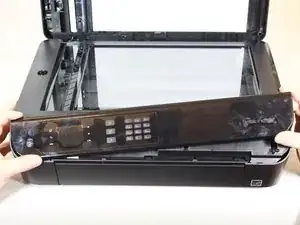
    • There is a hidden screw underneath the model sticker on the front panel.

    • Peel the model sticker off the cover.

    • This will expose the T10 screw securing the panel.

  2. 4v4mEgJUaYCaIeCx
    4v4mEgJUaYCaIeCx
    VDrxbHyoFonAO6U6
    XnNWpixCAShBmd1V
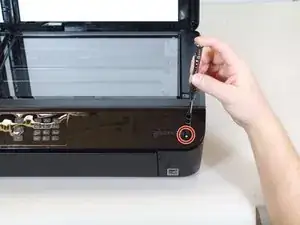
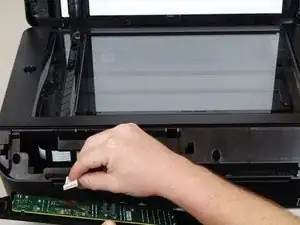
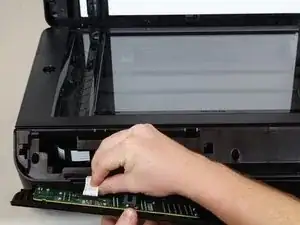
    • Remove the single 12mm-T10 screw securing the front panel to the printer body.

    • Loosen the panel cover from the printer body.

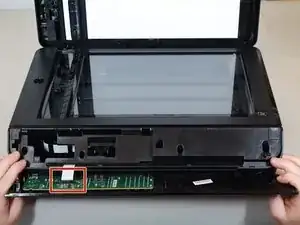
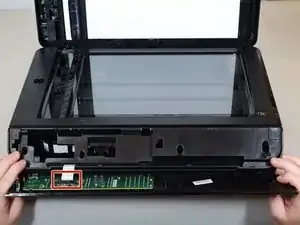
    • There is a ribbon cable connected to the backside of the cover. Disconnect the cable before separating the panel completely.

    It would be good to note that to “loosen the panel cover from the printer body,” the procedure is to:

    1. Take out the screw

    2. Slide the panel cover gently to the right until it stops (1/4 inch)

    3. Slide the panel cover upwards thus lifting it from the holding tabs

    4. Remove panel cover

    Otherwise it makes it seem like steps 2 and 3 are not necessary which could cause someone to use excessive force to remove the panel cover.

    Gordon Rodgers -

  3. r2miiqYmwZpmrjAJ
    r2miiqYmwZpmrjAJ
    UjN2CUETcKVQNHQa
    qFkyxlvBgySDfUmg
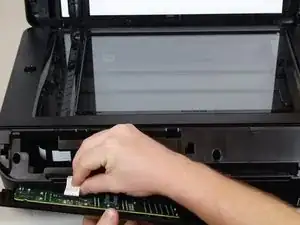
    • Gently remove the No-Fuss ribbon cable from the front panel.

  4. BSBVxKxK1IcWlyFc
    BSBVxKxK1IcWlyFc
    bGhgbMRQQEFJ36Mw
    jFC5EImdBkkBUajH
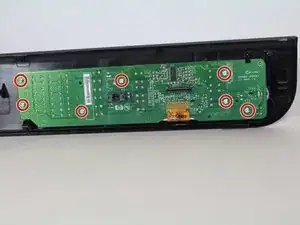
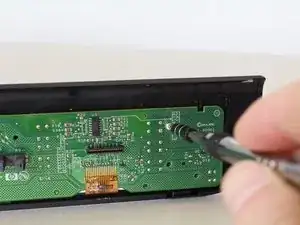
    • Remove the seven 8mm screws using the Torx T6 screwdriver.

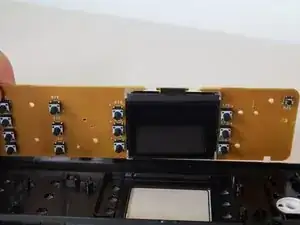
    • Remove the motherboard from the front-panel housing.

    • The LCD display is on the opposite side.

Conclusion

To reassemble your device, follow these instructions in reverse order.
Justin Engwall

Member since: 24/01/18

137 Reputation

0 comments