Introduction

Use this guide to replace the internal speaker assembly if the speakers are known to be blown on your HP Elitebook 8460p.

This guide requires disassembling a large part of the laptop and will take a longer period of time. Make sure to keep track of all the components and screws that must be removed. This guide also requires removing the chassis of the laptop which involves pry tools. Complete each step slowly and carefully to avoid breaking any plastic components.

Ground yourself with the ESD strap to prevent electrostatic discharges from damaging any of the components that must be removed or the motherboard.

To complete this guide, you will need a Phillips #0 screw driver, a T2 Torx screw driver, a plastic pry tool, and an ESD strap.

  1. Sh5qQlMTDdKDNAwQ
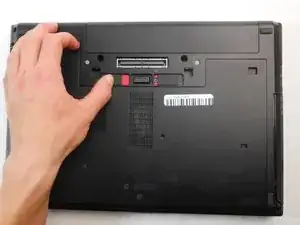
    • On the back of the computer, slide the left switch towards the outside of the laptop until you hear a click.

    what if it does not work,what does that mean?

    julia melrose -

  2. uYS3eSH6eqe6JNJT
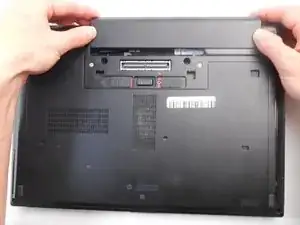
    • Slide the battery away from the switches until it can be lifted away from the laptop.

    • Lift the battery away from the laptop.

  3. NVuRvTc4dwod2cgj
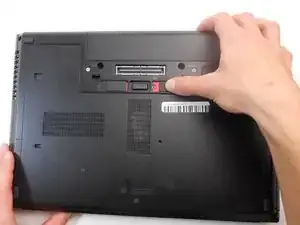
    • On the back of the laptop, slide the right switch toward the outside of the laptop until you hear a click.

  4. FigFljVIeFqYSBPH
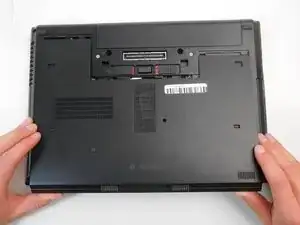
    • Slide the back shell of the laptop away from the switches until it can be lifted up.

    • Lift the shell straight up.

  5. wYbGcWXZfFSqFOcF
    wYbGcWXZfFSqFOcF
    GPpH1nOLUGPmiSq2
    • Attach an ESD strap to your wrist and to a ground.

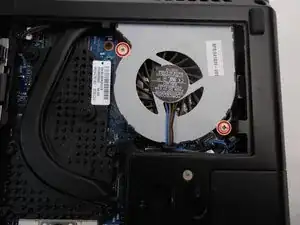
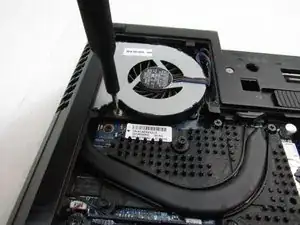
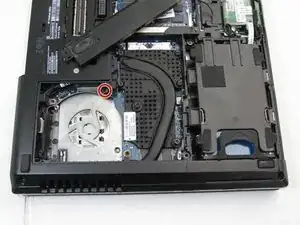
    • Using a Phillips #0 bit, unscrew the two screws on opposite corners of the fan.

  6. FeKbsw3dK2TN3iZt
    FeKbsw3dK2TN3iZt
    LREtsSq4dJHA5Yss
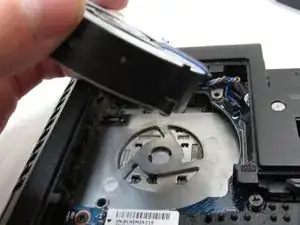
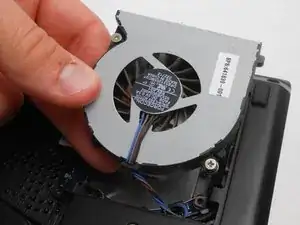
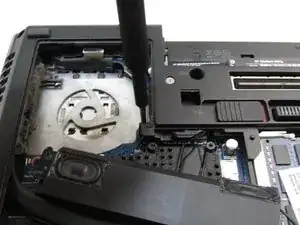
    • Pull the fan straight up and to the side slightly.

  7. CrlMG1jRPUrumIoy
    CrlMG1jRPUrumIoy
    NUefJhHsCNJZxgFM
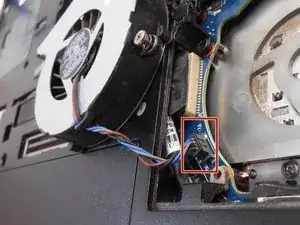
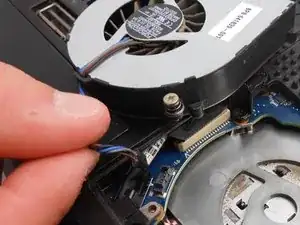
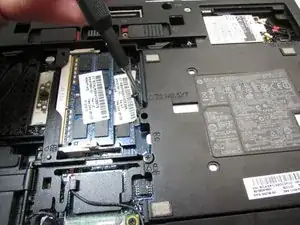
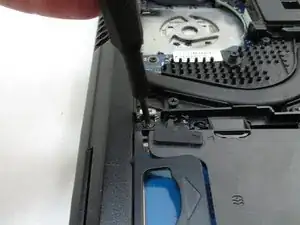
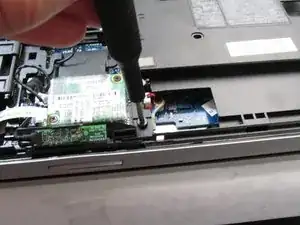
    • Disconnect the small electrical connector. Pry the edge up with your finger nails or using a small plastic pry tool.

  8. DBM1eHcFPqJBSLSb
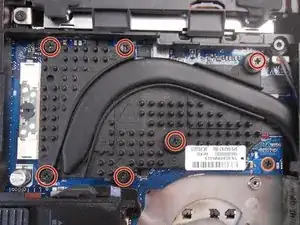
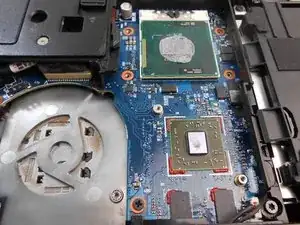
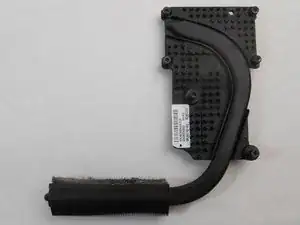
    • Using a Phillips #0 bit, unscrew the six screws on the heat sink.

  9. UthqxLb6SZqfJYCw
    UthqxLb6SZqfJYCw
    FOI2BXcgp2LOOMRS
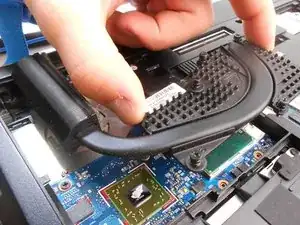
    • Pry the inside edge up, pulling the entire assembly to the inside of the laptop, exposing the processor and graphics processor

    • Clean and replace the thermal paste on the processor if you have any thermal paste.

  10. PirJEAJTYNry3NRp
    • Blow compressed air through the vent from the outside and through the heat sink.

  11. TX61eMdJPTfE4tVb
    TX61eMdJPTfE4tVb
    lCesOrNhlkSa3ZB3
    fdNWPXcykrm2nqUV
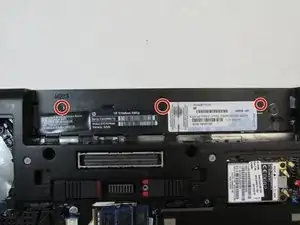
    • Using a Phillips #0 bit, unscrew the one Phillips head screw.

    • Using a T2 Torx screwdriver, remove the two 8.0mm Torx screws.

  12. cuMi1QlhrVCPmRBG
    cuMi1QlhrVCPmRBG
    vUf4Hwpwunq3mcVt
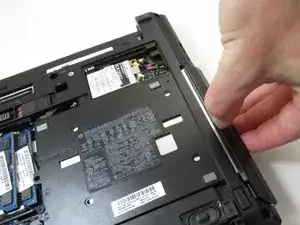
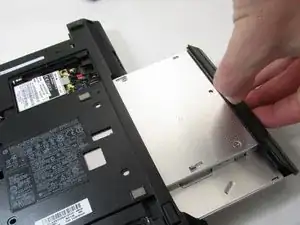
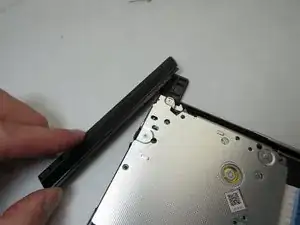
    • With your fingernail, pry the edge of the optical drive away from the chassis of the laptop and pull it straight out.

  13. 5XrXYquPKvnZQMSW
    5XrXYquPKvnZQMSW
    TtpWiL5fIBHlVKMb
    HIiqMAoDaHZsjkrL
    • Skip this step if you are removing the optical drive to fix or replace a different component in the laptop.

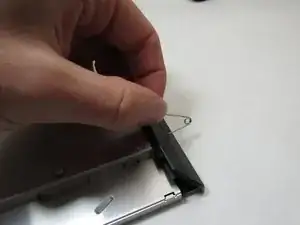
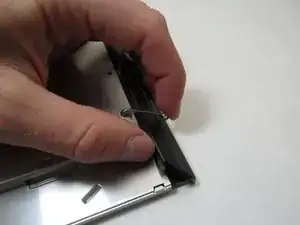
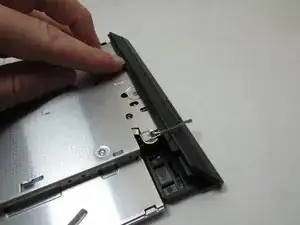
    • Using a small paper clip, push the paper clip straight in to open the optical drive.

  14. pB5ToyQ5p2YZgB1Y
    pB5ToyQ5p2YZgB1Y
    wwYlpTSt3s5D4fwL
    NboS6J2hD6PHUkZc
    • Skip this step if you are removing the optical drive to fix or replace a different component in the laptop.

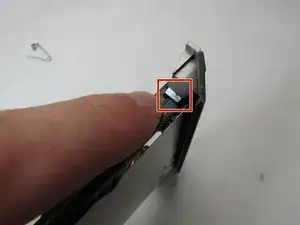
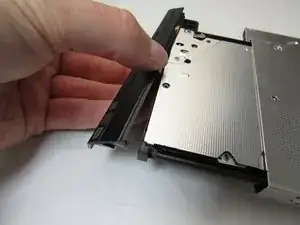
    • Using a small point, pop the tab out.

    • Rotate the plastic cover clockwise to release the tab on the left hand side of the optical drive.

  15. NUVyVu6pMjRWFyaV
    NUVyVu6pMjRWFyaV
    ZqkCfXuUBuYBiCII
    • Attach an ESD strap to your wrist and to a ground.

    • Pull the tab with the small engraved arrow up and towards the inside of the laptop.

  16. 2wSVWIFiF2KenWfX
    2wSVWIFiF2KenWfX
    aGIgyP4fnUvrHGfo
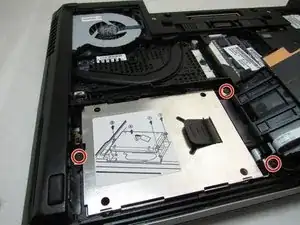
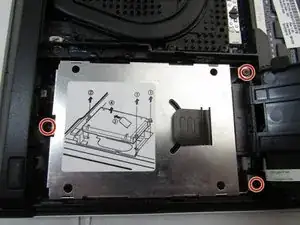
    • Using a Phillips #0 bit, unscrew the three screws that hold the hard drive assembly in place.

  17. hka3OgcG6QDP5BhO
    hka3OgcG6QDP5BhO
    kgarTCGQPZDQyuWO
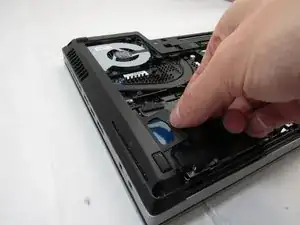
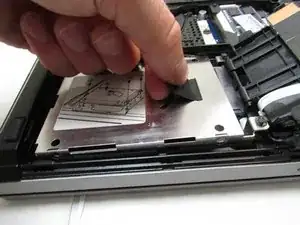
    • Remove the silver metal cover by pulling straight up on the black tab.

  18. vbfqPcwLsRU5mIab
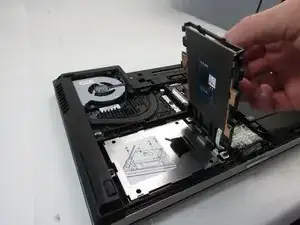
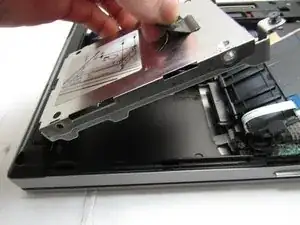
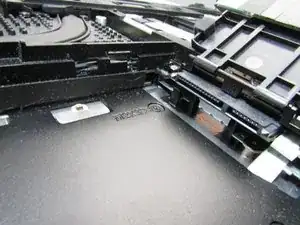
    • Disconnect the hard drive by pulling the drive straight out to the left.

    • If replacing the hard drive, seat the new hard drive firmly in the connector.

  19. XvCuvh1NgSqCtdpg
    XvCuvh1NgSqCtdpg
    ZD2W6rgUWyjpxhsJ
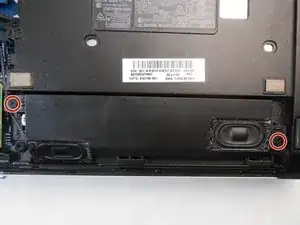
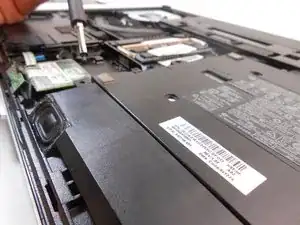
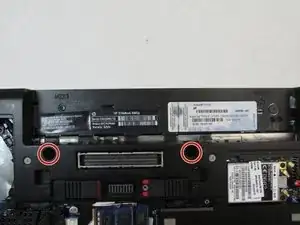
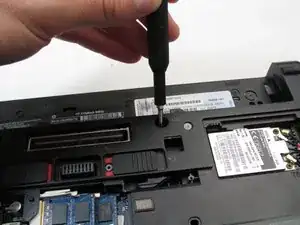
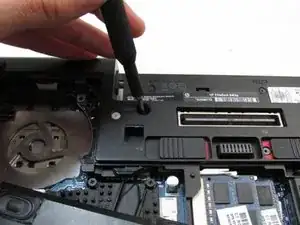
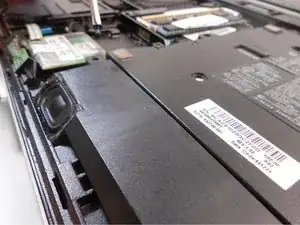
    • Using a Phillips #0 screwdriver, remove the two 3.0mm screws holding the speaker assembly in place.

  20. hJxnYGZ2AtBon2on
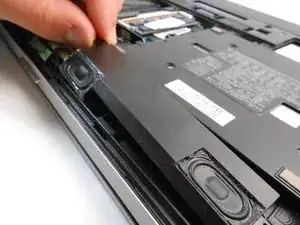
    • Grasping one corner with two fingers, lift the speaker assembly up and out of the laptop.

  21. fqnLIZmc4lSZyMU5
    fqnLIZmc4lSZyMU5
    N3MRYWNnnePXBqXC
    YSlhMU2VRdIKeO3u
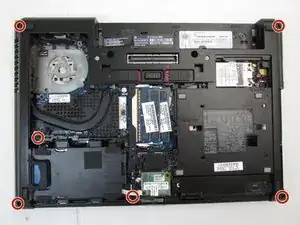
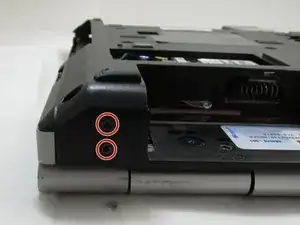
    • Using a T2 Torx screwdriver, remove the six 8.0mm Torx screws.

    • Four of the Torx screws are located on the four corners of the laptop and the other two are next to the hard drive assembly.

  22. lWqU2CkAJKSBX3DE
    lWqU2CkAJKSBX3DE
    ZLdDCarUOrETZc3q
    • Using a Phillips #0 screwdriver, unscrew the Phillips screw next to the fan assembly.

  23. 63xMfcvpUIPHjaS6
    63xMfcvpUIPHjaS6
    PmasIXvBHsVdutFA
    2lVnO1qnXUiMavTa
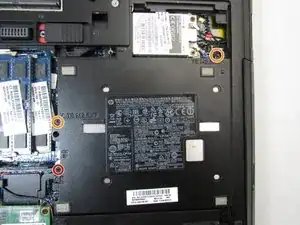
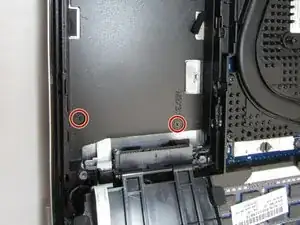
    • Using a Philips #0 screwdriver, unscrew the two Phillips screws next to the battery.

  24. ClsKiGH563DYukJr
    ClsKiGH563DYukJr
    YEs2vIsNIeOPN1Up
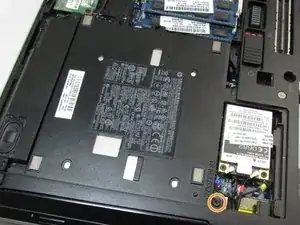
    • Using a Phillips #0 screwdriver, remove the three 2.0mm Phillips screws underneath the battery.

  25. 3m3eDd2bs4ZTxYFa
    3m3eDd2bs4ZTxYFa
    lthfCNa1QsFlIZK3
    • Using a Phillips #0 screwdriver, remove the two 3.0mm Phillips screws to the right of the optical drive slot

  26. KQ1PMMTLTMXDofQx
    KQ1PMMTLTMXDofQx
    PjbphONJCid6YrJ1
    • Using a Phillips #0 screwdriver, remove the two 2.0mm Phillips screws underneath the hard drive assembly.

  27. oIgDgdumQtmIcXFJ
    oIgDgdumQtmIcXFJ
    3NVYRNZYxV5yKiYa
    LSvtDLkx6dtNAJRI
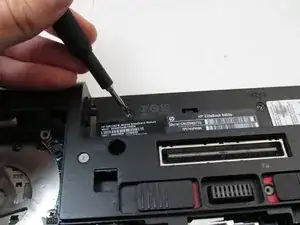
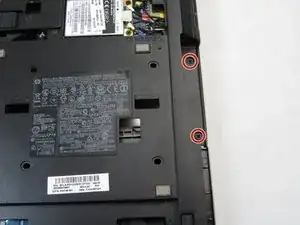
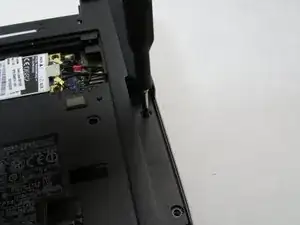
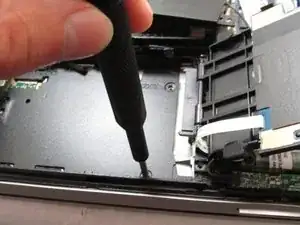
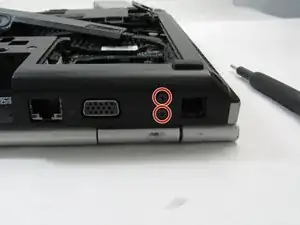
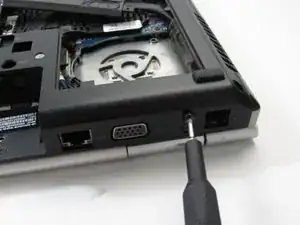
    • Using a T2 Torx screwdriver, remove the four 8.0mm Torx screws on the back side of the laptop.

  28. yFA31mAZg6YopHkt
    yFA31mAZg6YopHkt
    q4tcBPw1wAKWBvOG
    KfavMohAqfTGsLXR
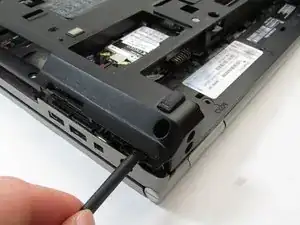
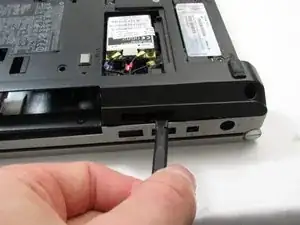
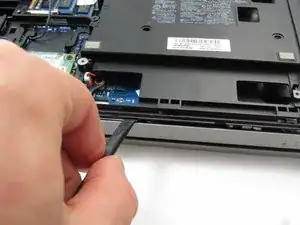
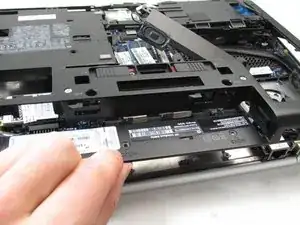
    • Using a spudger, work your way around the edge of the laptop popping the plastic chassis up.

  29. VKhnmYIspDQwvKQM
    VKhnmYIspDQwvKQM
    MfdJW1gKDR6GcyOV
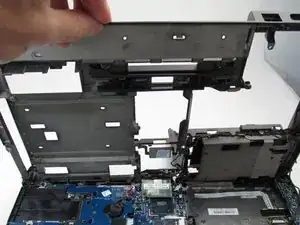
    • Lift the chassis up and detach the small connector between the hard drive and heat sink.

  30. S3sEfecncRgqxPp5
    S3sEfecncRgqxPp5
    wldRbLrnRRsYyWXT
    gqmZPTF1mtgqtpWP
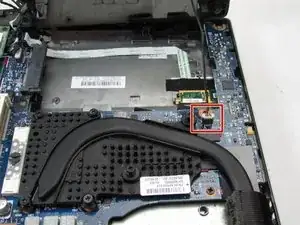
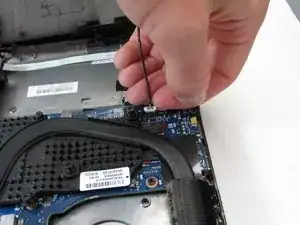
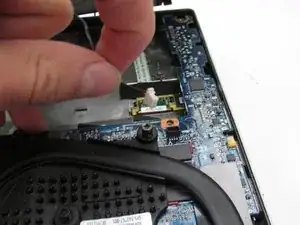
    • Disconnect the speaker connector from the motherboard.

    • Remove the old speaker assembly and connect the wire for the new speaker assembly in the same location.

Conclusion

To reassemble your device, follow these instructions in reverse order.

Garrett Anderson

Member since: 16/09/19

2157 Reputation

2 comments

Thanks for the tutorial. I skipped step 11 - 29 and just cut the wire of the old speakers on both ends. Put in the new speaker and hid the wire under the lid of the hard drive. Looking back.. I could have done this straight away after step 5. Removing the fan and heat sinc isn't necessary if onne's going to cut the wire. Nevertheless, taking out the fan was good to remove all the dust in front of the outlet.

Thanks again!

JJJJJJJJJJJ -

Thanks for your idea..I have searching easy way for it 🙏
Muditha Mahanama -