Introduction
If the blue screen of death occurs as well as strange noises emanating from the hard drive occur, replace the faulty or failing hard drive in your HP Elitebook 840 G1.
Tools
Parts
-
-
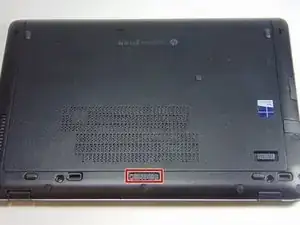
Slide the latch, to the right, away from the lock symbol.
-
Slide the cover away from the latch to remove it.
-
-
-
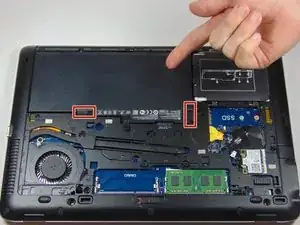
Once the cover is removed you will be able to see the battery and the two latches that hold it in place.
-
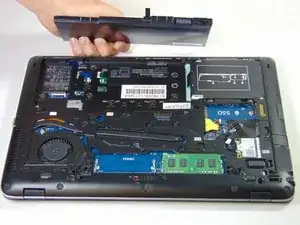
The two latches should be pulled back, one of which is spring loaded and must be held in place in order to remove the battery.
-
-
-
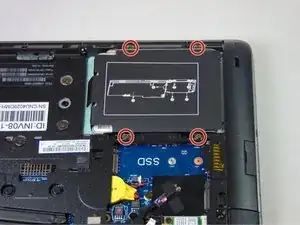
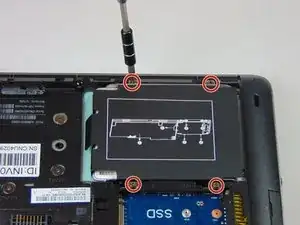
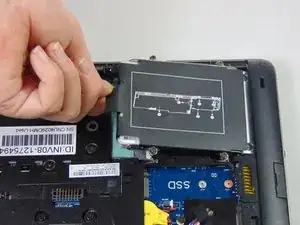
Grab the pull tab on the hard drives plastic casing and pull it out and to the side.
-
Remove the 2.5" hard drive from the plastic bracket.
-
To reassemble your device, follow these instructions in reverse order.
3 comments
I'm surprised not to see a caution about removing the hard drive, but I guess generally I fixit users are pretty computer savvy!
cadegans -
The NEW hard drive does NOT have any OP system. How does that work now ?????
In case you're still looking for an answer:
-Create a bootable usb flash drive with your os of choice: Download rufus, get iso file of os, flash the iso to the usb drive via rufus. (Unfortunately need a pc for this part).
-Put usb drive to your notebook and turn it on.
-Most notebooks should automatically start from that usb drive. However if not: your notebook brand should have specific button for that (Eg.: ESC, F2). You can google that and find out… OR choose usb drive as first boot option in your BIOS.
PS: If windows asks for key on installation, skip that part and use Microsoft Toolkit to activate it later ;)
Slide to your "other left", on this screen it would be to the right, to slide open the cover
petunia8107 -
l’expression “Détachez le cache du loquet pour le retirer “ est ambigüe et source d’erreur, elle donne à penser qu’il faut retirer un “cache” qui serait sur le loquet.
Ce qu’il faut c’est détacher le cache (la grande plaque où il y a la logo bleu) de la partie fixe sur laquelle se trouve le loquet. Pour ça il faut glisser une lame fine dans la fente entre le cache et la partie fixe.
merci pour le tutoriel.
Philippe Fayolle -
Bonjour Philippe,
Vous avez bien raison ! J’ai adapté la traduction. Merci pour l’observation ! N’hésitez pas à corriger le texte la prochaine fois. Vous trouverez l’interface de traduction en cliquant sur Traduire en haut à droite de l’étape.
Bonne réparation !
Claire Miesch -