Introduction

If your device is frequently overheating or making excessive noise, especially during compute intensive tasks, it may be due to a malfunctioning or dirty fan. This guide will show you how to replace the fan in the HP EliteBook 8530w laptop in the hopes of alleviating these issues.

  1. rTSkZbji5Ebp6XAY
    rTSkZbji5Ebp6XAY
    J3LLUvEdbLLP3Ekn
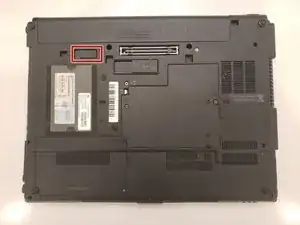
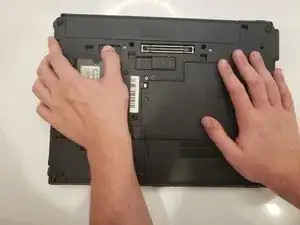
    • Turn the laptop off then place it down so that the back is facing up.

    • Slide the battery release switch to the left and hold it there.

  2. urCXsuEAeDyksDYA
    urCXsuEAeDyksDYA
    jBqKqxw5oFKdkcYp
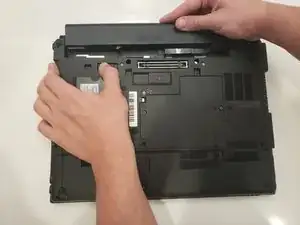
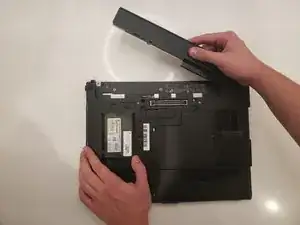
    • Pull the battery away upward and away from the laptop while continuing to hold the release switch.

    • Once the battery is removed from the laptop, you may release the switch.

    • To properly dispose of your battery, look for the closest location that accepts electronic waste in your area and drop it off there.

    The second bullet should be orange, not yellow

    John Lamothe -

    Also, how should they dispose of the batter?

    John Lamothe -

  3. kDA6MKHMcyWw3Nlg
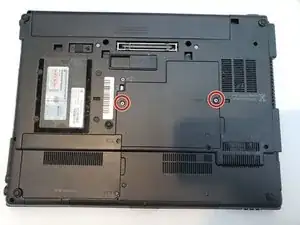
    • Unscrew the two screws from the center panel with a Phillips #00 screwdriver.

    • These screws should have a keyboard icon stamped next to them.

    The photos in this guide seem a little clearer than the other guides I’ve seen.

    John Lamothe -

    I found four screws with the keyboard icon

    Thomas Brobst -

  4. oIKlXPdGCBZaWj6t
    oIKlXPdGCBZaWj6t
    RMhPLxvaiGfdIeGT
    EkB1AvaDKPrmdt2E
    • Flip the laptop over then open the lid.

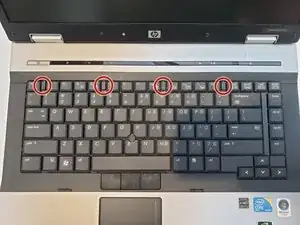
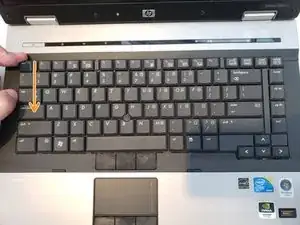
    • Slide the four tabs at the top of the keyboard towards you with your finger.

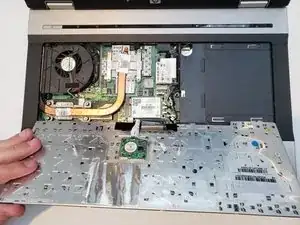
    • Wedge a finger or spudger in the top corner of the keyboard and hinge it forward to reveal the backside.

    • Do not try to pull the keyboard out of the laptop. There are still cables connected to it that can easily be damaged.

    Good caution.

    John Lamothe -

  5. nKqyfhRVgGZJddLb
    nKqyfhRVgGZJddLb
    FXRwSnNcOF1ObUxS
    YMvJwGRbo6QcxHxQ
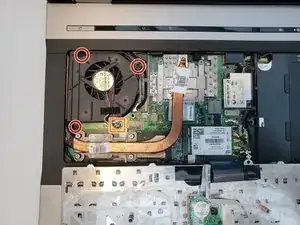
    • Use a Torx TR7 screwdriver to remove the three screws holding down the fan.

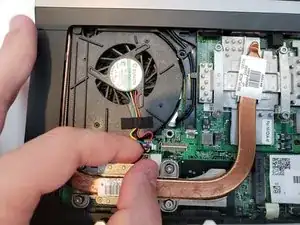
    • Gently remove the fan connector that plugs into the motherboard.

    • Note: It can help to use something like tweezers to remove the connector if you are having trouble.

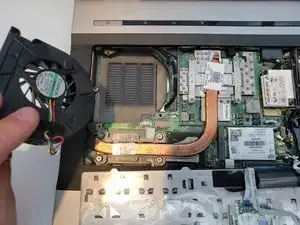
    • Remove the fan.

Conclusion

To reassemble your device, follow these instructions in reverse order.
Raymond Kwasneski

Member since: 30/01/20

511 Reputation

0 comments