Introduction
The motherboard is the main printed circuit board (PCB) in the computer. The central connection point which all components and external peripherals communicate and connect.
Your motherboard can become damaged from physical force, spilled liquids, or faulty connections. If you have previously opened your laptop without disconnecting the power, you can short connections in your motherboard from static electricity. Some symptoms to look for when deciding if you should replace your motherboard include a failure to boot or a blue screen of death.
Look through this device's troubleshooting page to see if the issues you are having could be related to something other than your motherboard before assuming that you need to replace your motherboard.
Before starting with the guide, do the following:
- Disconnect all external devices and connections to the device.
- Make sure the device is disconnected from power and Shut down the device from the Chromebook's OS.
Use the following replacement guide to access and replace your motherboard.
-
-
Remove six 6.6 mm screws from the back case using a Phillips #1 screwdriver.
-
Remove two 8.7 mm screws from the back case using a Phillips #1 screwdriver.
-
Turn the computer over and open it as if you are going to use it.
-
-
-
Use the iFixit opening tool to get between the keyboard bezel and the outer edge of the laptop.
-
Move the opening tool or spudger around the perimeter until you unclipped the keyboard on all sides.
-
-
-
Carefully lift the top of the keyboard up to access the ribbon cables connecting it to the device.
-
Use the tip of a spudger or your fingernail to flip up the small locking flap on each connector. Then, pull the cables out.
-
Lift the keyboard off the to remove.
-
-
-
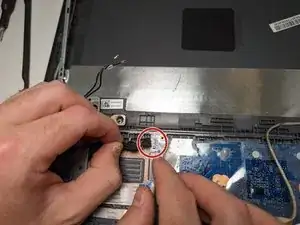
Use a Phillips #1 screwdriver to remove the 2.5 mm screw connected to the wireless module.
-
Gently peel back the tape and slide the wireless module out.
-
-
-
Peel back the tape that secures the webcam to the left display panel hinge.
-
Gently slide out the webcam connector.
-
-
-
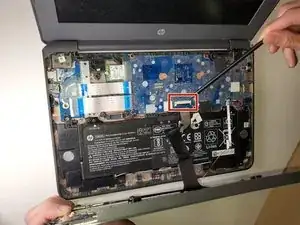
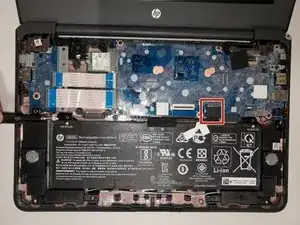
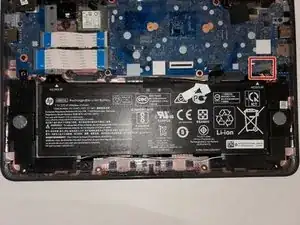
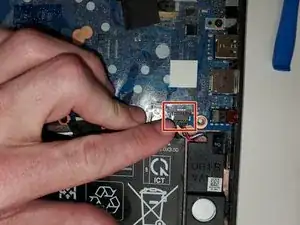
Release the tape that secures the battery cable connector to the system board.
-
Disconnect the battery cable from the system board. Pull the cable straight out of the connector by the white plastic portion near the connection point.
-
-
-
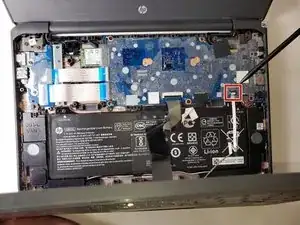
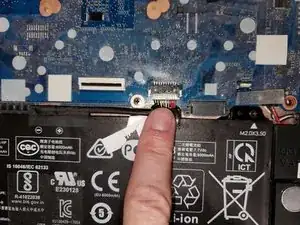
Peel the tape off of the speaker cable connector.
-
Disconnect the speaker cable from the system board. Pull the cable straight out of the connector by the black plastic portion near the connection point. Disconnect the speaker cable from the system board.
-
-
-
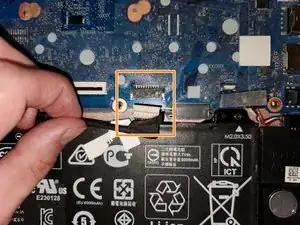
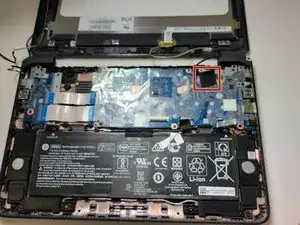
Peel back retention tape.
-
Use pry tool carefully to disconnect LCD cable from motherboard. Lift up on the back arm of the connection cable.
-
-
-
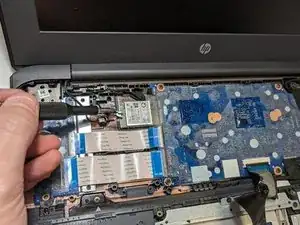
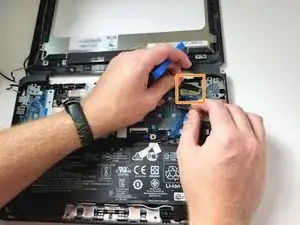
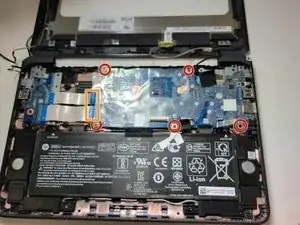
Remove the 5 M2x3.5 PH1 screws from motherboard.
-
Peel back protective tape, lift up on the back arm of the ZIF connector cable. Use prytool very carefully if needed to remove connectors.
-
Once screws are out, peel back the protective tape at the Wifi card socket. Carefully place finger on/under socket card connection area for leverage.
-


To reassemble your device, follow these instructions in reverse order.