Introduction

In this guide, you will be able to perform the process of removing and replacing your current SD card reader located at the top left corner above the battery. Once the removal of the keyboard is accomplished, you will be able to access other components from your HP Chromebook 11-2210nr.

  1. Yn1aGFaANaiJadED
    Yn1aGFaANaiJadED
    356R6e5DksKShO3w
    • Turn over your laptop and remove the 9 visible 6mm screws using the Phillips #1 screwdriver.

  2. qtmVqkWhVOS1LTlD
    qtmVqkWhVOS1LTlD
    2eJvOPYD15OW5nNy
    BAqmQLY51YhWkNDX
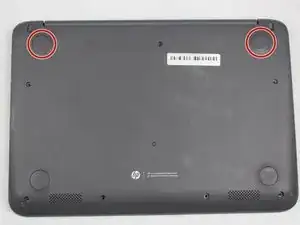
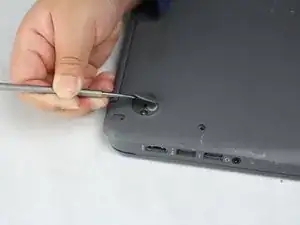
    • Using the metal spudger, remove the two rubber pads that are closer to the hinge of the laptop.

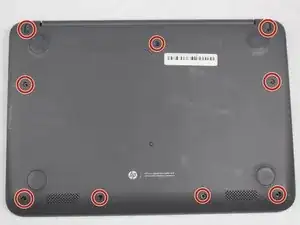
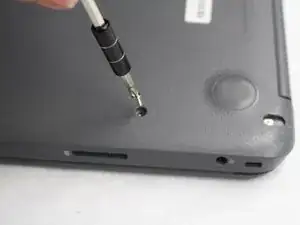
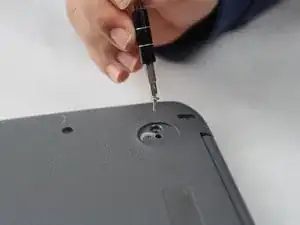
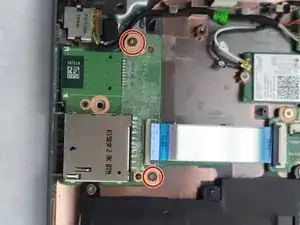
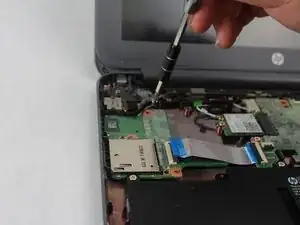
    • Remove the two additional 6mm screws located beneath the rubber pads using the Phillips #1 screwdriver.

    • The two bottom rubber pads do not contain screws, but you may check if you wish to be sure.

  3. fppHagG6xX3GdSsQ
    fppHagG6xX3GdSsQ
    cWOinHwjMRCUiiaj
    THcFPhTnQIDuEK2A
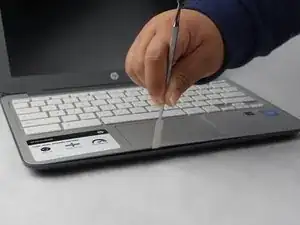
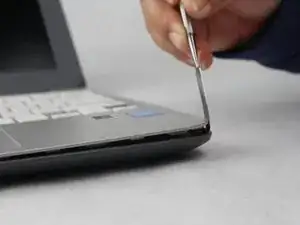
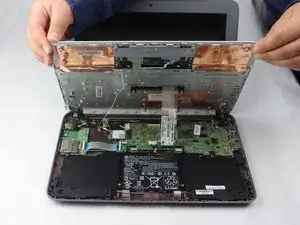
    • Turn the Laptop over and with the metal spudger start to run it along the plastic seam to pry it off.

    • You will hear popping sounds when you are sliding the spudger along the device.

    • For an easier removal, start from the sides and work your way in to the corners.

  4. rdV6PHOGWAQntdJ1
    rdV6PHOGWAQntdJ1
    eF1hgwCYJHHJy3UT
    ohAyAbVwFSmMWK1l
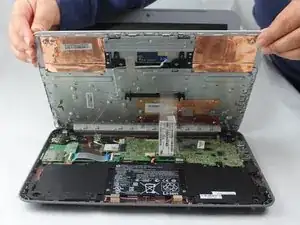
    • Carefully lift off the keyboard and gently place it towards you until the two ribbon wires become visible and place the keyboard down.

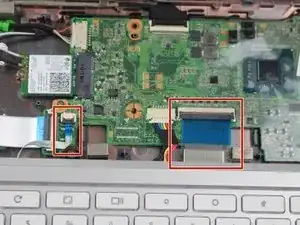
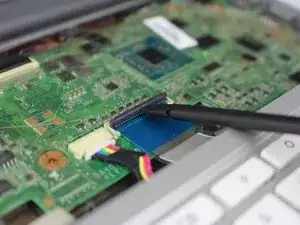
    • Locate where the two ribbon wires are being held in place by two chips.

    • This does not disconnect the keyboard from the laptop just yet.

  5. tSodyq3ZH2XA61FT
    tSodyq3ZH2XA61FT
    srXgjqdQNbx4RTHZ
    2XJm1RyZBWuyAPAY
    • Using the nylon spudger, push the plastic clasps holding the two ribbon wires up to properly disconnect the wires.

    • You must use the nylon spudger for this step. Any metal can damage your motherboard.

    • This step completely disconnects the keyboard to allow safe removal and replacement.

  6. nyDwJKNcRAGeYNBG
    nyDwJKNcRAGeYNBG
    p5hh3gRGQHVdAbKr
    JRhRKsgIoxViq2LT
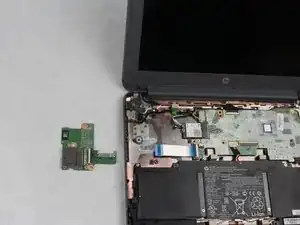
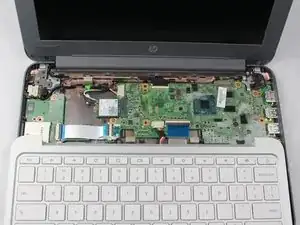
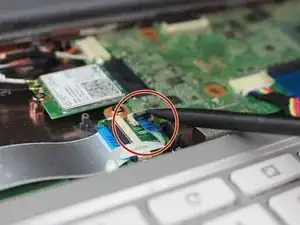
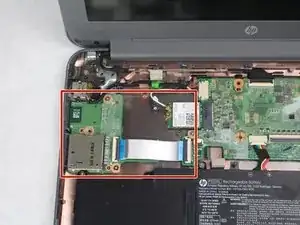
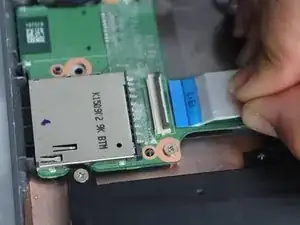
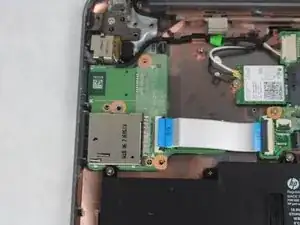
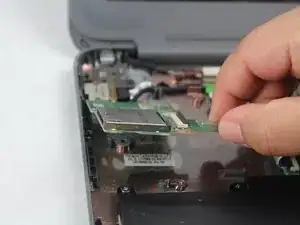
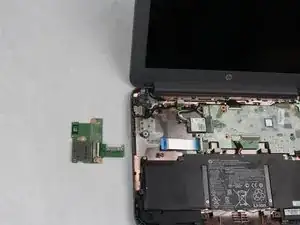
    • Locate the SD card reader at the top left corner above the battery.

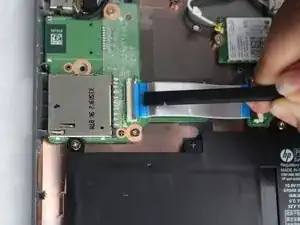
    • Flip up the plastic clasps holding the ZIF connectors into place by using the nylon spudger or your finger.

    • Gently slide out the ribbon cable, removing it from the SD Card Reader.

  7. FVgHowrLNbEA2HcA
    FVgHowrLNbEA2HcA
    ekpbh1WJYZWHCeAJ
    WDDKSuUm3IPmfR6P
    • Remove the two 4mm screws using a Phillips #1 screwdriver.

    • This successfully disconnects the SD port from the laptop.

  8. qJaBQ2UBDISPftOF
    qJaBQ2UBDISPftOF
    QNgrLLDTATcRksYF
    • Gently lift and remove SD Card Reader component from laptop.

Conclusion

To reassemble your device, follow these instructions in reverse order.

Gerardo Cardona

Member since: 02/10/18

364 Reputation

0 comments