Introduction
This is a guide on how to replace the hard drive of your HP 15-f162dx. Due to the assembly of the laptop, this process will require a substantial amount of disassembly and reassembly. Before beginning disassembly completely power off the laptop, remove the power cord, and unplug any external devices connected to the laptop.
Tools
Parts
-
-
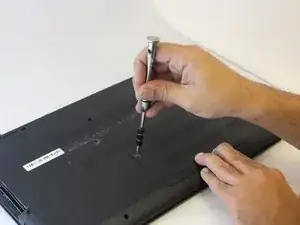
Place the laptop upside down on a hard flat surface.
-
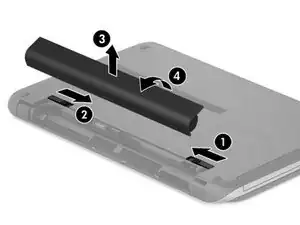
Slide the right release latch to unlock the battery.
-
Slide the left release latch to release the battery.
-
Lift the battery up and away from the computer.
-
-
-
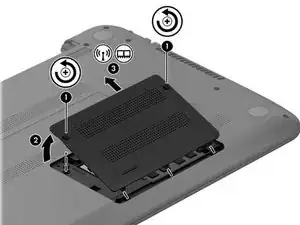
Loosen the two screws holding on the laptops service door.
-
Lift and slide the service door out of the body of the laptop.
-
-
-
Remove the small screw holding in the optical drive.
-
Carefully slide the optical drive out of the laptop and set it aside.
-
-
-
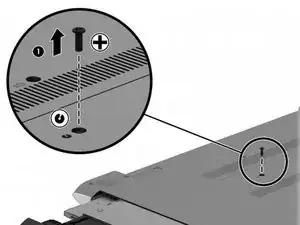
Remove the center screw near the battery slot.
-
Open the lid of the laptop and set it on its side. Insert a spudger into the same hole the screw was removed from.
-
Push the spudger inward until the keyboard is disengaged. Once disengaged, flip the laptop upright.
-
-
-
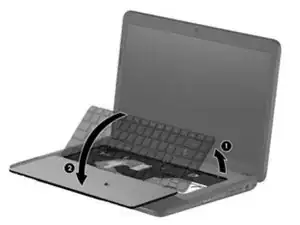
Slide your finger under the keyboard along the top edge of the keyboard to release the keyboard.
-
Swing the keyboard away from the screen and rest it on its face.
-
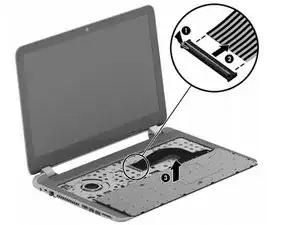
Release the ZIF connecter by lifting the connector tab connected to the keyboard cable.
-
Disconnect the keyboard cable.
-
Remove the keyboard.
-
-
-
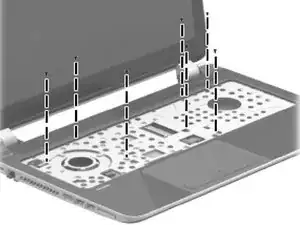
Remove the screws that were underneath the keyboard.
-
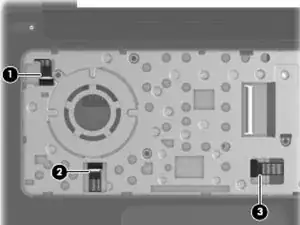
Disconnect the three cables that were underneath the keyboard.
-
Close the laptop lid and flip the laptop upside down.
-
-
-
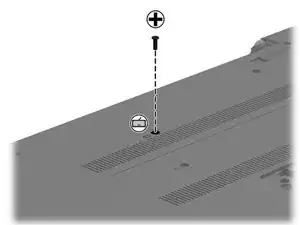
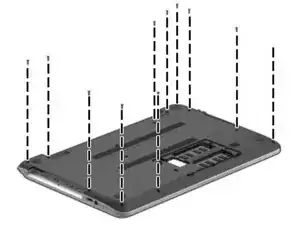
Remove the screws shown.
-
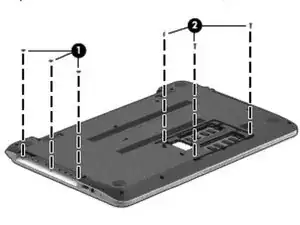
Remove the screws shown.
-
Flip the laptop right side up and open the lid.
-
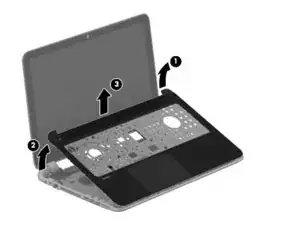
Insert the jimmy in between the top cover and the base and slide it along the edge of the laptop. Repeat for the opposite edge.
-
Swing the upper left and upper right corners away from the screen and lift the top cover away from the laptop.
-
-
-
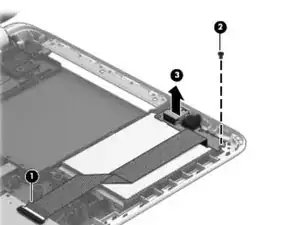
Flip open the ZIF connecter on the USB/Audio cable. Disconnect the USB/Audio cable.
-
Unscrew the screw shown.
-
Lift out the USB/Audio board.
-
-
-
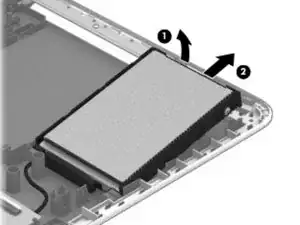
Lift the end of the hard drive that is along the side edge of the laptop.
-
Slide the hard drive out.
-
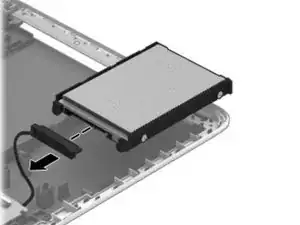
Disconnect the cable attached to the hard drive.
-
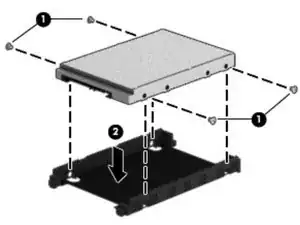
Remove the screws shown.
-
Remove the hard drive bracket from the old hard drive.
-
To reassemble your device, follow these instructions in reverse order.
