Introduction

If your HP 15-ef2025nr laptop is not charging, use this guide to replace your laptop’s battery. The battery is what allows the computer to run the data in the computer which allows it to turn on.

But, before you pull out your screwdriver, see the troubleshooting guide.

See the guide and precautions for a swollen battery first if your device is extremely hot.

Before using this guide ensure that the computer is not plugged in/charging and that the computer is powered off. When working on any electronic device, it is always recommended that you wear a static discharge bracelet because evens small amounts of static electricity can damage electronics.

  1. TINatTGq5kMKPMJN
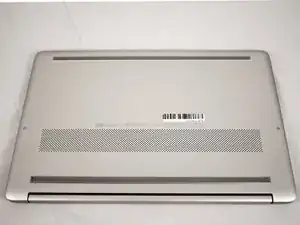
    • Turn the laptop upside down with the hinge facing you.

    You don't need to add the set out materials step--that's what the part above is for! Also, I'd suggest using flipbook style shots as often as possible to show action. It's pretty rare that a step should only have one image.

    Alex Watkins -

    Please be sure to take into account the comments I've already made on the battery guide. It doesn't look like those edits were made yet.

    Alex Watkins -

  2. UdFPJbIXIwuCpQGm
    UdFPJbIXIwuCpQGm
    bDNPbgEProqQKlsM
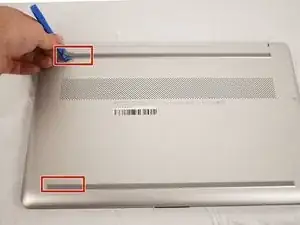
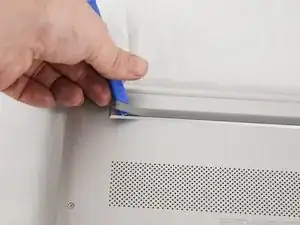
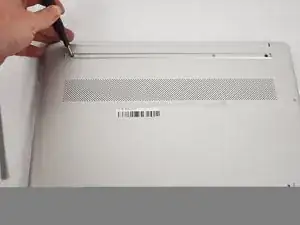
    • Use an opening tool to remove the rubber strips by prying up a corner and gently pulling off the strip.

    For the second part of the first bullet in this step, use a special bullet for additional information. Here's some info on how to use special bullets: https://edu.ifixit.com/include-visual-el...

    I think a "note" bullet would work best here.

    Alex Watkins -

    For the second bullet, what do you want the reader to do? Each step should be an action. I think you might be able to combine this information, or just delete the second bullet and move on to the next step.

    Alex Watkins -

  3. Iry3BiTCUpxRPvfn
    Iry3BiTCUpxRPvfn
    Swws6stcgZRPbXpY
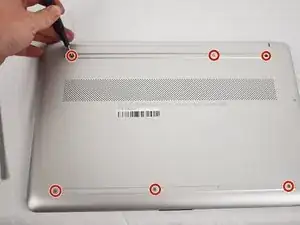
    • Use a Phillips screwdriver to remove the eight 3 mm screws (including the 2 screws that were not under the rubber strips) securing the lower case.

    I'd use markup here to mark the location of screws. You also need to measure all screw lengths. Are all the screws the same, or are they different? If they're the same, use red markup and coinciding red bullets. If they're different, then use red, then orange, etc. (ROYGBIV) to let the user know that.

    Alex Watkins -

    That way, you also don't have to "place screws in the order removed"--they'd be able to do that by following markup and measurements.

    Alex Watkins -

  4. YZOGtn5p1BiABcnD
    YZOGtn5p1BiABcnD
    AmiDCnllGTZMbsCg
    • Flip the laptop over and open the lid.

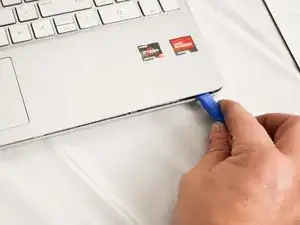
    • Insert an opening tool into the seam between the edge of the lower case and the chassis.

    • Gently pry around the entire perimeter until the lower case separates from the chassis.

    • Close the lid and flip the laptop back over.

    • Remove the lower case.

    Is the use of a metal tool necessary here? Do you have a picture of what it looks like when the backing plate separates?

    Alex Watkins -

  5. lrSFGKW4PtAcvpfS
    lrSFGKW4PtAcvpfS
    muAZHvCpWOAvpJPe
    DZ65aw1yFBDERBJV
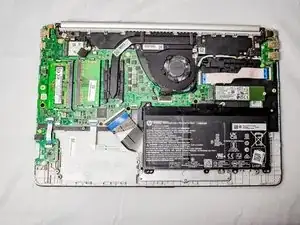
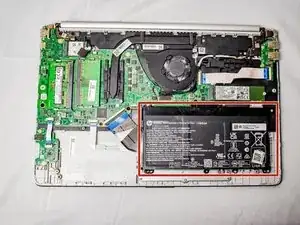
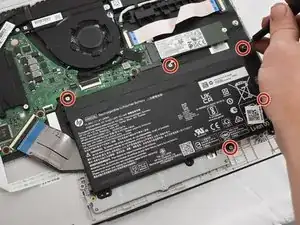
    • Remove the five 2 mm Phillips screws holding the battery down.

    • Take care not to puncture, bend, or twist the battery. Lithium batteries can be very volatile. Follow all proper hazardous disposal laws where you live.

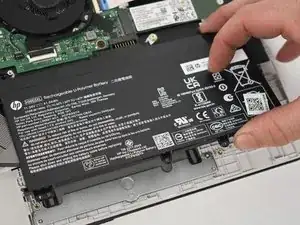
    • Gently lift the front edge of the battery up to disconnect the socket.

    • Lift the battery up and out.

    Remember to eliminate extra words, like "now the logic board..." in the first step and all locate steps. You can use markup to help a reader locate different elements. Use special bullets, like caution. I think there's too much going on in this one step, and not enough images. I also see a ZIF connector hanging out next to the battery--did you need to remove that? how do you do so, if so?

    Alex Watkins -

Conclusion

To reassemble your device, follow these instructions in reverse order.
Maribella Rivera

Member since: 13/02/23

327 Reputation

0 comments