Introduction

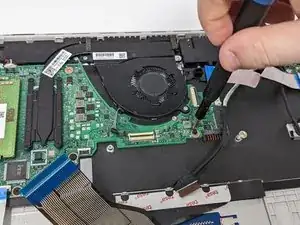
Replacing the motherboard of your HP 15-dy2024nr laptop can be a daunting task. If your motherboard needs to be replaced this guide will help you remove the old motherboard so that you can replace it with a new one.

To remove the motherboard of your laptop, you'll first need to remove the back cover, the battery, and the hard drive.

When removing any chip or board from your laptop, be careful to touch the sides only. Touching any of the components can damage them. If the battery is swollen take extra precautions to safely remove and dispose of it. As with all parts, be sure the laptop is powered off before removing the battery. Before removing or replacing any part, be sure the laptop is powered off. If you are unsure, turn the laptop on, then shut it off from the start menu.

  1. ANQ2tBtq5L16noAt
    ANQ2tBtq5L16noAt
    ot4D5TnWuYZfjf2E
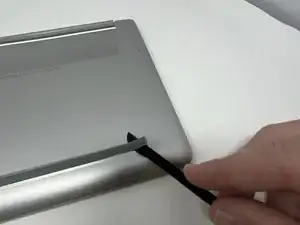
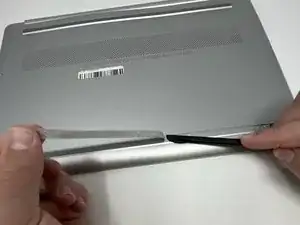
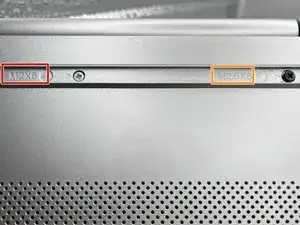
    • Use a spudger to peel one corner of each of the rubber feet from the bottom of the laptop.

    • Gently peel the feet from the laptop using the spudger revealing the screws underneath.

    • If the rubber foot peels away but leaves adhesive behind you must peel the adhesive away before removing the screws.

  2. evJvbP1NdEXQ22TY
    evJvbP1NdEXQ22TY
    hF6q4CihNgZPJM1H
    fPNlY1HQsUrnDfZX
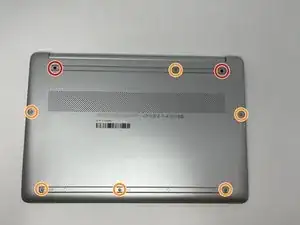
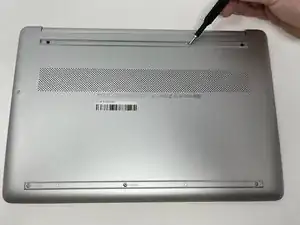
    • Use a Phillips #1 screwdriver to remove:

    • Two 2.5mm x 6mm screws

    • Six 2mm x 6mm screws

    • Be sure to keep different screw sizes separated.

  3. Zph4BmunnKNFEjgQ
    Zph4BmunnKNFEjgQ
    UOADtpNLfnrBOW3W
    mIkiPnRovqSLe4oQ
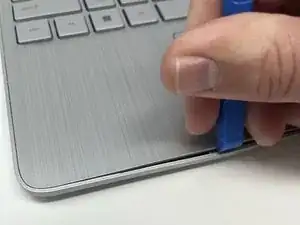
    • Insert an iFixit opening tool into the seam between the keyboard area and bottom cover.

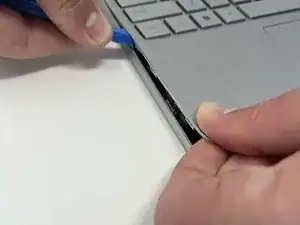
    • Using another iFixit opening tool, slide along the seam to unhook the clips.

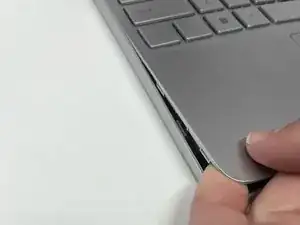
    • There are clips all the way around the seam. You may hear a popping sound as the clips come loose. This step may require some force to separate the back cover from the laptop.

    • When the front of the laptop is open, you can use your finger to hold a corner open then slide an iFixit opening tool along the seam toward the back corner.

    • After the clips have been released, flip the laptop over and lift the cover.

  4. PHfZY5ppya5b5M46
    PHfZY5ppya5b5M46
    pZOZGbLXhsVspwVf
    1qbpRSVCJURGQcC2
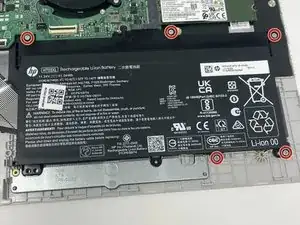
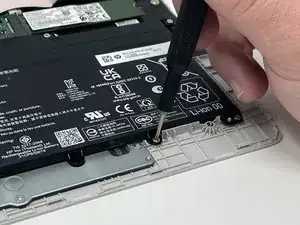
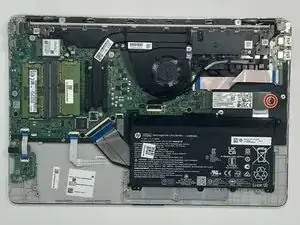
    • Remove five 2.0mm x 3.0mm screws using a Phillips #00 screwdriver.

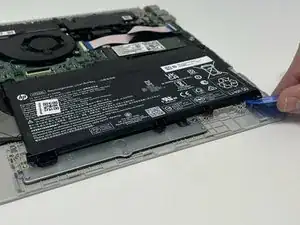
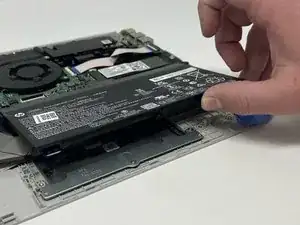
    • Use the iFixit opening picks to lift the battery away from the laptop.

  5. ckpkktPTElQiJAck
    ckpkktPTElQiJAck
    xPZhQN32wGWKQCPe
    6yWnOVHNlyI3weY3
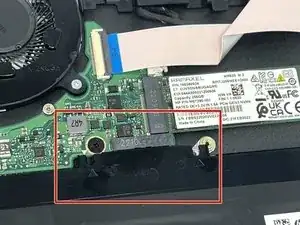
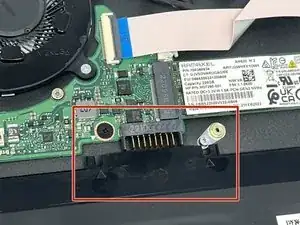
    • Be aware that the battery is plugged into the motherboard.

    • Unplug the battery from the motherboard.

    • Lift the battery away from the laptop and remove.

  6. jts6AOepQTN1RAJU
    jts6AOepQTN1RAJU
    LQCcZFwq3JhNq3Df
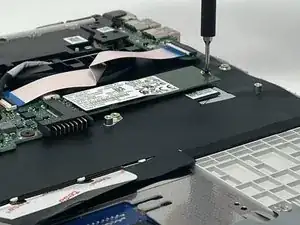
    • Remove the single 2 mm screw from the hard drive using a Phillips #00 screwdriver.

  7. 4aIF1fC4IDMkCLpm
    4aIF1fC4IDMkCLpm
    vPRCi5vR4iMLbJ5X
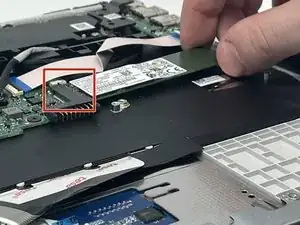
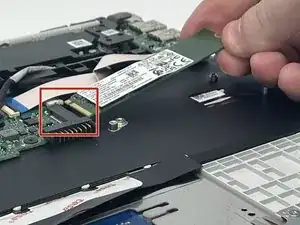
    • Pull the SSD away from the connector, while gently lifting it out using your hands.

  8. PPqrU6IMFViCoJPg
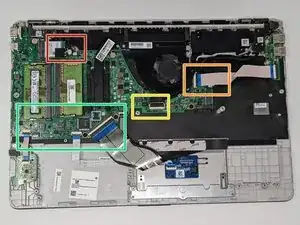
    • Locate each cable connected to the motherboard.

    • WLAN Module Antennas & Speaker Cable.

    • USB Board Cable & Power Connector.

    • Display Cable & Fan Cable.

    • Keyboard, Touchpad, & Card Reader Cables.

    • Note that there are at least 9 cables to disconnect from the motherboard, however there may be more cables depending on any additional features your model has such as fingerprint readers or keyboard backlights. All cables are removed using the same methods demonstrated in this guide.

  9. kfKDQAZYyl1avVnA
    kfKDQAZYyl1avVnA
    VXAKjs4vEFUhwSXQ
    p2uT6gcFCdmIBlkK
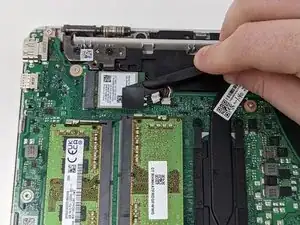
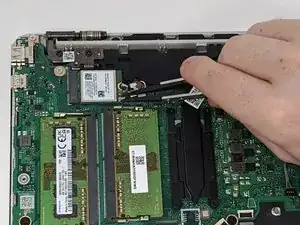
    • Locate the WLAN module near the left display hinge.

    • Use the blade end of the spudger to remove the black square sticker covering the WLAN cables.

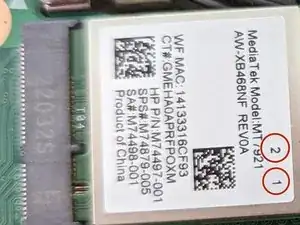
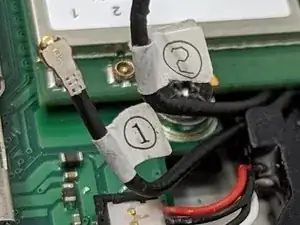
    • Note the number labels of each antenna cable and the numbers on the WLAN module antenna connectors. This detail will be important later during the reassembly of the laptop.

  10. QeD4SNETbhZKbPnk
    QeD4SNETbhZKbPnk
    aYrEtXfWQA5Z3bi4
    NOBmgClnv2AciVZo
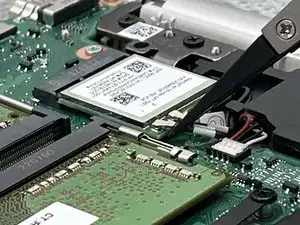
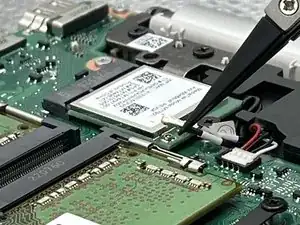
    • Remove the two WLAN antennas from the WLAN module using the nylon reverse tweezers.

    • Only grasp the antenna cables from the connector ends; do not pull on the cable.

    • The solder points for these connectors on the WLAN module are fragile and can easily break.

    • These antennas are clipped into the WLAN module using a similar mechanism to a denim snap button. Pulling the connector off at a slight angle will be more effective than pulling it straight up.

  11. DxTFbvbPPL2w5lXc
    DxTFbvbPPL2w5lXc
    eMvVr3JRf5umC5WQ
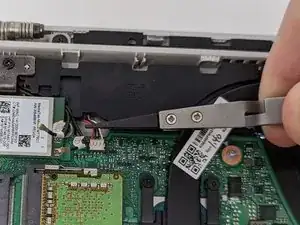
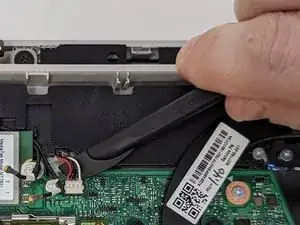
    • Use the nylon tipped reverse tweezers to lift the speaker cables up.

    • Do not use the tweezers to pull the cable out.

    • User the blade end of the spudger to pry the speaker connector up from between the connector and the motherboard.

  12. IDgeUsGPsC2mMSAc
    IDgeUsGPsC2mMSAc
    cJKSWZhp1dACIQIV
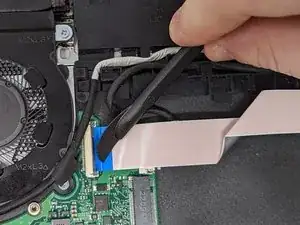
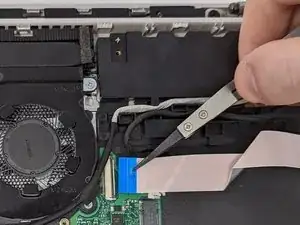
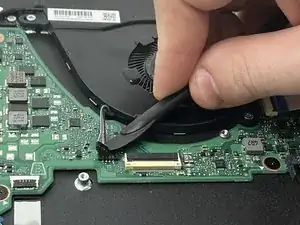
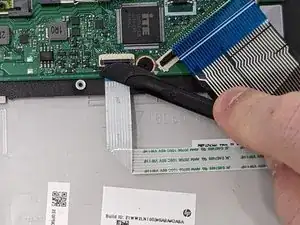
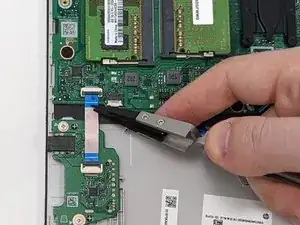
    • Use the blade end of the spudger to lift the black retaining clip.

    • Use the nylon tipped reverse tweezers to grip the blue tab on the ribbon cable and pull it gently out of the socket.

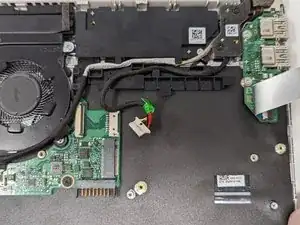
    • After the cable is out of the socket, move the cable out of the way to get to the power connector underneath.

    • Be careful not to fold or bend the ribbon cable too severely.

  13. TuLFgOZSJcyop3JF
    TuLFgOZSJcyop3JF
    KvEorhDNGEoKeKn1
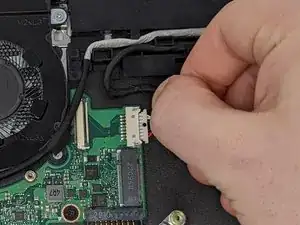
    • Grasp the power cable firmly and lightly tug on the cable. You may need to grab the connector end and wiggle it out of the socket.

    • Be sure to grasp all of the cables bundled together or the connector end itself; do not tug on one wire at a time.

  14. 5iiFTSjLYJ2fc2tu
    5iiFTSjLYJ2fc2tu
    3UFByLDXUSC1B2Tf
    uVwpoZ3pUWEZwdd4
    • Use the blade end of the spudger to lift the black retaining clip.

    • Ue the nylon tipped reverse tweezers to grip the black ribbon cable and pull it gently out of the socket.

    • Avoid folding or bending the ribbon cable too severely.

  15. uNKNCGJm4iUlFxTn
    uNKNCGJm4iUlFxTn
    gVPlx5Yjxy6Dcg3U
    4qIVq1Byi6AxOSe5
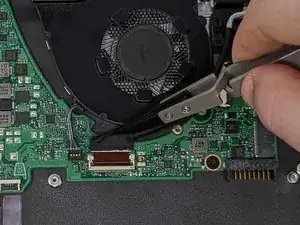
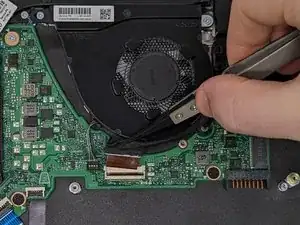
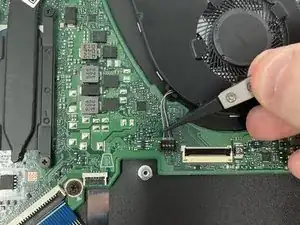
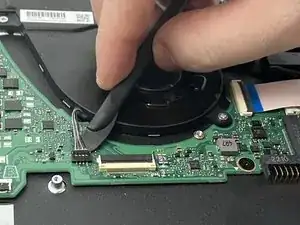
    • Use the nylon tipped reverse tweezers to lift the cables up from off the motherboard.

    • Do not use the tweezers to pull the cables off the motherboard.

    • User the knife end of the Halberd spudger to wedge between the black plastic connector and the motherboard. Lightly twist the spudger blade up. The connector should pop off.

  16. 1SsjZAhmHB2jgb5N
    1SsjZAhmHB2jgb5N
    e6L2GUwLuLyMsfkU
    YNbwefLWJEXKVHEf
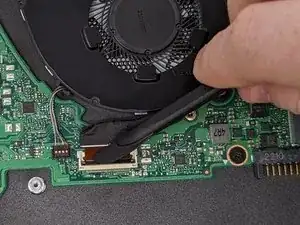
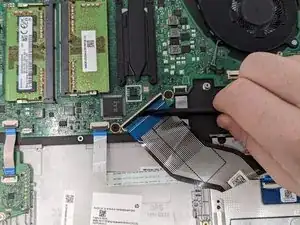
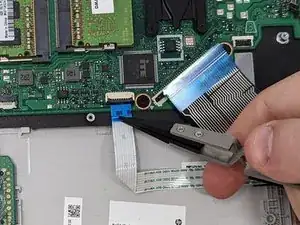
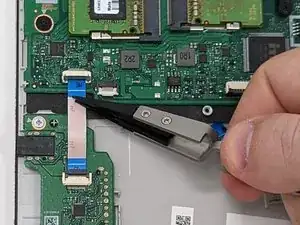
    • Use the blade end of the spudger to lift the black retaining clip.

    • Use the nylon-tipped reverse tweezers to grip the blue tab on the ribbon cable and pull it gently out of the socket.

    • Avoid folding or bending the ribbon cable too severely.

  17. B3gFTD6WyERMVXXr
    B3gFTD6WyERMVXXr
    U2WhBpEpKOjTNuJe
    dpqof5sPDFLCEsXa
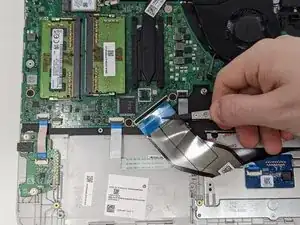
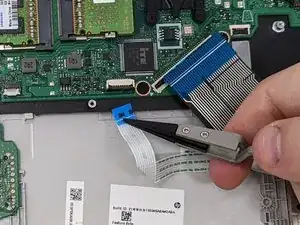
    • Use the blade end of the spudger to lift the black retaining clip.

    • Use the nylon-tipped reverse tweezers to grip the blue tab on the ribbon cable and pull it gently out of the socket.

    • Avoid folding or bending the ribbon cable too severely.

  18. UlM1estgaThDXGvu
    UlM1estgaThDXGvu
    3LQ5IMHQxIDU4daX
    KNnfvtVjQcECwSZY
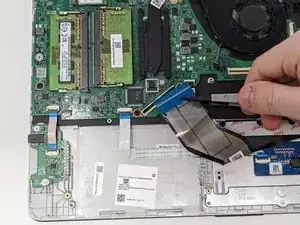
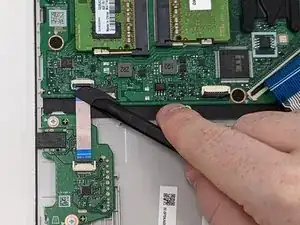
    • Use the blade end of the spudger to lift the black retaining clip.

    • Use the nylon-tipped reverse tweezers to grip the blue tab on the ribbon cable and pull it gently out of the socket.

    • Avoid folding or bending the ribbon cable too severely.

  19. SfsEMa1iVKMLWNfJ
    SfsEMa1iVKMLWNfJ
    JUdkPyPed34w2xnH
    tEQVshjZJRHZGwEx
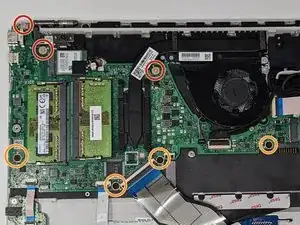
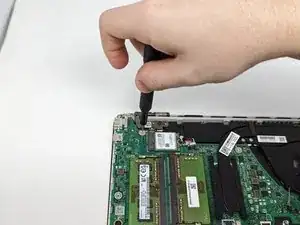
    • Remove the three 3 mm chrome-plated screws using a Phillips #0 screwdriver.

    • Remove the four 2 mm black wide-head screws using a Phillips #0 screwdriver.

  20. BnCOJiOnZoBRyrdQ
    BnCOJiOnZoBRyrdQ
    ZC642RGA6oVToAKH
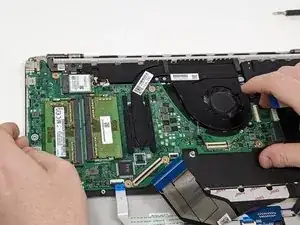
    • Grasp the motherboard by the edges. Lift the motherboard out of the laptop.

    • Be sure not to let any cables get caught on the motherboard as you lift if out of the laptop.

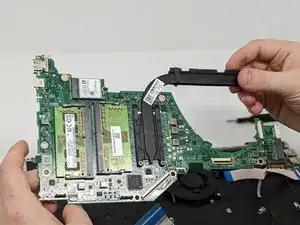
    • The cooling pipe and heatsink will come off with the motherboard. It will slide out from the back of the laptop by the hinge.

Conclusion

To reassemble your device, follow these instructions in reverse order.
Nathaniel Reeves

Member since: 28/09/22

366 Reputation

0 comments