Introduction

If your device is over heating excessively, and running loudly, the fan may need to be replaced. Follow this guide to correctly remove it.

  1. 5ekgiaIUE5Fx21cF
    5ekgiaIUE5Fx21cF
    mfISxJR4GtU2u2AA
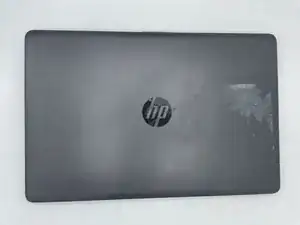
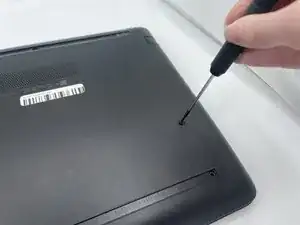
    • Turn the laptop off and unplug it before starting.

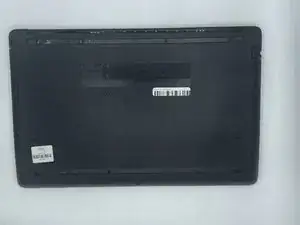
    • Flip your laptop over, face down.

  2. QGQlM3aKotfqUK2Z
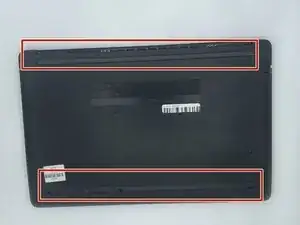
    • Peel off the two long rubber grips running lengthwise on the laptop.

  3. 6pWBmIuvVIVFQTAB
    6pWBmIuvVIVFQTAB
    k1nQ4KOLEKNltf1q
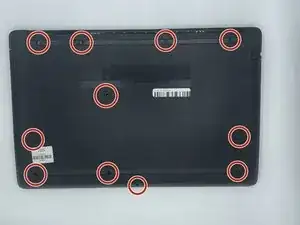
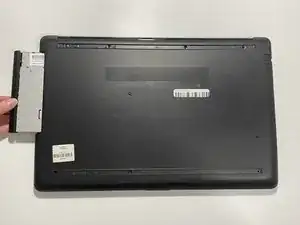
    • Using a Phillips #000 screwdriver, remove the eleven 10 mm screws located on the underside of the laptop, that are holding the back panel in place.

  4. IZCVJMQK1QifktNc
    • Carefully slide the optical drive out of the laptop.

  5. xXTkUukUahFJOf2K
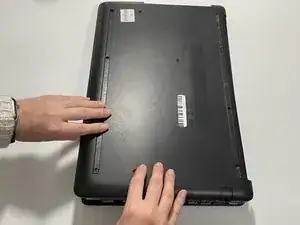
    • Use a plastic opening tool to separate the back panel from the laptop.

    • For an easier removal, start at the corner and run the tool along the edge of the cover.

    • If you do not have a plastic opening tool, open it carefully using your hands, as shown.

    • Be careful to not bend the back panel, or to not apply too much pressure and force, doing so could cause the panel to break.

  6. YYED234IgWXGxAav
    YYED234IgWXGxAav
    pk2ufLUWlHTAivBo
    teHAGJ2SPiC5UTDD
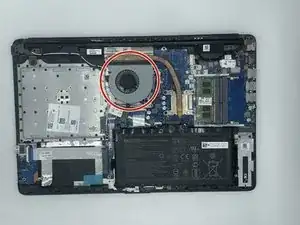
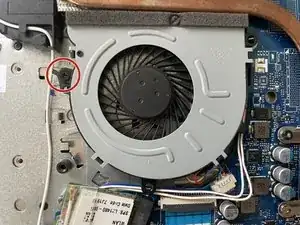
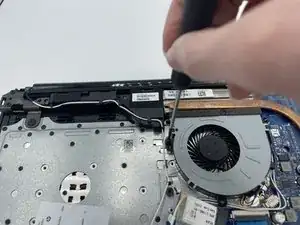
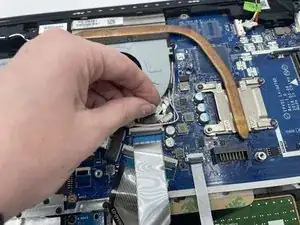
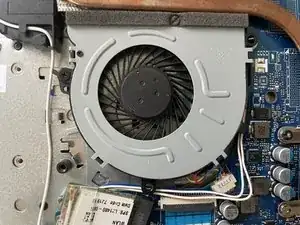
    • Using a Phillips #000 screwdriver remove the 5mm screw holding the fan in place.

  7. 2C55TscTC3WtsdKj
    2C55TscTC3WtsdKj
    MfBSXpMJMVhPCYLt
    ODIREPIIokQRclSI
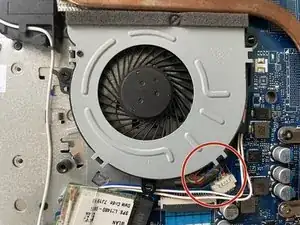
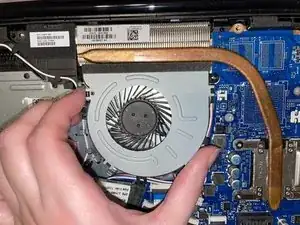
    • After the screw is removed, carefully unplug the set of wires with one of each colored, red, black, yellow, and blue, from the white connector it is secured at.

    • To unplug it gently pull the white connector from the adapter, possibly in a back and forth motion to free it.

    • DO NOT pull on the wires, doing so could cause damage to the wires, or for them to become disconnected to the white adapter they are attached to.

  8. 1D25hLVi2UlGiQBp
    1D25hLVi2UlGiQBp
    VpQQCcDHSNUAV1fa
    rhuLKpGWseUHxfGX
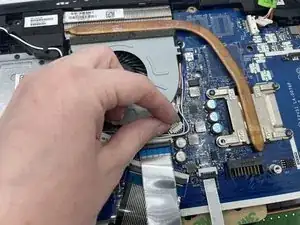
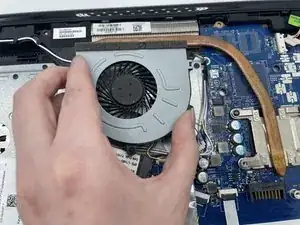
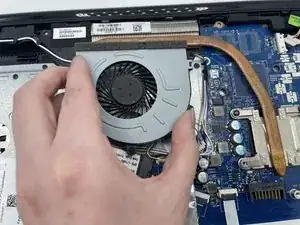
    • Carefully remove the fan from the laptop.

    • Be careful with removal as to not bend or break anything. There is a metal peg shown in the image, that the fan is secured on that could potentially bend

Conclusion

To reassemble your device, follow these instructions in reverse order.
Britanni Arizola

Member since: 22/09/22

562 Reputation

0 comments