Introduction

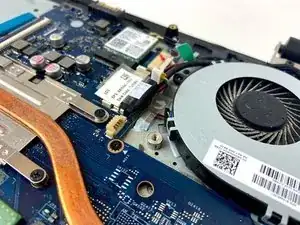
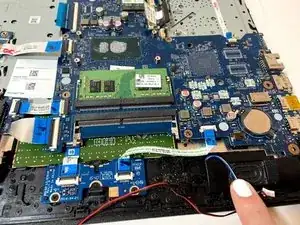
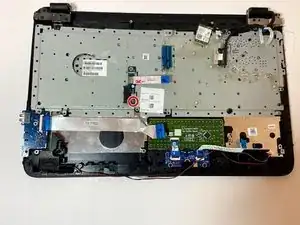
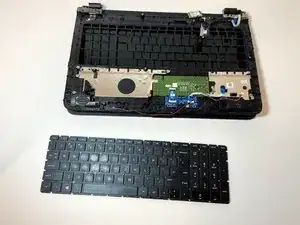
This guide will teach you how to replace the keyboard on your HP 15-ay114cy laptop. This process is estimated to take around one hour and is a very invasive procedure. We recommend following the instructions exactly and taking pictures along the way to ensure screws and parts are reassembled appropriately. We also recommend the use of eye protection when using the metal spudger to pry the panel from the keyboard and a broom or vacuum to clean up the plastic dots after the fact. Happy fixing!

  1. eqLBV6JxA43aGHra
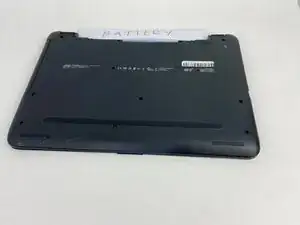
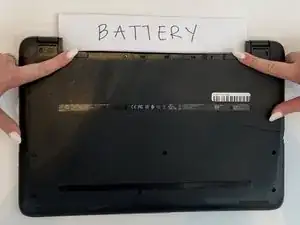
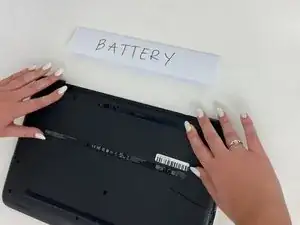
    • Orient the Laptop so the HP logo is facing the table and the battery tabs are accessible.

    • Ensure the laptop is powered off before moving forward.

    Make sure to use a caution bullet here.

    Alex Watkins -

  2. FoJDEsSV2QJITwVe
    FoJDEsSV2QJITwVe
    uZmZmRMbK6tXtKTA
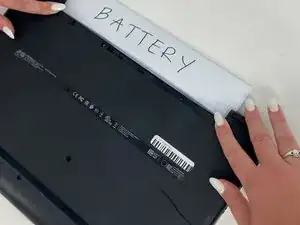
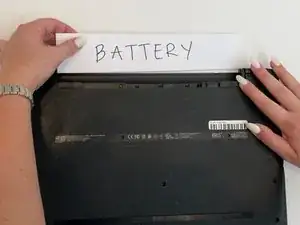
    • Place your index fingers on each of the two battery holder clips.

    • Using your index fingers, push the battery holder clips inwards (towards the center of the laptop).

    Try to avoid reorienting the device between the two steps. This change kind of disrupts the flipbook style.

    Alex Watkins -

  3. mMiRsTiF33AmGBqv
    mMiRsTiF33AmGBqv
    D2YIHknfGBYCRFVL
    • After the battery clips are pushed in, use either hand to grab hold of the battery.

    • Gently push up to remove the battery.

    Make sure to use end punctuation on all steps. Also, for the last bullet—can you think of a stronger verb that indicates how to do this? E.g., gently pull? Forcibly yank? etc.

    Alex Watkins -

  4. xqmcMLahciWoQe2d
    xqmcMLahciWoQe2d
    Ha3jTZIhRXSgl6TO
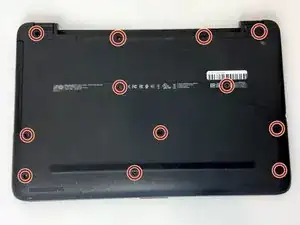
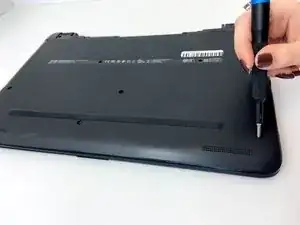
    • Use a Phillips #0 screwdriver to remove the twelve 8 mm Phillips screws that are holding down the bottom cover of the laptop.

    Here, you could just include the second bullet and the red markup. If you ever do use two tiers of markup, then move to orange, not yellow.

    Alex Watkins -

  5. TgTyuqHrJVYYXTNj
    TgTyuqHrJVYYXTNj
    GFcXbM2huoRqRGc6
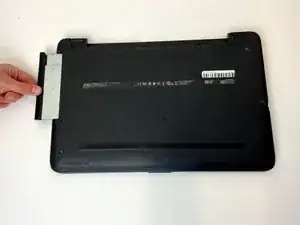
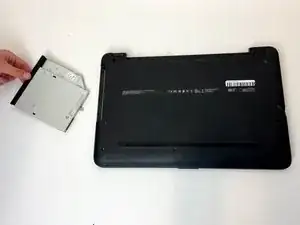
    • Grab a hold of the disk drive and carefully pull it away from the computer.

    • Continue to slide the disk drive out of the laptop until fully removed.

    • Due to the removal of the battery, no power is available to open the disk drive through the use of the eject button.

    • Make sure to pull out the disk drive at a 90 degree angle as demonstrated. Do not attempt to wiggle the drive out of the laptop.

    • There will be resistance when removing the drive. Mishandling may cause broken wires, which could make your disk drive inoperative.

    How do you open the disk drive? Aren’t you already holding it when you’re sliding it out? What changes? How can the user avoid mishandling, e.g., applying force without damaging the device?

    Alex Watkins -

  6. sld1rXFmDPA1CAia
    sld1rXFmDPA1CAia
    4MagQELq4TafAP1T
    uFF5ONmJFnvxDxh2
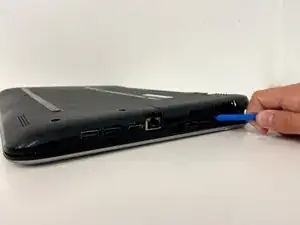
    • Place a plastic opening tool in-between the upper and lower pieces of the bottom cover.

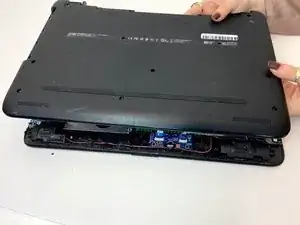
    • Using your hands and the plastic opening tool, gently separate the cover from the frame.

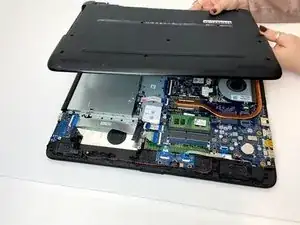
    • Slowly remove the bottom cover from the base of the laptop.

    • Using metal pry tools can damage your device.

    Here, I think there are a couple of things—it looks like the first shot shows two people completing the repair. Is that necessary? Also, try to take shots solely from the first-person perspective.

    Alex Watkins -

  7. UecONq2FJx1Nj2dQ
    UecONq2FJx1Nj2dQ
    UlqxwnG1TUhRTTDs
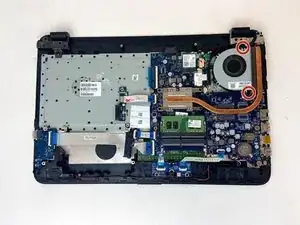
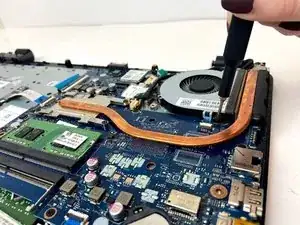
    • Use a Phillips #0 screwdriver to remove the two 8 mm Phillips-head screws that attach the fan to the base.

    With all locate steps, combine and condense. I’ve not marked this elsewhere.

    Alex Watkins -

  8. wTaKX1HSmoxuZdWJ
    wTaKX1HSmoxuZdWJ
    RIaIxZrMsP2iSGHW
    kykCpPD42yLmLhfc
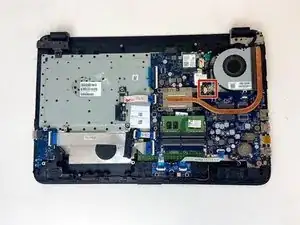
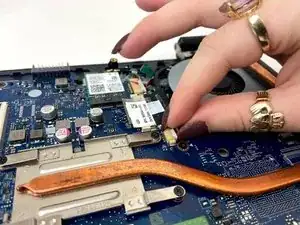
    • Using your index finger and thumb, carefully grab the wire that connects the fan to the motherboard.

    • Using a bit of force, remove the cable from the connector on the motherboard.

    Make sure to start over with ROYGBIV. Instead of the last shot, do you have a picture where the wire is slightly disconnected?

    Alex Watkins -

  9. EQXkEoMohLtw5TUx
    EQXkEoMohLtw5TUx
    Ak5n1nwgHZvbpNwl
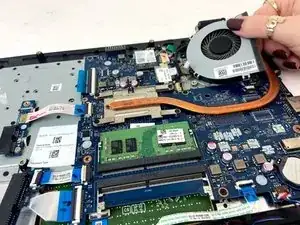
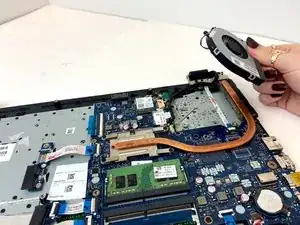
    • Using your hand, grab one of the fan corners and pull up.

    • Carefully remove the entire fan from the base of the laptop.

  10. MOVAM2LJuEdkwvwq
    MOVAM2LJuEdkwvwq
    IkgJ5n54sBxZToBa
    XcLH31GNGSNQyEDD
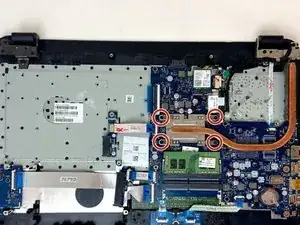
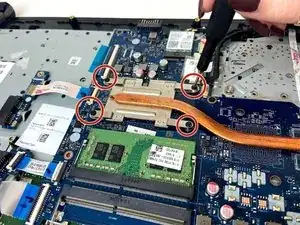
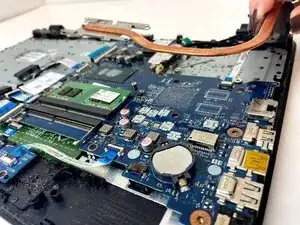
    • Using the Phillips #0 screwdriver, unscrew the four 2 mm Phillips-head screws that secure the heatsink to the laptop base.

    • Grasp one end of the heatsink and then carefully lift up to remove it from the laptop base.

    Proofread the first step.

    Alex Watkins -

  11. 6sFCsOZAXqDy3HFI
    6sFCsOZAXqDy3HFI
    KvY3QI5CIv4Wvbem
    Rh3yXuPOD651WRAc
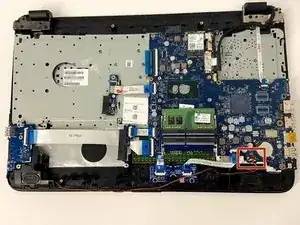
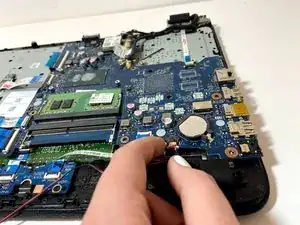
    • Using your index finger and thumb, gently grasp the speaker cable and pull it from the connector.

    • Move along the speaker wire and ensure that none of the wiring is caught on other components or mounting tabs.

    • Remove the speakers.

    I would suggest adding markup to the first image. Can you be more clear in the third bullet about how to remove it? Remove is a non-specific verb, so if you use it alone when something can be done multiple ways, it introduces ambiguity.

    Alex Watkins -

  12. hHVqA3gdVDHW113u
    hHVqA3gdVDHW113u
    DhNAWqZenobOjXI6
    aWMC1Seuiw64VCWs
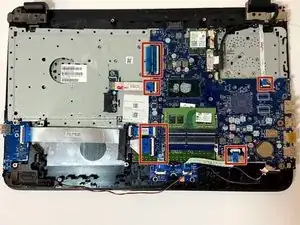
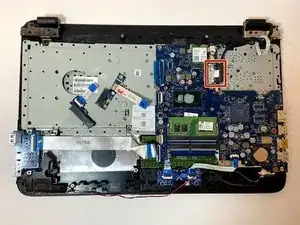
    • Place your index finger on the plastic ridge of each of the seven ZIF connectors connected to the motherboard.

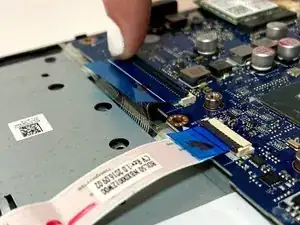
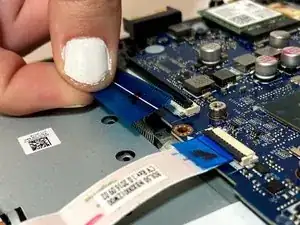
    • Using your index finger, flip up the black tabs on each of the connectors to release the cable.

    • Gently pull each the wired connections from the motherboard.

  13. SRAP5mKbvLOfSpbN
    SRAP5mKbvLOfSpbN
    bN6yGU5nBwbLgLQo
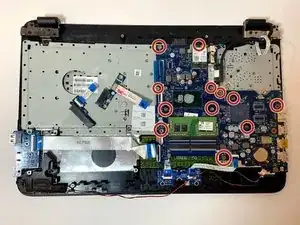
    • Using a Phillips #0 screwdriver, unscrew the twelve 2 mm Phillips-head screws that secure the motherboard to the laptop base.

  14. fBNtsiypTL4Xbkc3
    fBNtsiypTL4Xbkc3
    fMIyr63PlMWIdTDK
    eJdUpOJUYXkouJBX
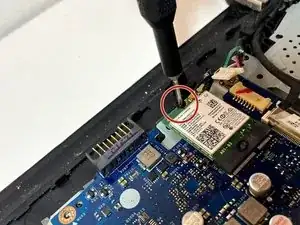
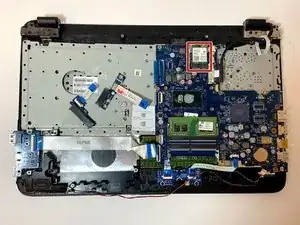
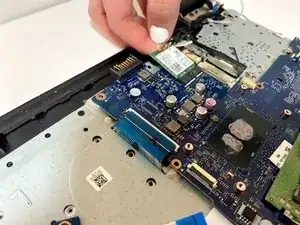
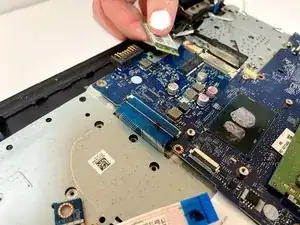
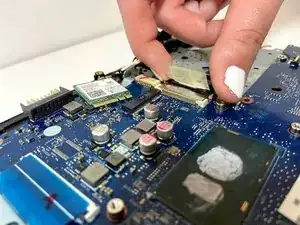
    • Use your index finger and thumb to gently grasp the green wireless card, then pull the card horizontally out and away from the motherboard.

    Proofreading issue here. How do I remove it? I think condensing all these steps into one bullet would help you address the issues happening here.

    Alex Watkins -

  15. 5oUnuJNOUIbCHJUJ
    5oUnuJNOUIbCHJUJ
    24uSpXBlbFVrijLM
    BSuZlIIHmrtY51tL
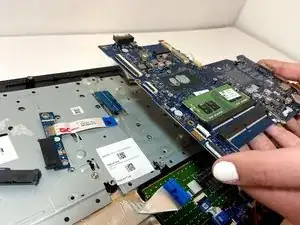
    • Use your index finger and thumb to gently grasp the display connector and remove it from the motherboard.

    • Carefully grasp an end of the motherboard and gradually lift it up and away from the laptop.

    Proofreading (you/your).

    Alex Watkins -

  16. sLqMbbKZWUBGOdaG
    sLqMbbKZWUBGOdaG
    Cbi6lR2K4quEjbke
    JUaYqEYYDUVyYeZu
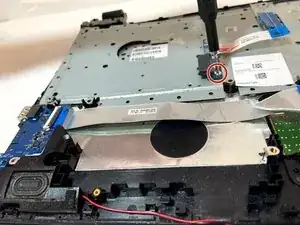
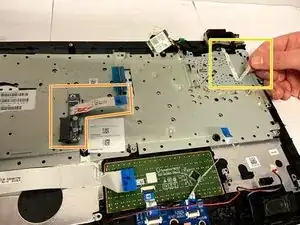
    • Unscrew the silver 2 mm Phillips #0 screw holding on the blue circuit/dock and place it to the side.

    • Gently lift up to remove the blue circuit board from the silver panel.

    • Peel the 3M tape towards the battery compartment to un-stick it from the panel.

    • Note: Check for any other screws which may prevent you from removing the silver panel.

    What should I do with the screw? How can I remove the circuit board? Do you have pictures of you taking off the tape? Avoid using arrows.

    Alex Watkins -

  17. jwEALqJKpmjQPLye
    jwEALqJKpmjQPLye
    LIS5cTmGUcsHfoDw
    WAPQEUvylEyCJQ5P
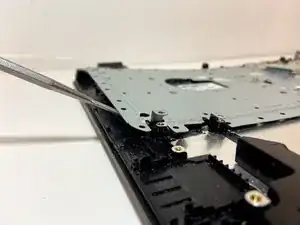
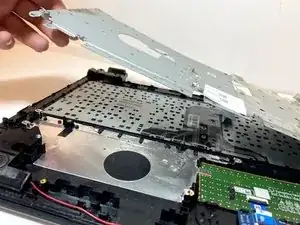
    • Insert the flat end of the metal spudger into one of the panel corners and lift up on the pry tool. This action will separate the panel from the laptop frame.

    • Steadily pry around the edges of the rectangular panel in a clockwise rotation.

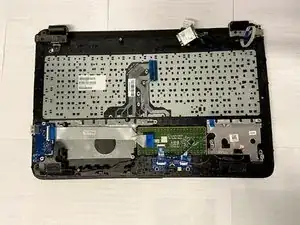
    • Lift up the silver panel cover to remove it and place it to the side. This will reveal your keyboard assembly.

    • When using the pry tool to separate the panel, you will hear popping and also will see small plastic bits break off of your device.

    • Due to the likelihood of plastic projectiles, we recommend the use of eye protection when performing this task.

    • Using the metal spudger pry tool may damage your device. Be careful not to put too much pressure on the plastic frame, as it may cause bending and cracking.

    The first bullet is wordy. Try “Insert the flat end of the metal spudger in one of the corners (of what?) and lift up…” This step should be separated significantly with more pictures of you removing the keyboard. Avoid using arrows.

    Alex Watkins -

  18. hWWedHFMMBQ2QFTJ
    hWWedHFMMBQ2QFTJ
    goYU2Tn3LuDumijI
    WK5ZkcAy6bJpmccU
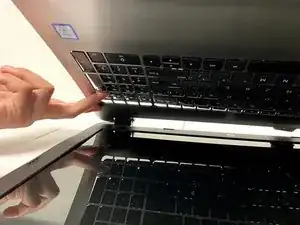
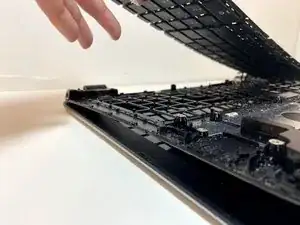
    • Carefully open the laptop and push up on one of the keys. This will allow you to grab the keyboard from the edge and remove the keyboard assembly from the device.

    See below step.

    Alex Watkins -

Conclusion

To reassemble your device, follow these instructions in reverse order.
Bradley Evans

Member since: 24/01/20

613 Reputation

0 comments