Introduction

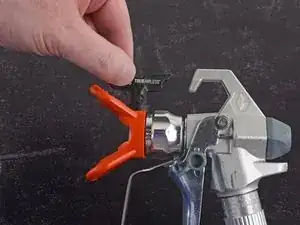
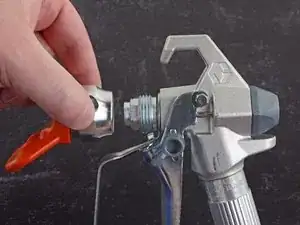
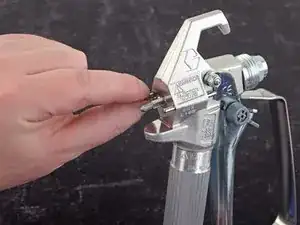
Follow this guide to disassemble and rebuild a leaky, clogged, or otherwise improperly-working spray gun for the Graco Paint Sprayer, model 17C325.

As you disassemble the spray gun, take the time to clean all the parts with soap, water, and a brush before reassembly, and replace any worn-out parts as needed, which are provided in the gun repair kit (part # 288817).

The filter is not included in the repair kit, but it may be a good idea to clean or replace it during the rebuild process.

  1. fFeZSU2juAiqsO6q
    fFeZSU2juAiqsO6q
    jsOurSmcntkpCIv1
    • Before you begin, make sure to follow the pressure relief procedure documented in the user manual before disconnecting and disassembling the spray gun.

    • Pull the spray tip straight up and out of its housing near the front of the spray gun.

  2. M3yONVmCuBX1iJQG
    M3yONVmCuBX1iJQG
    VgnVo1GAARFQgKA1
    3N5iDAvTZwbhGcyO
    • Use your fingers to unscrew and remove the nozzle guard.

    • You may need to use an adjustable wrench to loosen the nut.

  3. QgGrDHF2CYMXEGdM
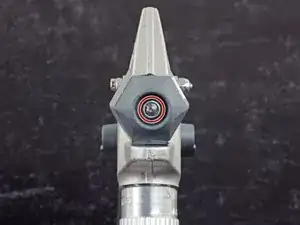
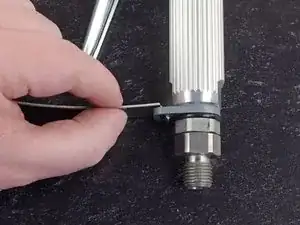
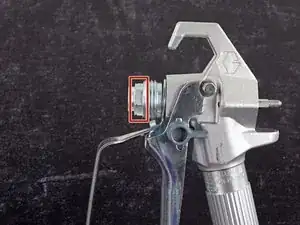
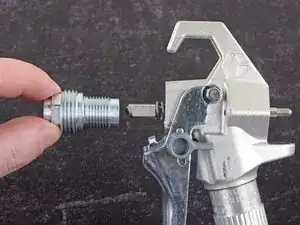
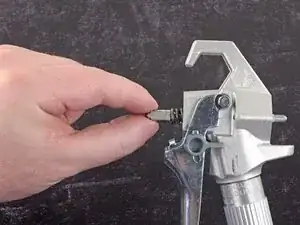
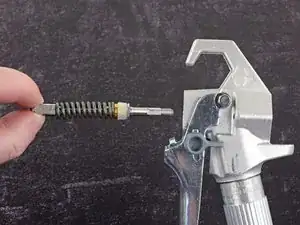
    • Use a 5/16" socket and socket wrench to remove the lock nut securing the end cap on the back of the spray gun.

    • Replace the lock nut with the new lock nut included in the gun repair kit.

  4. 4KAPBrrNSBMHeaHV
    4KAPBrrNSBMHeaHV
    KQiN3ITMyhn5FR2G
    MTqdF3KkVRwcSOyw
    • Pull the end cap straight off the end of the spray gun.

    • Reassembly Tip: Make sure the holes on the end cap line up with the actuator pins and needle.

  5. dieci5dCn6SrjmqH
    dieci5dCn6SrjmqH
    FjdBFK1i6UMU2UR6
    1X13yThMBZAcwHGK
    • Pull the two actuator pins straight out of the spray gun.

  6. gIuRc4ScYNljvmyE
    gIuRc4ScYNljvmyE
    kk262tDlIXvbqSwC
    B5hpbikOg2NAwdGS
    • Push up on the trigger guard to unseat it from its clip at the bottom of the handle.

  7. QgNCo5LFcZ1BfAwN
    QgNCo5LFcZ1BfAwN
    htggFqwLqi4cptBE
    • Use a 5/8" wrench to remove the valve seat from the front of the spray gun.

    • This will also allow you to completely remove the trigger guard.

    • Replace the valve seat with the new valve seat included in the gun repair kit. Torque the valve seat to 26-32 ft. lb during reinstallation.

    How in the F do you get that part out without breaking the gun?!?!

    Bryan Ruth -

  8. QaTpvJkCRImm2RMV
    QaTpvJkCRImm2RMV
    Ee3sIRYPAUYUikIQ
    • Grab the front tip of the gun needle and pull it straight out of the housing.

    • Replace the needle with the new needle included in the gun repair kit.

    part replacement/ordering information would help.

    WILLIAM -

Conclusion

To reassemble your device, follow these instructions in reverse order.

Craig Lloyd

Member since: 10/02/16

35240 Reputation

6 comments

if you use this procedure you brake your gun

YURIY -

Hi YURIY,

To help us improve the guide, can you please elaborate what would break? Any specific steps? Any extra detail would help. Thanks!

Arthur Shi -

I can't break the tip loose. The piece that u screw the tip on to. I can't break it loose.

William Pinkston -

Amazing post. keep sharing

Laura M -

From factory, or after use, they are screwed in incredibaly tight. I coulnd't get the valve seat to budge. I'd avoid using an adjustable wrench since those sometimes come loose and strip the nut. The gun repair kit is about $70-$100. HD sells the entire gun for $150, which includes a 515 tip, orange spray tip guard, and new filter inside. Probably better to buy. Great guide though. If the needle can be cleaned to stop the post-release leak, then its probably OK to keep it. Else new gun may be a better option.

Y Woo -

When you screw the new seat in you must first have the nut screwed all the way bottomed out. Then have the trigger valve pulled back so to not make contact between the seat and valve while screwing it on the gun or it will damage the new valve and seat mating surfaces causing the gun to leak. then back the nut off till it seals.

BRIAN -