Introduction
The Grace Digital MONDO is a fairly easy device to deconstruct. The replacement of a display glass includes mainly removing screws, so, as long as you're content on the whole "lefty loosey, righty tighty" phrase, you should be well off for this guide.
Tools
-
-
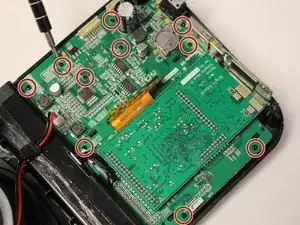
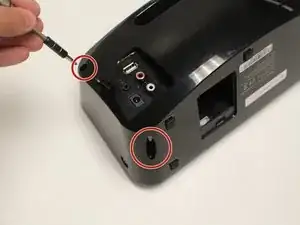
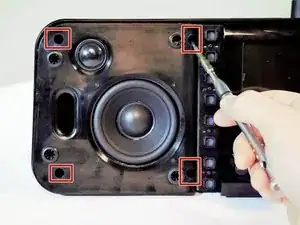
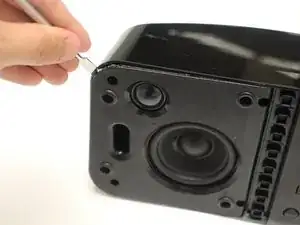
Remove (2) screws (14 mm) with a PH1 screwdriver on the device.
-
There is one screw on the back left, and another just below it on the bottom of the device.
-
-
-
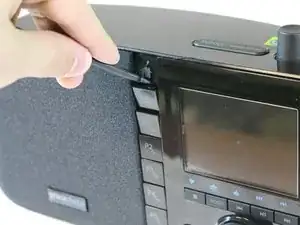
Use a plastic spudger to remove the front preset selection buttons.
-
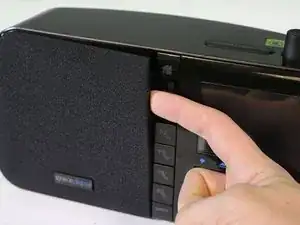
Gently reach underneath and pull off the mesh speaker cover. It only clips in so don't worry about breaking anything.
-
-
-
Move the metal spudger around the front panel to remove any adhesive attaching the front panel to the device.
-
Pull apart the front panel from the device with help from the metal spudger.
-
-
-
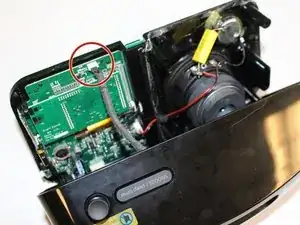
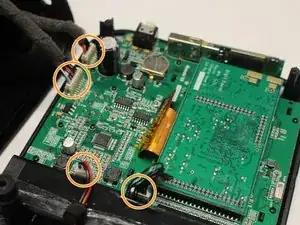
Detach a pin connector at the top of the device using a metal spudger to open up the inner components.
-
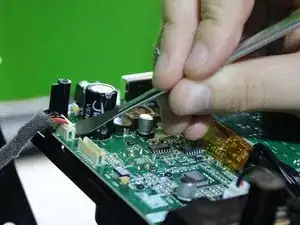
Detach (4) pin connectors inside using a metal spudger to separate the front panel from the rest of the device.
-
-
-
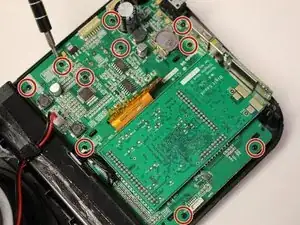
Separate the display and motherboard from the front panel of the device.
-
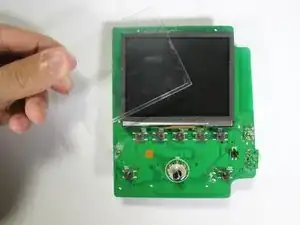
Remove the display glass.
-
To reassemble your device, follow these instructions in reverse order.
5 comments
Has anyone had to replace the digital volume control? Mine is intermittent. PCB solder joints all look good. I guess I will have to un-solder it to hopefully find a part number.
Has anyone had to replace the rotary encoder volume control? Mine is intermittent. PCB solder joints all look good. I guess I will have to un-solder it to hopefully find a part number.
EDIT: No markings on it, but one on Ebay seems close enough to try. The shaft looks a little longer than the original. http://www.ebay.com/itm/2PCS-Rotary-enco...
I’m experiencing the same issue with the volume control. Did you use this rotary encoder from Ebay and if so how did it work out?
I used this procedure to install a phone jack that had more volume. It is hooked to the speaker with a switching jack. I just needed a little more volume. The above pictures made it possible to disassemble. I would have been lost without it.
Thanks
ironabby -

“it only clips”
Broke 3/4 “clips” on the first try,
you should be worried.
Andrew King -