Introduction

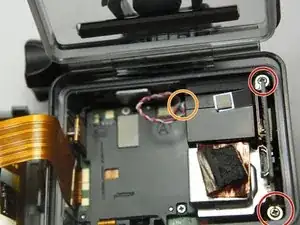
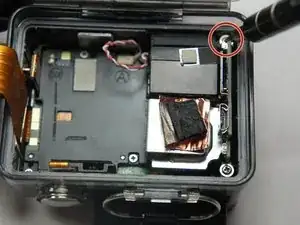
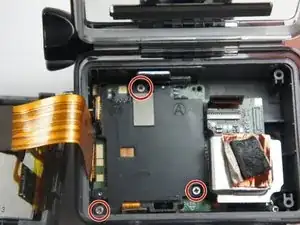
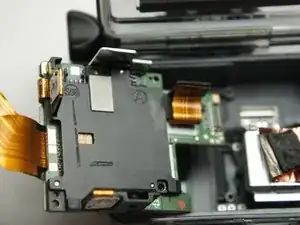
To remove the lens assembly, you must remove some internal parts first. Some of these screws are in tight places, so they will be tedious to access.

  1. veBKex3PJoGbJNVs
    veBKex3PJoGbJNVs
    dtVmUMJSjQZmCOoM
    • Be sure to power off the GoPro before you start disassembly.

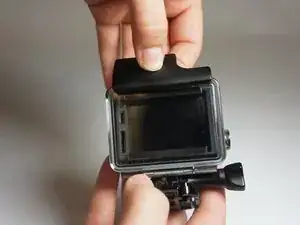
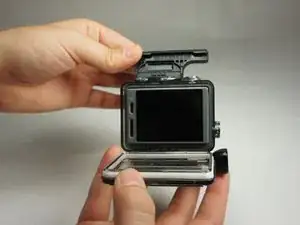
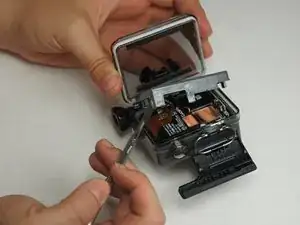
    • Pop up and pull back on the clip to remove the screen cover and expose the back panel with the touchscreen.

    No parts required! What about the microSD/Micro USB assembly!!!! where to buy?!?!

    WPN -

  2. nn5XBlqcVOVNPP35
    nn5XBlqcVOVNPP35
    h1LTojlumdaY3BTv
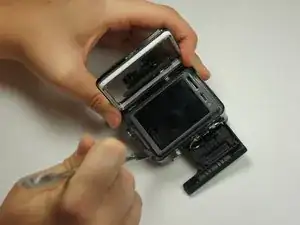
    • Use the metal spudger to pry around the perimeter of the panel.

    • Pry the panel upwards by inserting the metal spudger into the corner crease between the panel and camera shell.

  3. AHpaE3JECUFDpUiR
    AHpaE3JECUFDpUiR
    rR5MGNqM2DEy5rTb
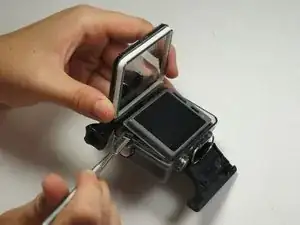
    • Pry around the panel to ensure it is not attached to the device.

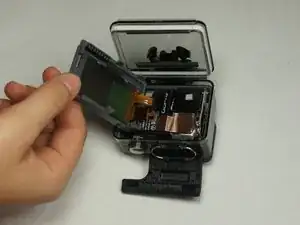
    • Move the panel to the side so you can access the internal components.

    • The panel is still attached to the rest of the device with a ribbon cable, so be sure to not tear or damage the cable.

    а где можно купить вот этот шлейф соединяющий дисплей и плату.???

    Александр «ivkadre» Карпенко -

  4. 1K5lYwMj6TGOsqXx
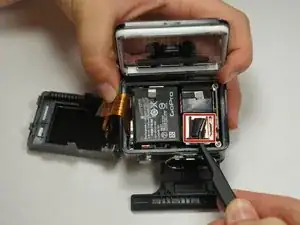
    • Peel back the rear panel ribbon cable that is adhered to the battery until it is completely separated from the battery.

    • Be careful of metal contacts on strip; they can be sharp.

  5. vA1JyBxlaDHAZoyU
    • Using tweezers, peel off the copper tape on the right side of the battery.

  6. RwG5seTxgUItMwfq
    RwG5seTxgUItMwfq
    sHDYJeDJ2Lt3XhCl
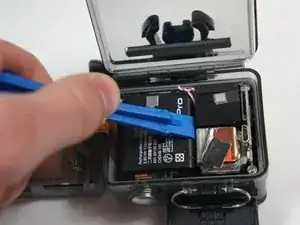
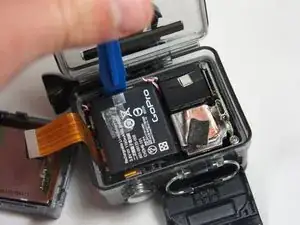
    • Place the plastic opening tool at one of the edges of the battery then pry until the battery is removed from the GoPro.

  7. WXBrGjWnwTqtCqYE
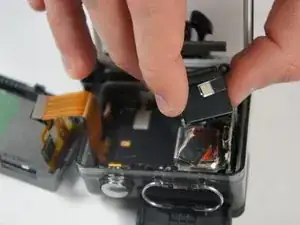
    • Use a pair of tweezers to disconnect the battery connector from the motherboard.

    • Gently pull the battery off the motherboard. Pulling vertically off the motherboard will give a clean release.

    Lift the battery connector straight up.

    glenn tanner -

    hi what kind battery can replace for hero+?

    sherwin_0011 -

  8. jkj2rKFchNDjXfLu
    jkj2rKFchNDjXfLu
    3Uwc4ndlw6bWNVaD
    rZDhlx5IFsAuT1IO
    • Remove the two 6 mm Phillips #00 screws.

    • Remove the single 4 mm Phillips #000 screws.

  9. RLgDilYqRsekdEqm
    • Remove the image sensor from the camera.

    • You do not have to unplug the black box to remove the USB/SD chip.

  10. vwFOSAehEFanBSvy
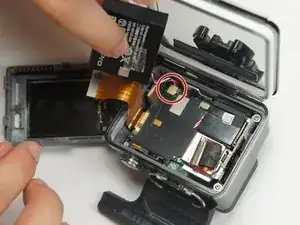
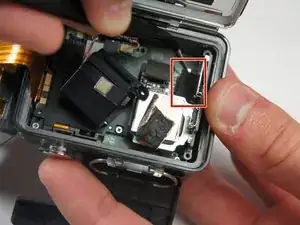
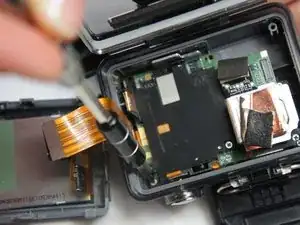
    • Grab the edge of the ribbon cable with the tweezers and gently pull until the cable is disconnected from the motherboard.

    • Be careful when removing the ribbon cable. You must pull gently or you can rip the ribbon off of its contacts.

  11. fA4GoJZBcNNiH4a3
    • Gently lift the microSD/Micro USB assembly up and out of the device.

  12. yGZSfahBRbGicECj
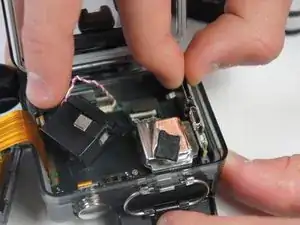
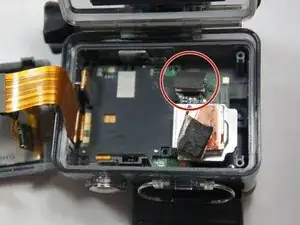
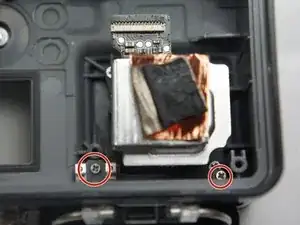
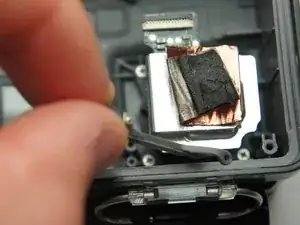
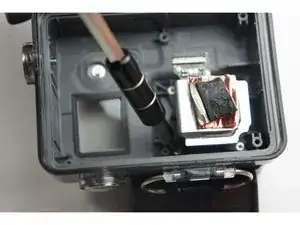
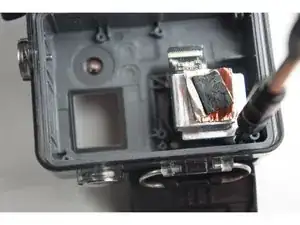
    • Use your fingers and gently pull out the sensor from the motherboard by slowly and gradually pulling up on the image sensor box.

    • Do not yank on the image sensor, it can rip out the wiring or damage the motherboard.

  13. daic4WFK1x6obnaR
    daic4WFK1x6obnaR
    vO5SNtDpefQN1Sdg
    HEA4rDWQJ6LXPIXm
    • Remove the three 4 mm Phillips #000 screws securing the motherboard.

  14. MYSWJJ1ZZQUHQB5S
    • Use your fingers to gently remove the ribbon connected to the lens.

    • Be careful when removing the ribbon cable. Pull off gently or you can separate the ribbon from the contacts.

  15. anHNNXhmKiGNVcyW
    anHNNXhmKiGNVcyW
    bwMtAMvIb5ZLQqYa
    odMGJDAERjoUpLTK
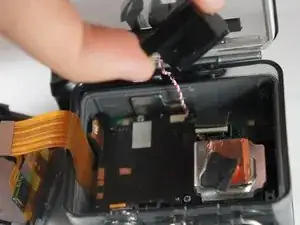
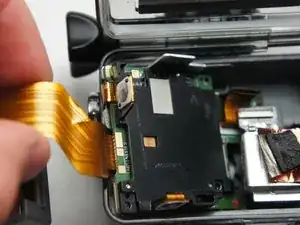
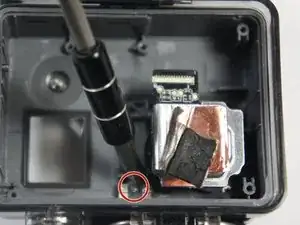
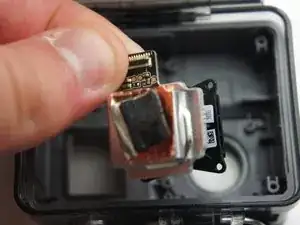
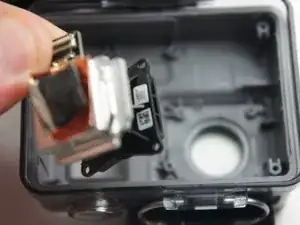
    • Use your fingers and carefully pull out the motherboard from under the lens. It may take a little bit of adjusting to get it out.

  16. oueQurEAoBFoVXCS
    oueQurEAoBFoVXCS
    GCVwpHhTbLGSymVC
    Lxtw2HeSKw1nlqkG
    • Remove the two 4 mm Phillips #000 screws securing the top button.

  17. QoMMsuCLLwAdmvSo
    QoMMsuCLLwAdmvSo
    xLCMLiulPwDiUWmR
    • Remove the four 4 mm Phillips #000 screws securing the lens to the case.

  18. ORCEhTcp3UvFp5Ki
    ORCEhTcp3UvFp5Ki
    BIII5Fk6b4SWJLEq
    UON6EDFbmPb5RWlm
    • Gently lift the lens up and out of the device.

Conclusion

To reassemble your device, follow these instructions in reverse order.

Matthew Tinkey

Member since: 27/08/15

892 Reputation

2 comments

I'm curious if you have any suggestions for sourcing the replacement part.

Bridgetown Electronics Repair -

My hing clip is broken, Can I remove the actual camera & replace the full waterproof case then reinstall my camera into the new replacement case ?

jimmac044 -