Introduction

Use this guide to replace the power cable in a General Pipe Cleaners Drain Cleaner PMEBO 2016.

  1. SKAPK61UEcnXWWnk
    • Before you begin, make sure the drain cleaner is disconnected from power.

    • Use a Phillips #2 driver to remove the two screws securing the control box cover.

  2. ZGRopeTVnyWlIyJB
    • Remove the control box cover.

  3. YdUjPbvtExssNDSh
    • Use a 9/16 inch deep socket and ratchet to remove the nut securing the reverse switch.

  4. aHMMQw3RtVWLvRJL
    • Remove the reverse switch guard.

  5. fpXDYVVXpSCr6vJs
    fpXDYVVXpSCr6vJs
    jZ1FwaYGFfJEcyFF
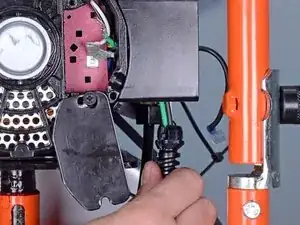
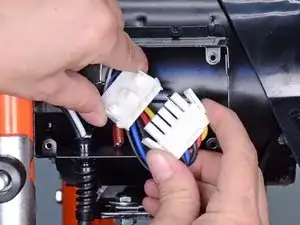
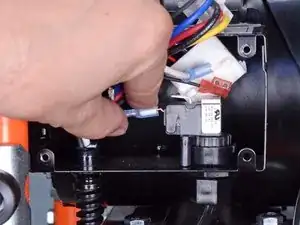
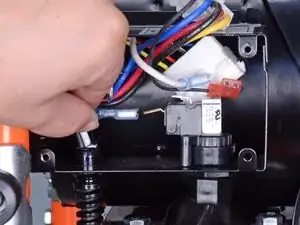
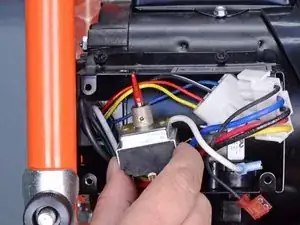
    • Squeeze the tabs on either side of the reverse switch connector.

    • Pull the two halves of the connector apart to disconnect it.

    • Take note of where everything is connected in the control box before disconnecting anything else.

  6. CDQYDDwCVG5xhSuV
    CDQYDDwCVG5xhSuV
    blvH6qkmyRHXBSCT
    • Pull the white cable straight off of its spade connector on the power switch diaphragm.

  7. mh5QARJvw3jNvJYk
    mh5QARJvw3jNvJYk
    lreTPWuGCYCOPvCy
    • Pull the black cable straight off of its spade connector on the power switch diaphragm.

  8. YomLE4RggWy4SwIV
    YomLE4RggWy4SwIV
    6jgNgbIe1pxku5eA
    fa3PaP2CBIOrCs5U
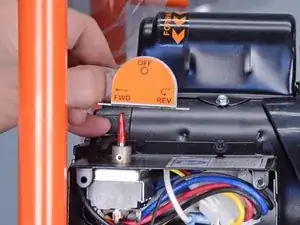
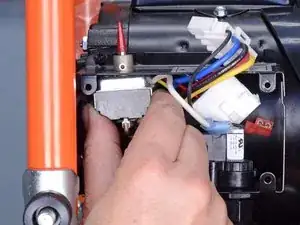
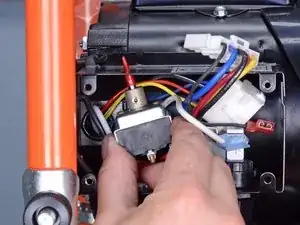
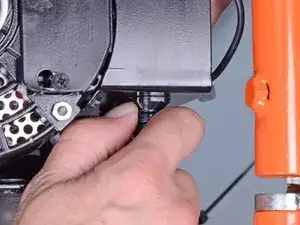
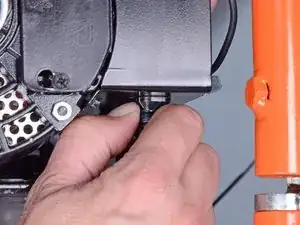
    • Slide the switch assembly down out of its hole in the control box and pull it out of the control box.

    • Be careful not to snag the switch on any cables during removal.

  9. pAKw6gIXfCoxMPUV
    pAKw6gIXfCoxMPUV
    O1lTFEYqeHZcFnBb
    h6GHMTcRdm1MWrZp
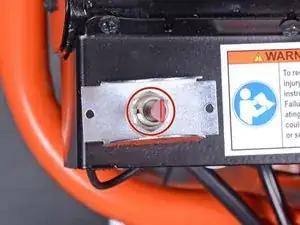
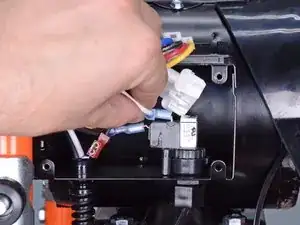
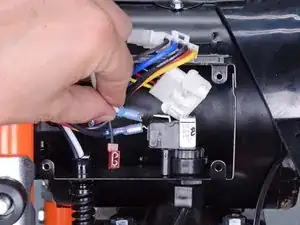
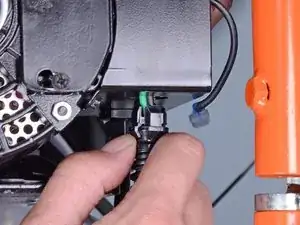
    • Push in on the small tab on the side of the plastic power cable clip.

    • While holding the tab down, pull straight down on the power cable.

    • Do not remove the cable yet, it is still connected to the drain cleaner. Slide it down just enough to move the clip out of the control box.

  10. fHdlfMh3tiIRo1MF
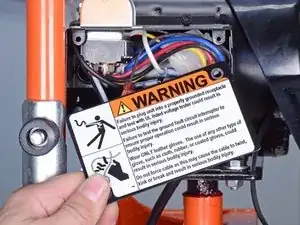
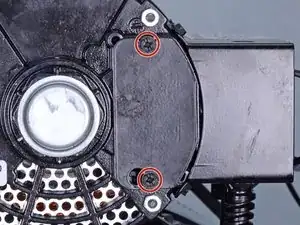
    • Use a Phillips #2 screwdriver to loosen the two screws securing the power box cover.

    • With the screws loose, slide the bottom of the cover to the right enough so the whole cover can swing down and away from the box opening.

  11. sZgLygCGiZusII6j
    • Use a flathead screwdriver to remove the green screw securing the green power cable wire.

  12. 3xH5uTCpeTnNnaxl
    • Use pliers to pull the white power cable straight off of its spade connector.

  13. RWO3ZTsWYkYgikFC
    RWO3ZTsWYkYgikFC
    RNiVdbZ4TJO5OnlV
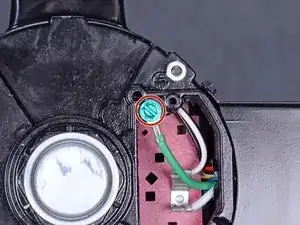
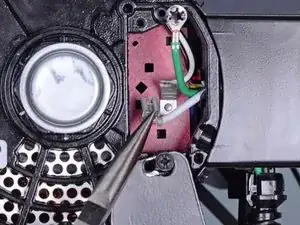
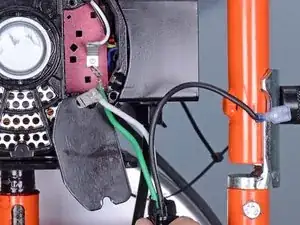
    • Feed the green power cable wire through the control box first, then carefully pull down on the entire power cable and remove it.

    • Make sure you don't snag the power cable on any wires or on the control box during removal.

    • During reassembly, feed the white wire through the control box and into the power box first, then the green wire.

Conclusion

To reassemble your device, follow these instructions in reverse order.

Adam O'Camb

Member since: 11/04/15

195421 Reputation

0 comments