Introduction
An active user of the Garmin Vivoactive may find that the wristband may start to break down over time, or get bored with the stock color provided with the device. Replacing the two wristband ends is a simple procedure that requires minimal time and can help make the Vivoactive look fresh out of the box again.
This band can also be changed based on the event you're wearing the watch to. Some options are fancy leather while others are simple rubber. This feature affords some customizability .
Tools
Parts
-
-
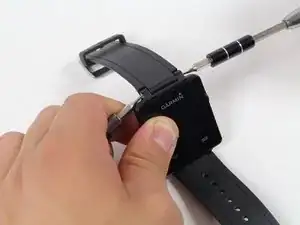
Hold the the metal screwdriver, with a T5 Torx bit, in your dominant hand.
-
Hold the rubber screwdriver, with a Hex T6 Torx bit, in your other hand.
-
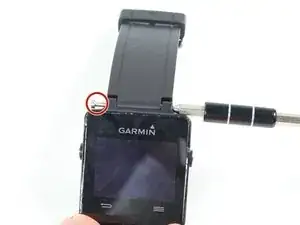
While holding the rubber screwdriver in place, simultaneously unscrew the pin (counterclockwise) with the metal screwdriver in your dominant hand.
-
-
-
Once the 1mm screw is removed, reinsert the metal screwdriver in that same hole.
-
Gently push the strap's pin out. It will begin to protrude from the other end.
-
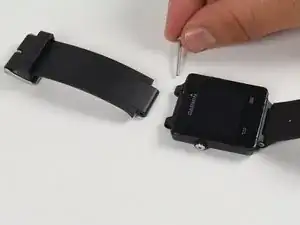
Use your fingers to grab the exposed pin and slide it free. The strap should now be disconnected from the device.
-
Repeat steps to remove the second band end. To reassemble your device, follow these instructions in reverse order using new band ends.
One comment
Most Garmin watches use the same style pin and the same instructions apply for changing the band. Be aware that the Vivoactive HR, the successor to the Vivoactive, uses only ONE size Torx screwdriver for both sides of the pin. You need 2 screwdrivers of the same size.
What size? Sorry but I don’t know. My Torx screwdrivers came with a replacement band kit and the instructions don’t say.
Google does a bad job of distinguishing results between the Vivoactive and the Vivoactive HR. Just wanted to make people aware so they aren’t confused.


