Introduction

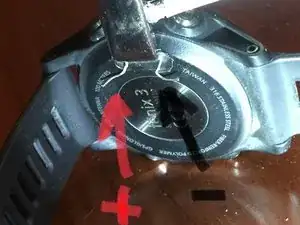
cut off the mini-USB, or micro-USB, or Thunderbolt and remove the isolation of the red and the black wires.

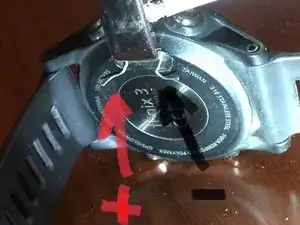
the red wire will go on the top of the 4 contacts.

the black will go on the bottom last of the 4 contacts.

be creative and fasten them to the fenix 3. I used a clip and insulted it with a piece of plastic. you can also use duck take or similar to stick the 2 wires to the corresponding contacts on the fenix.

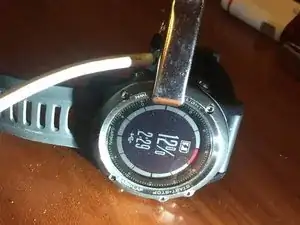
plug in the USB to a USB port or USB charging plug.

on the display you should now see the charging %

  1. yiyUf3dtVny2qZS5
    yiyUf3dtVny2qZS5
    SNTWWNvVHdxjumIo
    • Insert wisdom here.

  2. 4mALURykTDC5RGM5
    • Insert wisdom here.

Conclusion

To reassemble your device, follow these instructions in reverse order.
david704

349 Reputation

8 comments

great job, very easy to do it. The hard part is that the wiring is too small :)

thank you

Pedro R. -

Thank you, David704. Your guide save me 13.50$ and a 3 day wait.

asads zia -

Thank you.. forgot charger at work before vacation.. thank youuuu :)

jakadels -

Thank you! You just saved my step streak :)

Magnus Berg -

quiero que me cheque un garmin istinct que no recibe carga

Victor Manuel Perez Rodriguez -

Forgot my charger during a trip and found this guide. Works like a charm! Thank you for this nifty guide! Works well for Garmin Fenix 3 HR.

helenaandprashant -

Worked great thanks. The only hard part was that the wires are small.

Manuel Reverie -

Since the original charging connector plug is symmetrical and can be connected either way around, it's very likely that you can connect the + and - either way around. Just be sure to connect to pin 1 and pin 4 and you should be good.

David P. Ingram -