Introduction

Following this guide involves the Fujifilm FinePix S1 and is moderately difficult.

  1. cxF4EvM1OZFKl2As
    cxF4EvM1OZFKl2As
    EPHxkoArHJRtPYYj
    Sv6vbLQ21VulELCC
    • Remove the 4 screws surrounding the LCD screen.

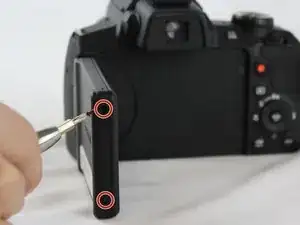
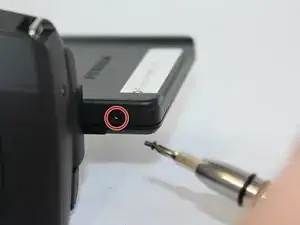
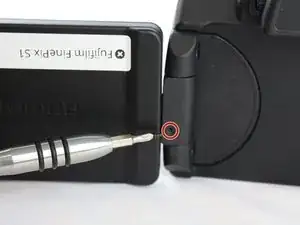
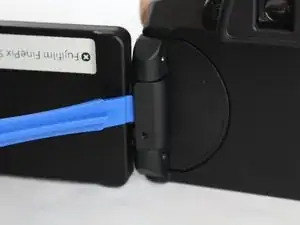
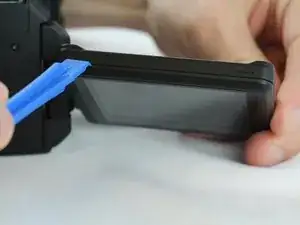
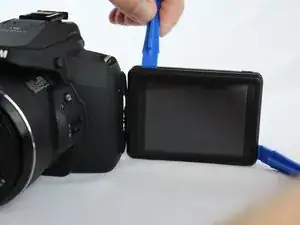
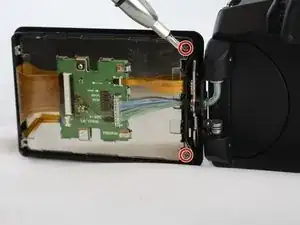
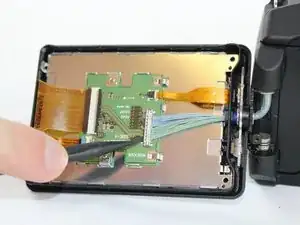
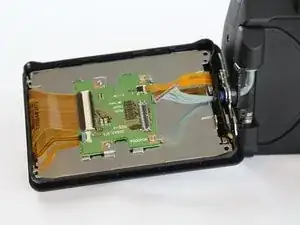
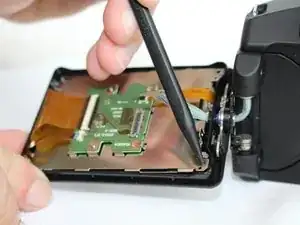
    This shows removing the two screws opposite the hinge and then the hinge cover with one screw. You don't really need to remove the hinge cover or its screw however there are two more screws on the display on the hinge side. Not clearly shown

    Glenn Blanc -

  2. R6AGMrjdIYdQhSII
    • Use an opening tool to remove the casing on the hinge of the LCD screen.

    This does not have to be removed to replace the display

    Glenn Blanc -

  3. MeZPDDAJJeokDTSU
    MeZPDDAJJeokDTSU
    BJWcq4FhBHW1kjXO
    • Use an opening tool to pry apart the LCD screen casing and remove the casing.

  4. NhIn2cSGTbLcq514
    • Remove the 2 screws located on the inner corners of the inside of the LCD screen.

  5. GgurQTkA5qkS6Z45
    GgurQTkA5qkS6Z45
    BZCstGjwhegJ2vjL
    • Disconnect the blue cable set by carefully prying it off with a spudger.

    This cable lifts straight up from both sides, not like most cable the pull directly out from the connector. Be very careful as it is easy to damage the connector

    Glenn Blanc -

  6. AHCyTAkkyTXFYnxj
    AHCyTAkkyTXFYnxj
    STkAwYlAOy1marEy
    • Use a spudger to lift the LCD screen out of its placement and remove it from the casing.

    On my two cameras there is an additional screw on the hinge side that you cannot get to without removing the display from the metal hinge as the head is behind the metal hinge.

    Glenn Blanc -

    Pay close attention to the little loose clip, it is used to spring the door open or closed, when you put the cover back on make sure it ends up inside the cover.

    Glenn Blanc -

Conclusion

To reassemble your device, follow these instructions in reverse order.

Brandon Benavente

Member since: 15/02/16

677 Reputation

0 comments