Introduction

Is your Fitbit Surge battery not charging no matter what you do? Read this guide to learn how to replace the battery, but keep in mind that you will need to cut the wristband in order to complete this repair and the band cannot be reattached.

  1. gjYLsZEyogo2iIlY
    gjYLsZEyogo2iIlY
    oGXXUcxFMQtiuJmN
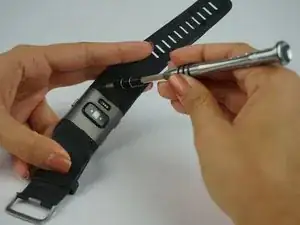
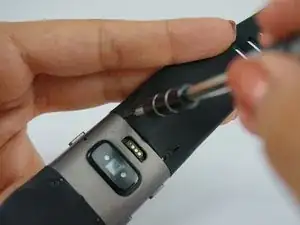
    • Unscrew all four black 3 mm Phillips screws on the underside of the watch using a T5 screwdriver.

    This is the only step that makes sense for a battery replacement. The next 6 are a joke. Maybe if I had my nails done first I’d have had better luck.

    Heidi Ann -

  2. hiFWdPLeFK2rxskx
    hiFWdPLeFK2rxskx
    lU6j3E2AvsaQS1mV
    Xm4jHIOsche1BTiA
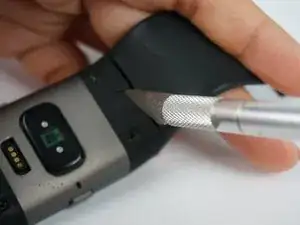
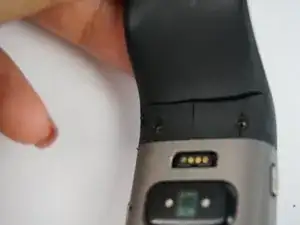
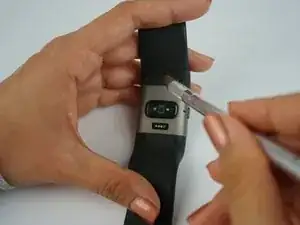
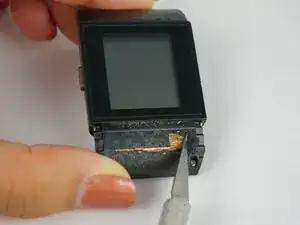
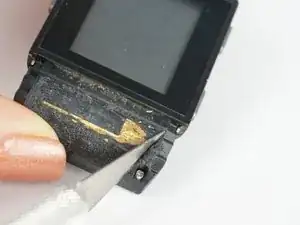
    • Use an X-Acto knife to cut the band above, on either side, and in between the 2 screws.

    • Note: Part of the band is hard plastic.

    • Caution: The band cannot be reattached once it is cut.

    It is not necessary to cut the wristband, after removing the T5 screws a small screwdriver can be worked in between the wristband and the watch bezel edge and wriggled carefully along to break the gluebond whilst pulling firmly, the band should part company undamaged.

    Pat -

  3. PETHVyYdZPPAUZhX
    PETHVyYdZPPAUZhX
    nNOy4JjvgsyDtRTP
    • Scrape away the glue beneath the hard shell portion of the band to reveal the GPS.

    Apparently some solvent/cleaner was used to clean up the residual glue between steps 3 and 4 pictures. If so, can you share what was used?

    DmcB -

  4. OYePFRpA3Iirukwf
    OYePFRpA3Iirukwf
    GSBHPqqEZrCnqZ1O
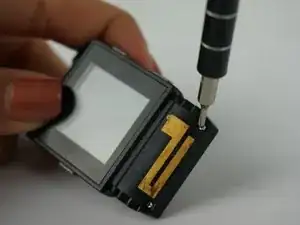
    • Use a PH000 screw head to undo the newly revealed silver 4 mm Phillips screws that were hidden beneath the glue.

  5. VEns3OW4TJDyRoj2
    VEns3OW4TJDyRoj2
    2VAWD3MZGdyAiUR6
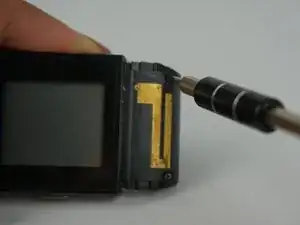
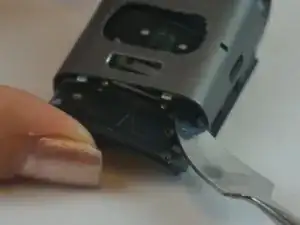
    • Using a metal spudger, push down on the plastic gray square clamps on the underside of the device to dislodge the whole silver backing.

    • Note: the buttons will also come off.

    Perhaps my model is slightly different, but I never saw any ‘plastic grey square clamps’. The two tabs seen in the picture are metal, part of the backing but not coloured. They may have been what I was supposed to press, but my backing was almost glued down with dirt. I removed it eventually by starting at a corner and slowly prying, working back and forth between all the corners until one finally released.

    Brownbailey -

  6. NsZ4KFXZgxUuYTDZ
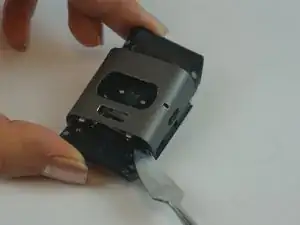
    • Use a pick or small flathead to remove the 4 metal clamps holding device together.

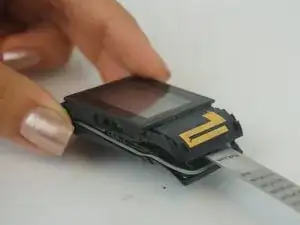
    • Use a thin tool to pry the the device apart by lodging it between the clock face and back side of the device.

    • Note: a spudger may not be thin enough to fit in the seam of the device. We used the 6 inch metal ruler from the Pro Tech Toolkit.

    • Go slowly and carefully disconnect two cables before fully opening.

    It would be helpful to include an image of the clips before an image go prying the case open.

    bills -

  7. IFPxEArFGoPBHi1o
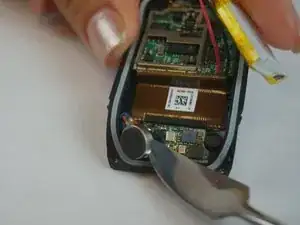
    • Gently remove the battery.

    What type of battery is used inside the watch? It's not listed in the materials needed nor in the description. Thanks!

    Benjamin Landman -

    Wow, Benjamin! You got to the battery without ruining your Surge? You could start a cottage business replacing all of ours.

    Heidi Ann -

    And this is why (other than the charging plug that has to be coaxed with wine and cheese to stay connected) the Surge is discontinued.

    Heidi Ann -

    I need replacement screws. Not the ones for the band. But the 4 (shown in step 4 above) that secure the face to the back of the watch, and I somehow lost 1 of the three tiny screws that secure the backlit and display to the face of the unit - only have 2 holding it in place now. Anyone know where I might be able to get these?

    jfrench864 -

    for possible replacement battery see :https://www.amazon.com/MPF-Products%C2%A...

    gwgaston -

Conclusion

To reassemble your device, follow these instructions in reverse order. Keep in mind that the band will need to be cut for this repair and it cannot be reattached.

Angela Pitts

Member since: 11/10/16

1187 Reputation

10 comments

I'm about to embark on replacing the battery for my fitbit surge. After having it for over 2 years it requires a charge about twice a day which get annoying.

Does removing/replacing the battery require the moderate soldering skill?

L “Rico” Hirano -

Looks like it must.

Chaspsmith -

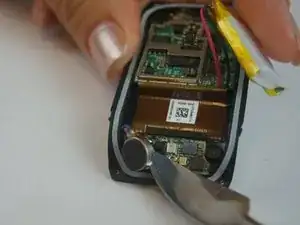
The last photo I think shows the tool prying the force feedback motor, the battery is the white plastic covered slim brick on the top right.
csaba.toth.us -

You do not need to cut bands off

Tim master -

The replacement battery for the Fitbit Surge can be found here:

Fitbit Surge Battery

It also includes all of the tools (except soldering iron) needed for the repair.

michaelf33707 -

Many batteries on Amazon either have no reviews or poor reviews. Mostly based upon incorrect battery size being too big. Does this battery ever give customers the same issue?

GLENN AKIYAMA -

I have replaced my bands many times on my surge and I have never needed to cut them off.

Jam N -

Anyone who even attempts this needs to get his or her head shrunk first…or after would also work. Hey, I have a soldering kit to sell…

Heidi Ann -

This was a great help if a 58 year old grandma can do it anyone can. I got the bands off with out cutting you have to be very careful or they will just tear. I wasn’t too worried because I was going to replace the bands. You might have to play around with the tools you use to get the back off. Other than that the instructions are spot on. I have had the fitbit for 4 years so not surprised a new battery was in order. Thanks tons for the help

momisatrigirl -

There is a youtube video showing how to remove the bands without cutting them: https://www.youtube.com/watch?v=KkHxFVX0...

Stefan Lehmann -