Introduction

Use this guide to replace a faulty impeller in the circulation pump (model P-150) of your Fluval Spec V Aquarium.

The impeller is a crucial component that drives water circulation within your aquarium setup. Over time or due to various factors, the impeller can become damaged, leading to reduced circulation or complete halt, both of which can have negative impacts on the wellbeing of your aquatic life. This guide walks you through the steps of replacing the impeller to restore optimum water circulation.

While this repair does not pose significant hazards, caution is required to ensure the safety of your aquarium's inhabitants, particularly if you have delicate species like Neocaridina shrimps. This guide includes necessary precautions to prevent them from getting stuck inside the filtration compartment during the repair.

You will need a pry tool like a smell flathead screwdriver for this repair, and a pair of needle nose pliers may come in handy. Both are common tools and don't require any special skills to use.

For additional information on maintaining your Fluval Spec V Aquarium, you may refer to the official manual.

Remember to disconnect the aquarium from power before starting the repair to ensure safety. Happy repairing!"

  1. TM5ijkwUsWAFOJcN
    TM5ijkwUsWAFOJcN
    tk1HqlpZFVCLDcMd
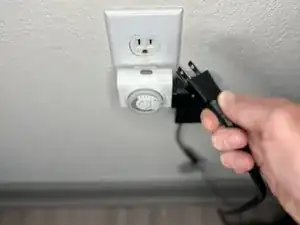
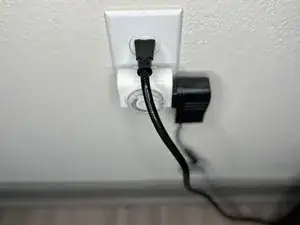
    • Unplug Aquarium: Firmly but carefully unplug it.

    • Never try to perform any maintenance or repair tasks on an aquarium or any other electrical appliance while it is still connected to a power source.

  2. ygjwaqRwKWkVPa5f
    ygjwaqRwKWkVPa5f
    yUVdgIAABY1HPrTw
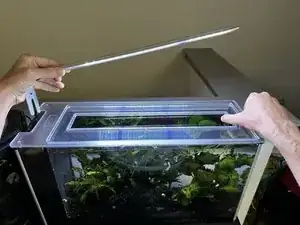
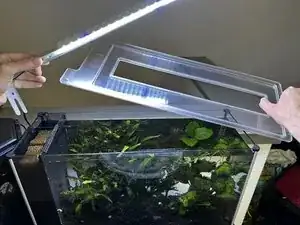
    • Remove Light: Carefully lift light from its mount, ensuring not to pull on any wires.

    • If the light is connected to a different power source, disconnect it first before removal.

    • Remove Lid Securely grasp edge of the aquarium lid and lift up to remove.

  3. KncZMZZgki6VxCkY
    KncZMZZgki6VxCkY
    WratCfZneTLEnxhj
    KDOlFJ3vDAOmOCrT
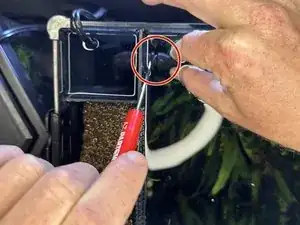
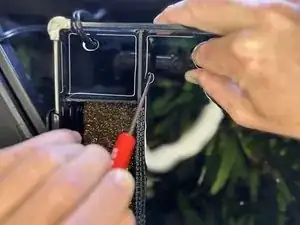
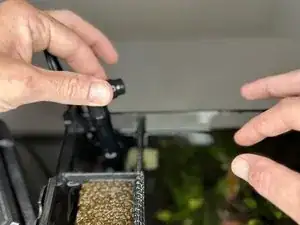
    • Insert Pry Tool: Take a small, flat-head screwdriver or pry tool and carefully insert it between the nozzle and the filter tube.

    • Pry Off Nozzle: Carefully apply some leverage to pry nozzle away from the filter tube. It should gradually detach.

    • Make sure to apply force evenly and gently to avoid breaking the nozzle.

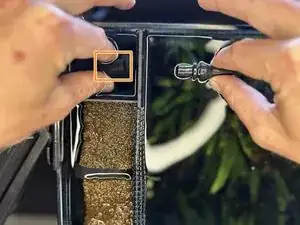
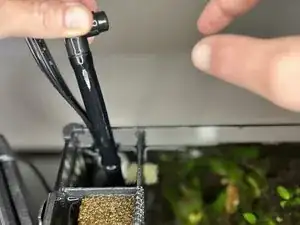
    • Pull Out Filter Tube: Grasp the filter tube firmly and pull it out from the divider.

    • Pull straight sideways for easy removal, this will prevent damaging the tube or the divider.

    • If the tube is firmly stuck, try gently wiggling it as you pull.

  4. yYM2DYUPMpgXNr1V
    yYM2DYUPMpgXNr1V
    de3a3OCOxpxCwQjS
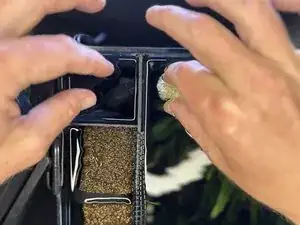
    • Caution: To protect Neocaridina shrimps, nano fish, and other small aquatic creatures in your aquarium, an extra precautionary step is necessary due to the potential danger posed by the outlet leading into the filtration compartment, which could cause them to get stuck behind the divider.

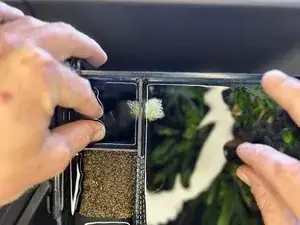
    • Cover Outlet (Optional): Carefully insert a suitable filter medium into the outlet.

    • This could be a piece of sponge, mesh, or any other aquarium-safe material that allows water flow while preventing the shrimps or fish from entering the filtration compartment. Be sure to securely place the filter medium so that it doesn't shift or come loose, potentially leaving the outlet unprotected.

  5. fDm4TEUQZpZhRoxF
    fDm4TEUQZpZhRoxF
    HSVTWkLxCdOspIhQ
    gJGXlnPDfsbRmUnX
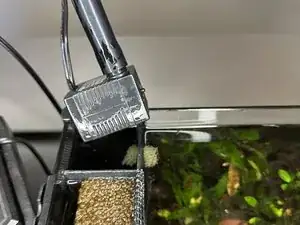
    • Pull Up on Output Tube: Firmly grasp the output tube and pull straight up. The pump should follow along, detaching from the bottom of the aquarium.

    • If you're having trouble removing the pump it may be due to the suction cups at the bottom of the pump securely holding it in place. In this case, try pulling up in a circular pattern. This action can help dislodge the suction cups, making it easier to lift the pump out.

    • Drain Excess Water: Hold pump over the tank for a moment to allow any excess water to drain out of the pump.

    • This will prevent water from spilling and making a mess as you work on the pump.

  6. vJSddd6pk2CwXixi
    vJSddd6pk2CwXixi
    CWqdIradqiL3VGa2
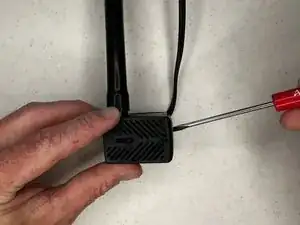
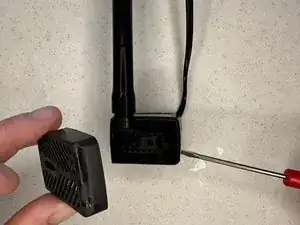
    • Insert Pry Tool: Take your small pry tool and carefully insert it anywhere under the edge of the pump cover.

    • Pry Off Cover: Gently pry it off by twisting the tool.

    • Twisting the pry tool will give you a smoother, more controlled prying action and minimize the risk of the cover suddenly popping off or flying away.

  7. TcL5XQmRxHYRqNGL
    TcL5XQmRxHYRqNGL
    prYpPBYkYO2kU1e2
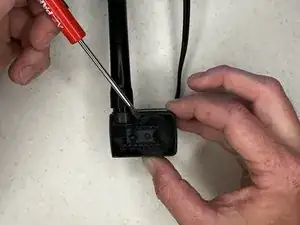
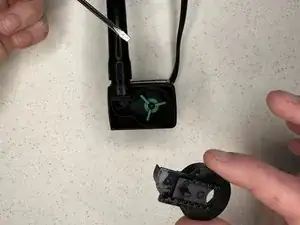
    • Insert Pry Tool: Carefully insert your pry tool anywhere under the edge of this cover.

    • Pry Off Cover: Gently pry it off.

    • Be sure to handle with care to prevent any damage to the impeller assembly underneath.

  8. NNpERMqJPGfrwhkq
    NNpERMqJPGfrwhkq
    HyM5EhxOtTlpyMPM
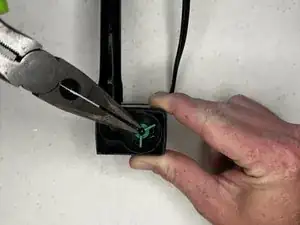
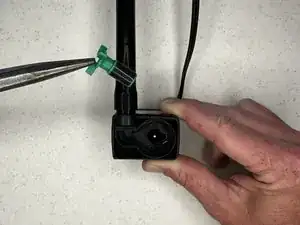
    • Grasp Impeller: Get a firm but gentle grip on the impeller.

    • The impeller is inset, making it difficult to grasp by hand. In this case, a pair of needle-nose pliers will come in handy.

    • Pull Out Impeller: Slowly and carefully pull it straight out.

    • Do not to twist or yank the impeller to prevent damage to it or the pump assembly.

  9. 5qEWRIaYerZ6FGdu
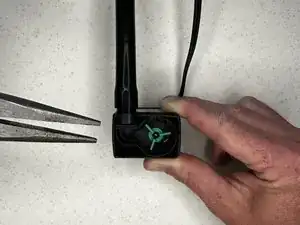
    • Install New Impeller: Take your new impeller and carefully align the slot with the pin in the impeller housing. Gently slide the new impeller on to the pin, ensuring that it's oriented correctly.

    • The impeller is magnetic, so it will naturally adhere to the motor assembly and does not require any additional securing. Once the impeller is in place, it should spin freely when nudged. This will confirm that it has been installed correctly.

Conclusion

To reassemble your device, follow these instructions in reverse order.
Ian Morrison

Member since: 01/07/23

196 Reputation

0 comments