Introduction

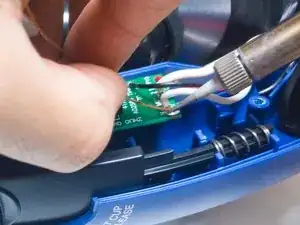
While the power cord is built to last for quite a while, it can still suffer from wear-and-tear. Additionally, accidents that damage the power cord can happen. This guide covers how to replace the vacuum’s power cord.

  1. ODTpitlvTRZOQTLw
    • Unscrew the two 18.1 mm PH2 Phillips head screws on the bottom of the vacuum.

  2. PmUaOAGXDMI5al6G
    • Pry off the Riser Visor using the plastic opening tool.

  3. 63npSLIoDVddugqk
    • Remove the screw cap using the metal spudger.

    • First-time removal of the screw cap can be difficult. The screw cap isn’t vital, so don’t worry about damaging the screw cap and just keep trying until it comes out.

  4. vphL3kAEymmRoNDu
    vphL3kAEymmRoNDu
    EuIGfiveFhVijYuO
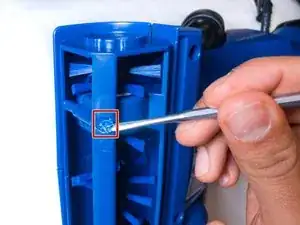
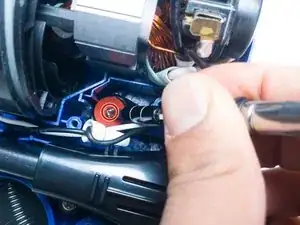
    • Unscrew the 14mm PH2 Phillips head screw.

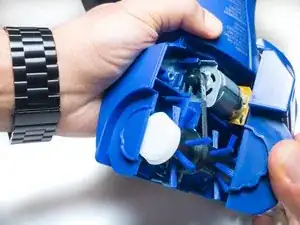
    • Pull the bottom cover off of the rest of the casing.

  5. EK4HVQsdKAQnZeEL
    • Pull the power switch all the way up and remove the dust cup.

  6. fGPevDmJfu6PNGws
    fGPevDmJfu6PNGws
    rcxGN25xHM2KO34C
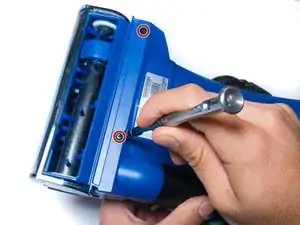
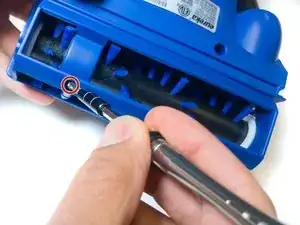
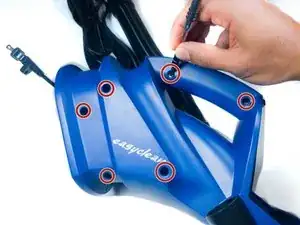
    • Unscrew the six 18.1mm PH2 Phillips head screws on the side of the vacuum.

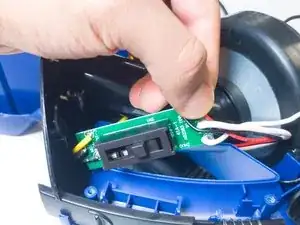
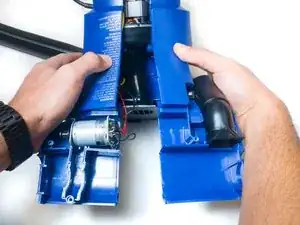
    • Pull the casing apart.

  7. dM1qVDKREDnRh4Fu
    • Pull out the switch board.

    • Ensure the vacuum is powered off and unplugged before handling any electronics.

  8. sKOn2LZplH3ABaVM
    sKOn2LZplH3ABaVM
    ouapxapRfXHBTUWJ
    • Desolder the highlighted black and white wires.

    • For instructions on how to solder and desolder wires, visit this guide.

  9. Lnt2LhqHUYmDRMTX
    • Unscrew the 22.3mm PH2 Phillips head screw.

    • Remove the power cord.

Conclusion

To reassemble your device, follow these instructions in reverse order.

Tanner Durnil

Member since: 06/11/17

631 Reputation

0 comments