Introduction

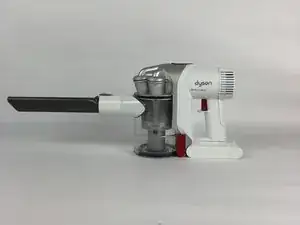
The battery is what makes this vacuum handheld and portable. It can keep the vacuum operational for approximately 3.5 hours.

  1. KCoO2h1WpTfGnVuJ
    • Make sure the vacuum is unplugged from charger.

    • Warning: Avoid pressing red trigger because the vacuum will turn on the device and begin suction.

  2. EVSgauHKloWxRDt4
    • Locate the purple button at the top of the device.

  3. HUZEtShfRafnr4VJ
    • Separate the device with the purple button.

  4. xi6BbR2CT1iPBX6B
    • Take out the filter.

  5. NNBFtGPUWBNtVQgM
    • Locate and remove the 10mm Phillips head screw using a Phillips #1 screw driver.

    You also have to remove the screw at the top on the back where the motor is. Otherwise, the battery will not come out!

    Mayme Kittman -

    Mayme Kittman.

    Isn't that what the next step of the instructions tells you to do?

    Ray Bellamy.

    Ray Bellamy -

  6. lnAm63BqHXQUhBTj
    • Locate and remove #000 25mm phillips screw on the reverse side of the vacuum

    the screw is turning but won't release

    elena calamaro -

    Same experience. Tried WD40 in hopes it would release but no luck. Had to use a very thin flat blade screwdriver to wedge the crease (on one the side of the handle by that screw) and simultaneously whack away at the base of the battery with a pair of channel-lock pliers, brute force. There is the risk of possibly breaking the plastic white handle as you try to wedge the thing open enough to pull the battery out. Very poor design in the replaceability department. I had already ordered a battery, so I would advise trying to remove existing battery FIRST (to make sure you can get it out without damage) before ordering a new battery,

    jkessjazz -

  7. 5ojYPPRDKvlFTjUf
    • Pull the battery pack down and away from the main body and remove it from the device.

    see Step 6 post on removing battery

    jkessjazz -

Conclusion

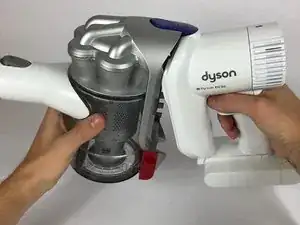
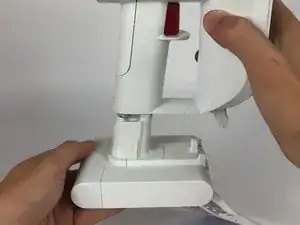
To reassemble your device, follow these instructions in reverse order.

Vu Nguyen

Member since: 02/10/17

189 Reputation

9 comments

Works for the DC44 animal also. :)

Tina Willman-Hammar -

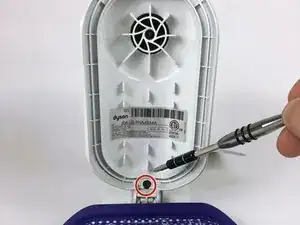
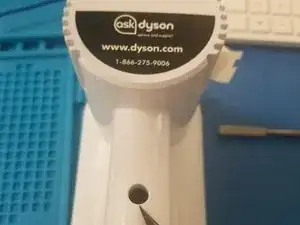
You left out the removal of the screw above the charging port.

Mike -

And after unscrewing the 2nd screw, you need very fine tweezers to extract it.

This experience has convinced me never to buy a Dyson product. Their manual gives no info about replacing the battery.

Loohan7 -

Vu Nguyen and contributors should definitely go back in and REVISE these instructions to include the second screw mentioned by Mike 7/29/18. I almost broke my vacuum because I trust iFixit to vet their content. I discovered the second screw after going to another site and only saw Mike’s post after returning here to see if I missed something - I did: I didn’t read his comments!

Cliff -

Yikes! Thanks goodness I read the comments before I too almost broke something by not removing the second screw!

Mark Nicoll -

Mike, thank you. cliff is right, revise this please

louturks23 -

How do you test the battery to see if it should be replaced? Why does it have two round prongs and two flat prongs? It will run for 5 seconds sometimes and 5 minutes sometimes not able to tell why.

Benjamin Karol -

the upper screw on the handle on the dc56 type b seems to have a glassy lock-tite substance on mine. it has to be scraped away to expose the screw.

Mick Russom -

Nice process description with great photos: much thanks, as I could NOT find the second shorter screw…..FOR the life of me. THANKS

pete33213321 -